Buttery Vegan Brioche
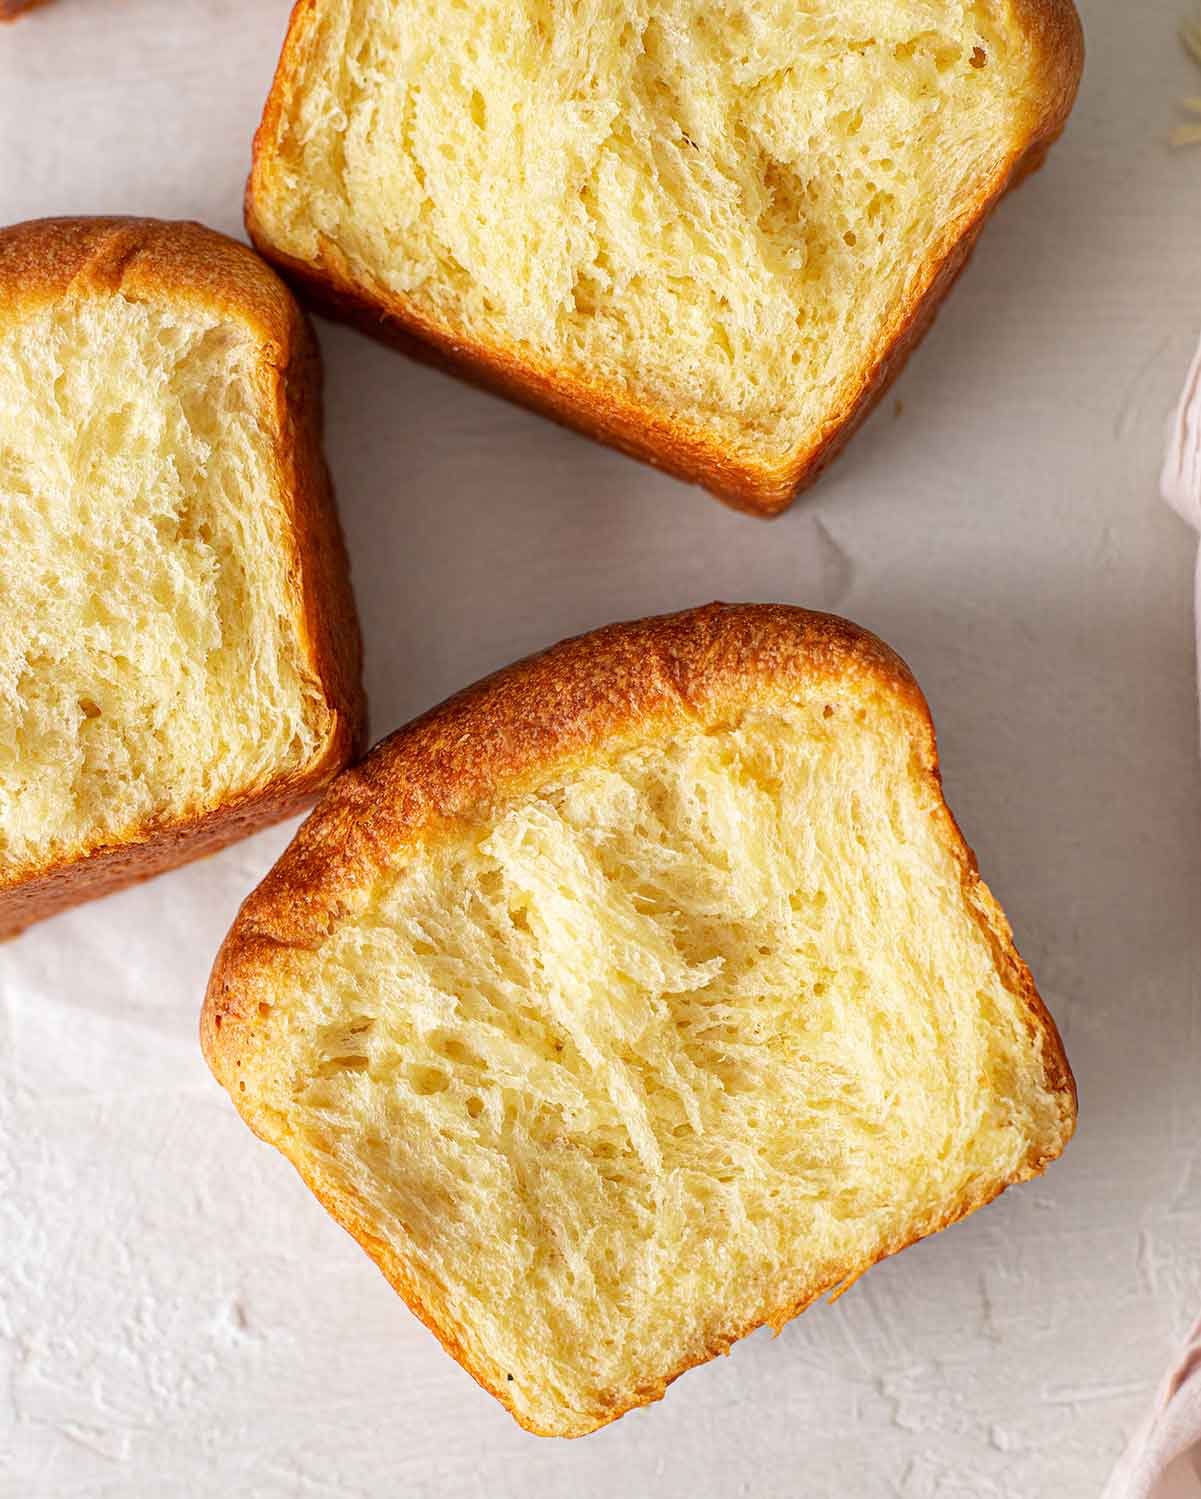
This buttery vegan brioche bread has a fluffy and tender crumb that melts in your mouth. It’s made with only 7 simple pantry ingredients and is egg-free and dairy-free!
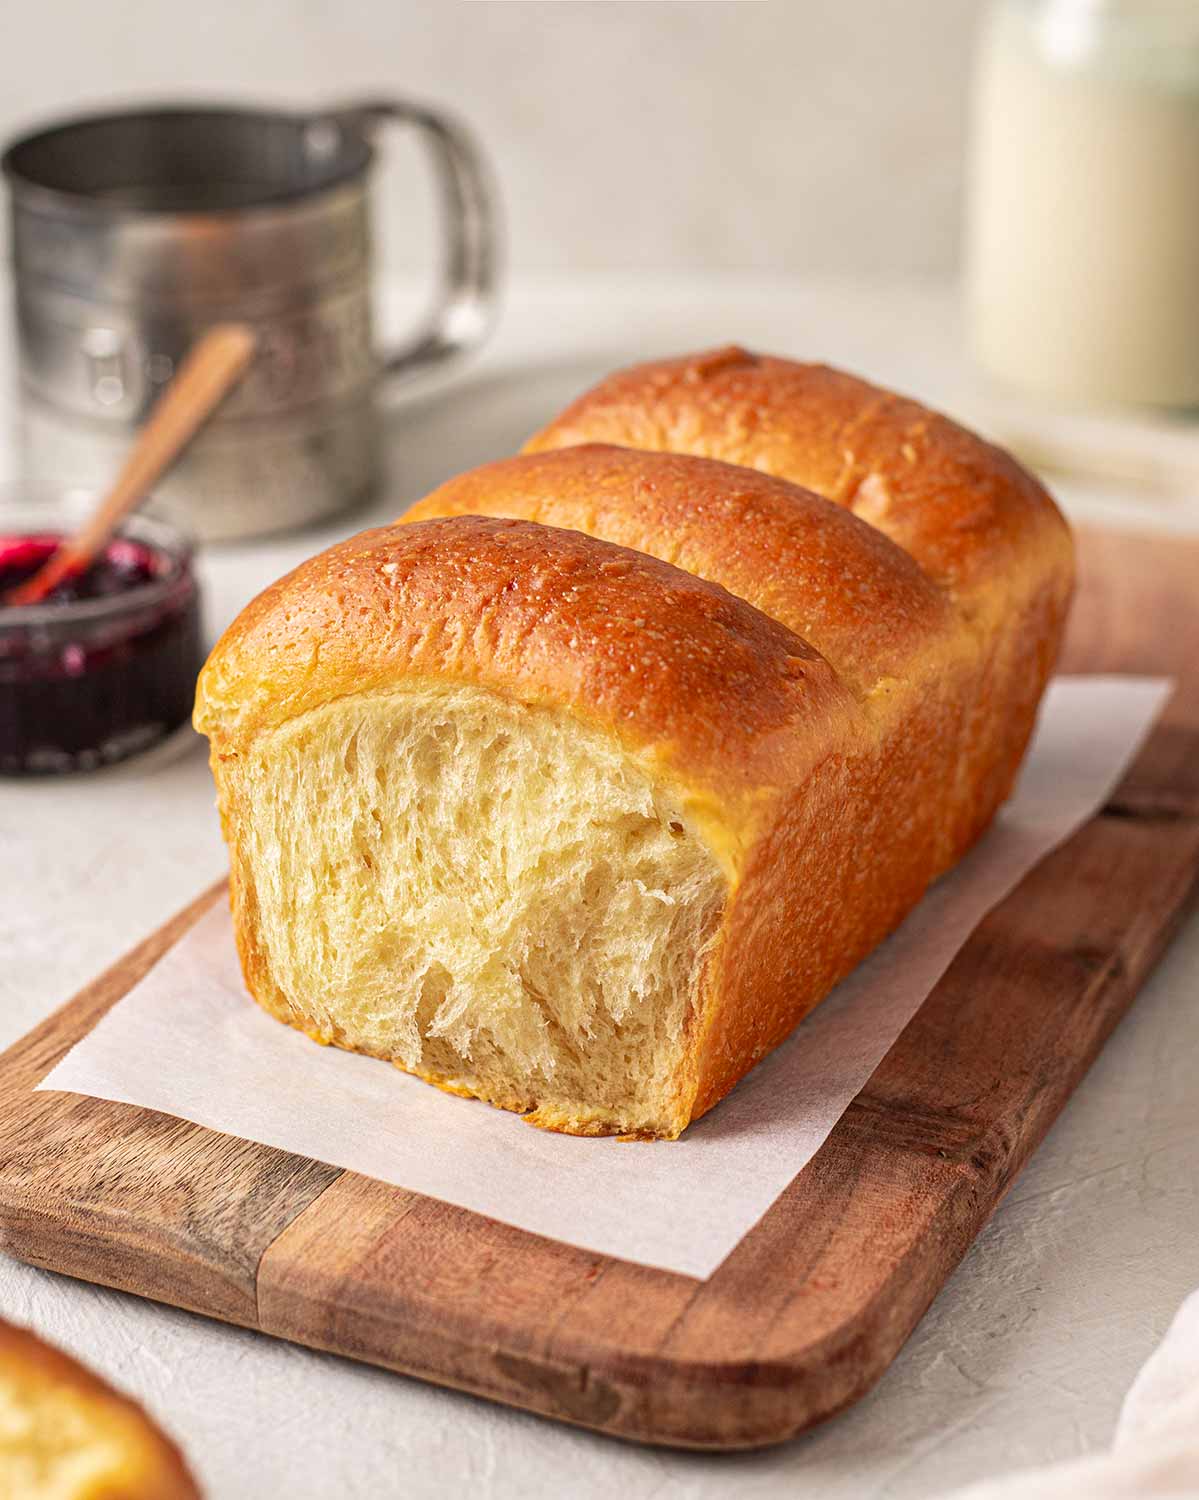
Table of contents
Simple ingredients you’ll need
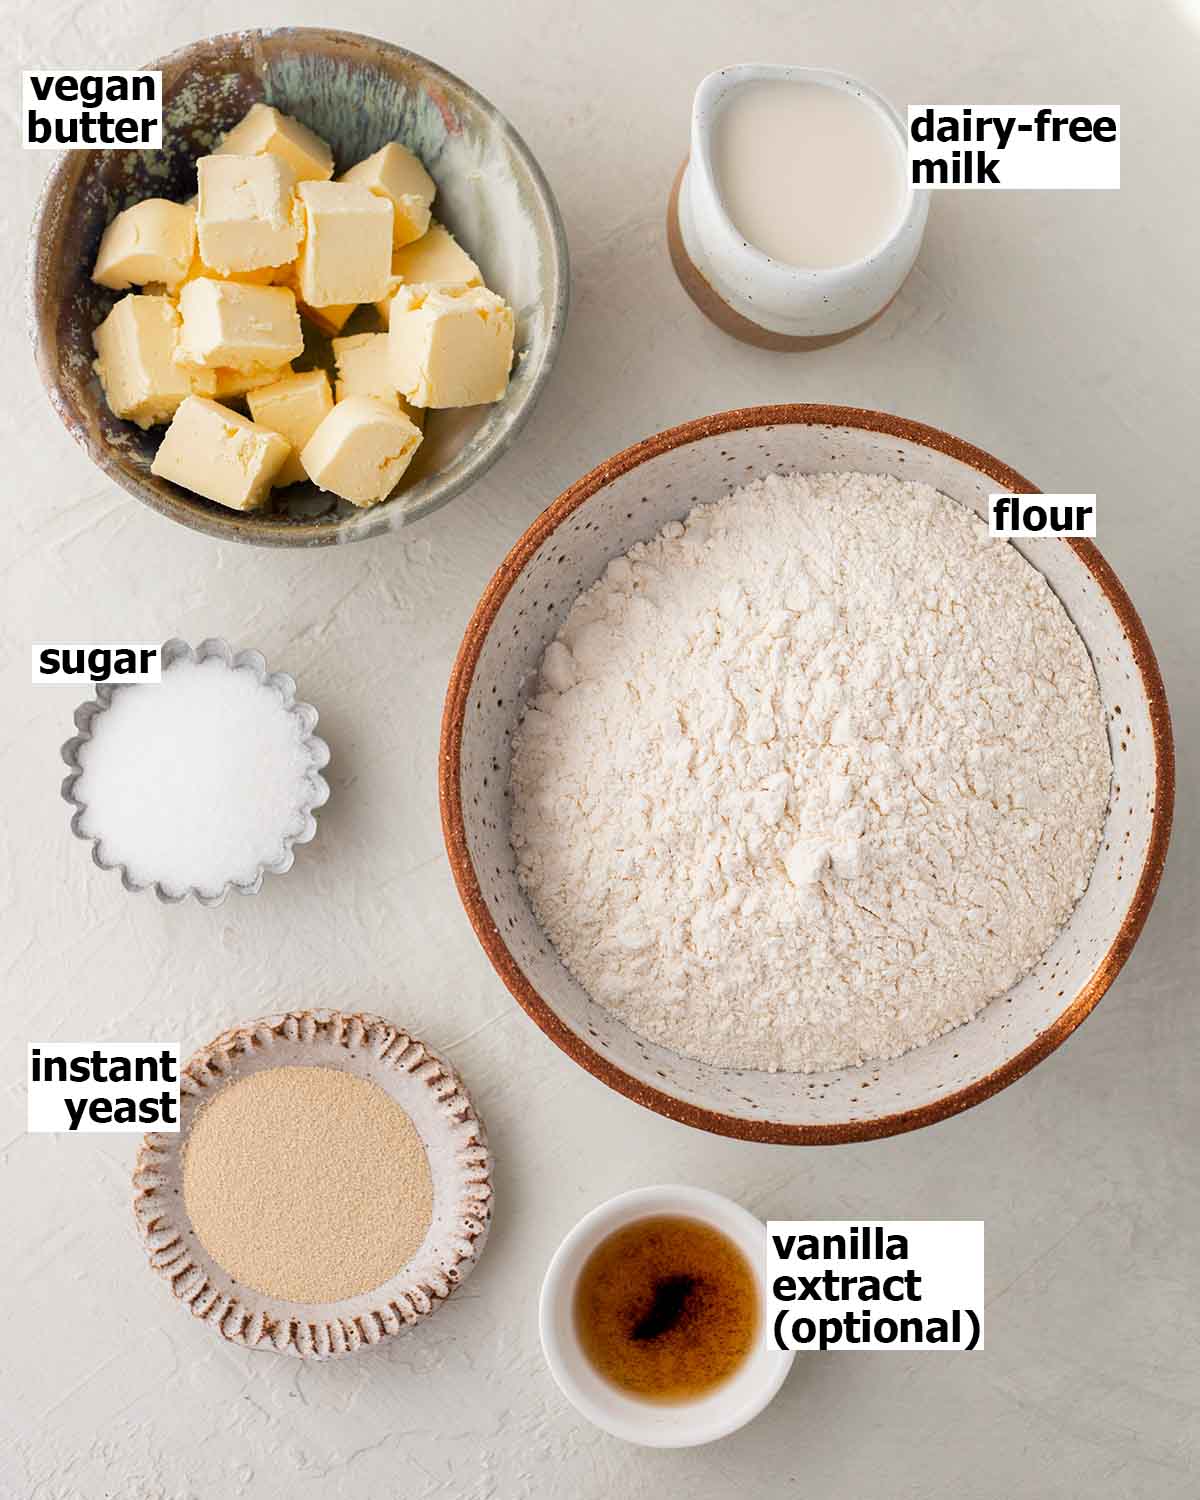
Notes about the ingredients
Bread flour or all-purpose plain flour. All-purpose flour creates a cakier vegan brioche whereas bread flour gives the brioche a slight ‘chew’.
Vegan butter creates a rich and tender texture that’s typical of traditional brioche and makes it different from sandwich bread.
Dairy-free milk. I prefer soy milk as it’s higher protein and creates a richer brioche. However, any dairy-free milk will work.
Instant-dried yeast because it’s easier and quicker to use than any other yeast. Or you can use dry or fresh yeast, as long as you proof it first.
Traditionally, French brioche bread is enriched with eggs or egg yolks. However, by increasing the amount of fat through butter and rising power through yeast, we can create an eggless and dairy-free brioche that is soft, fluffy and tender.
The full list of ingredient quantities and instructions are in the recipe card at the bottom of this post.
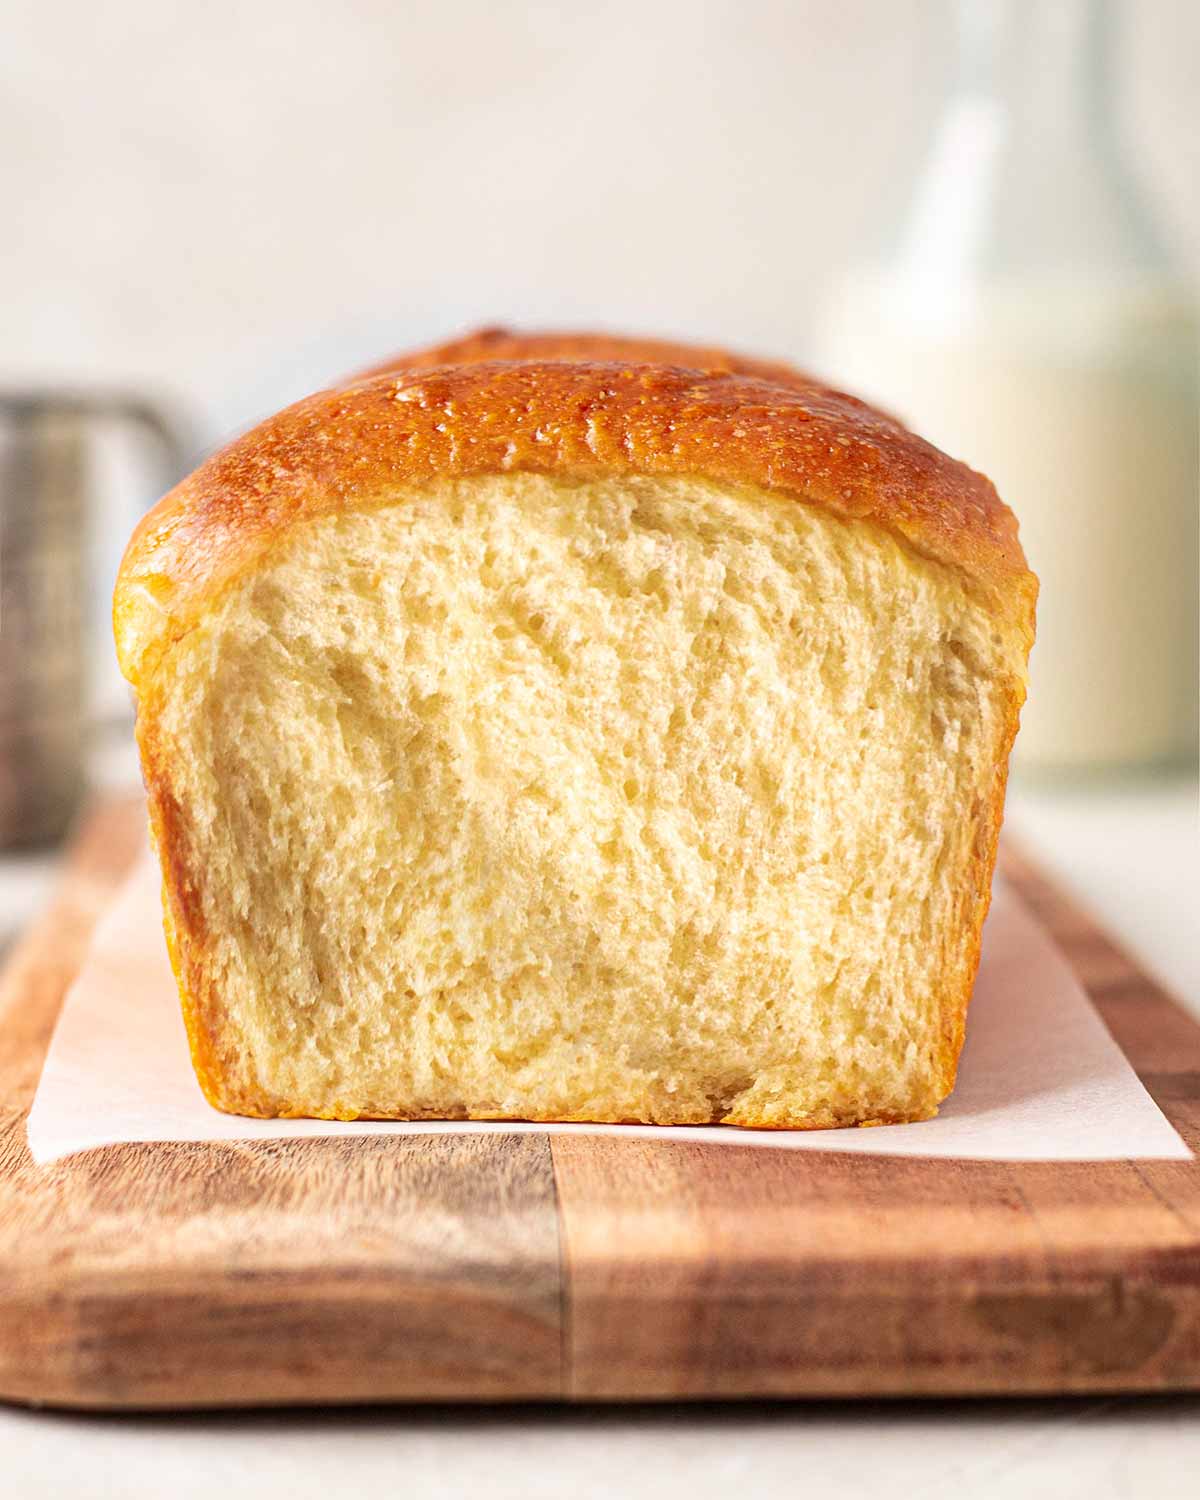
Two different kneading methods
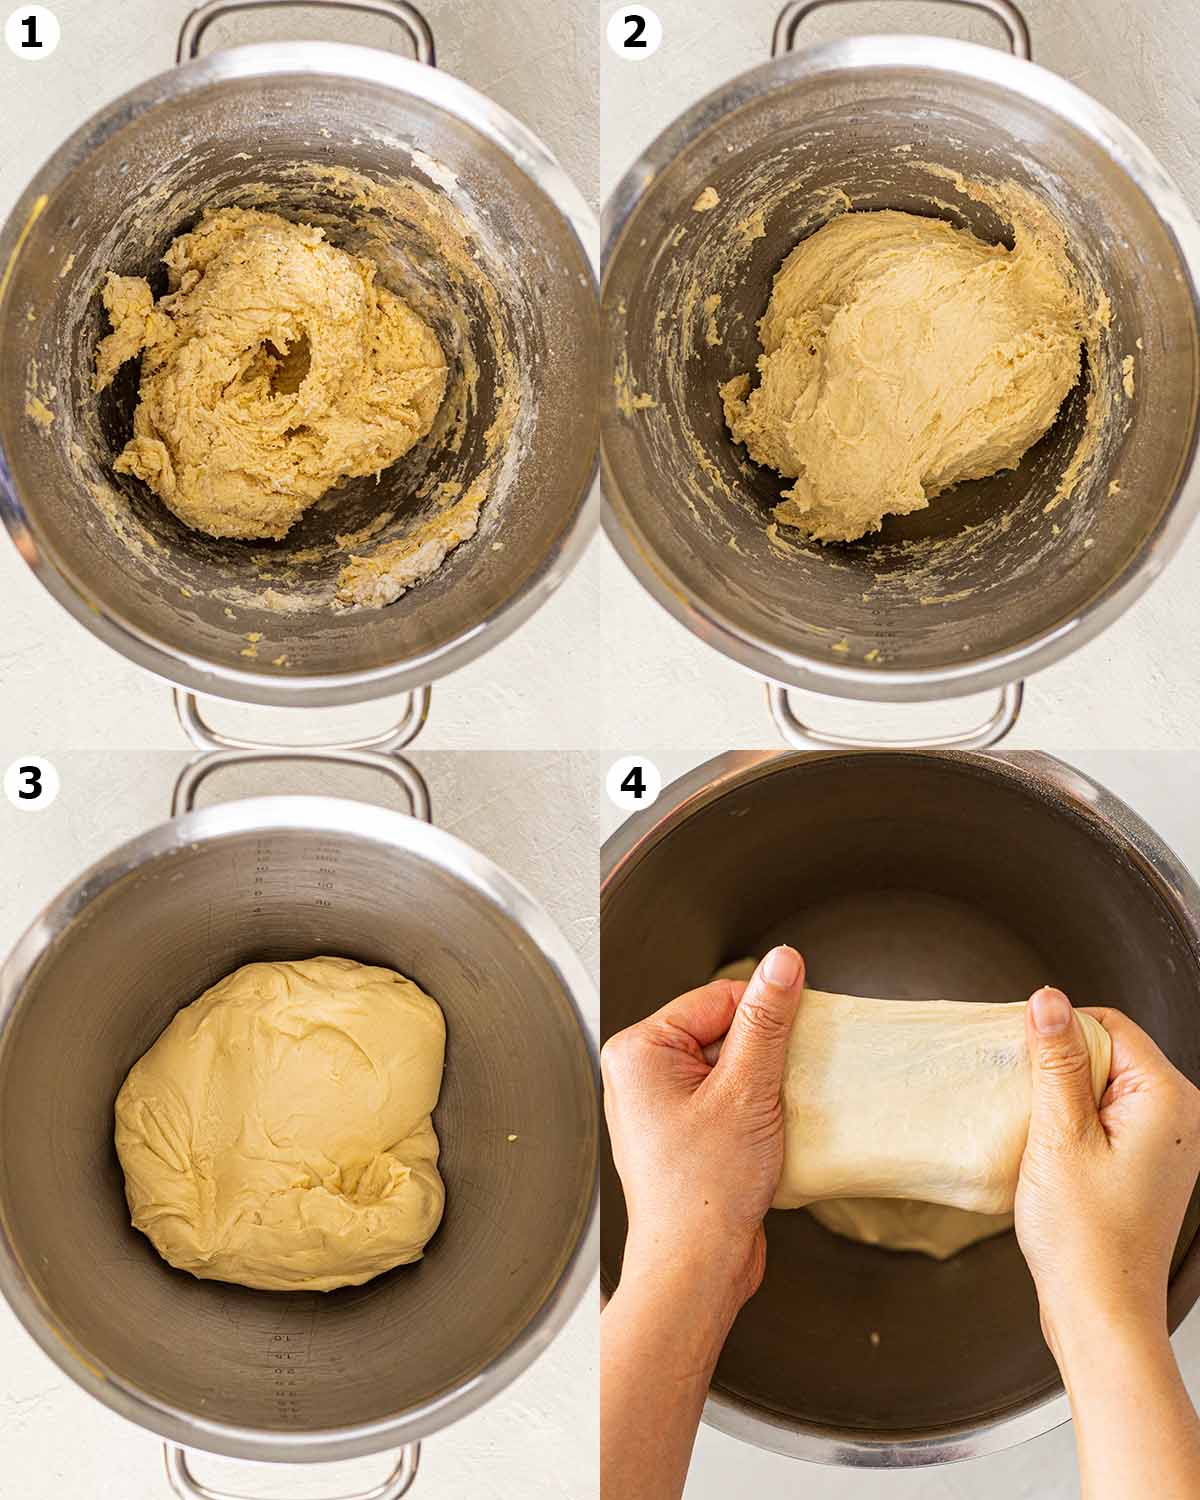
You can knead the dough by hand or in a stand mixer. However, there are two different methods for kneading the dough.
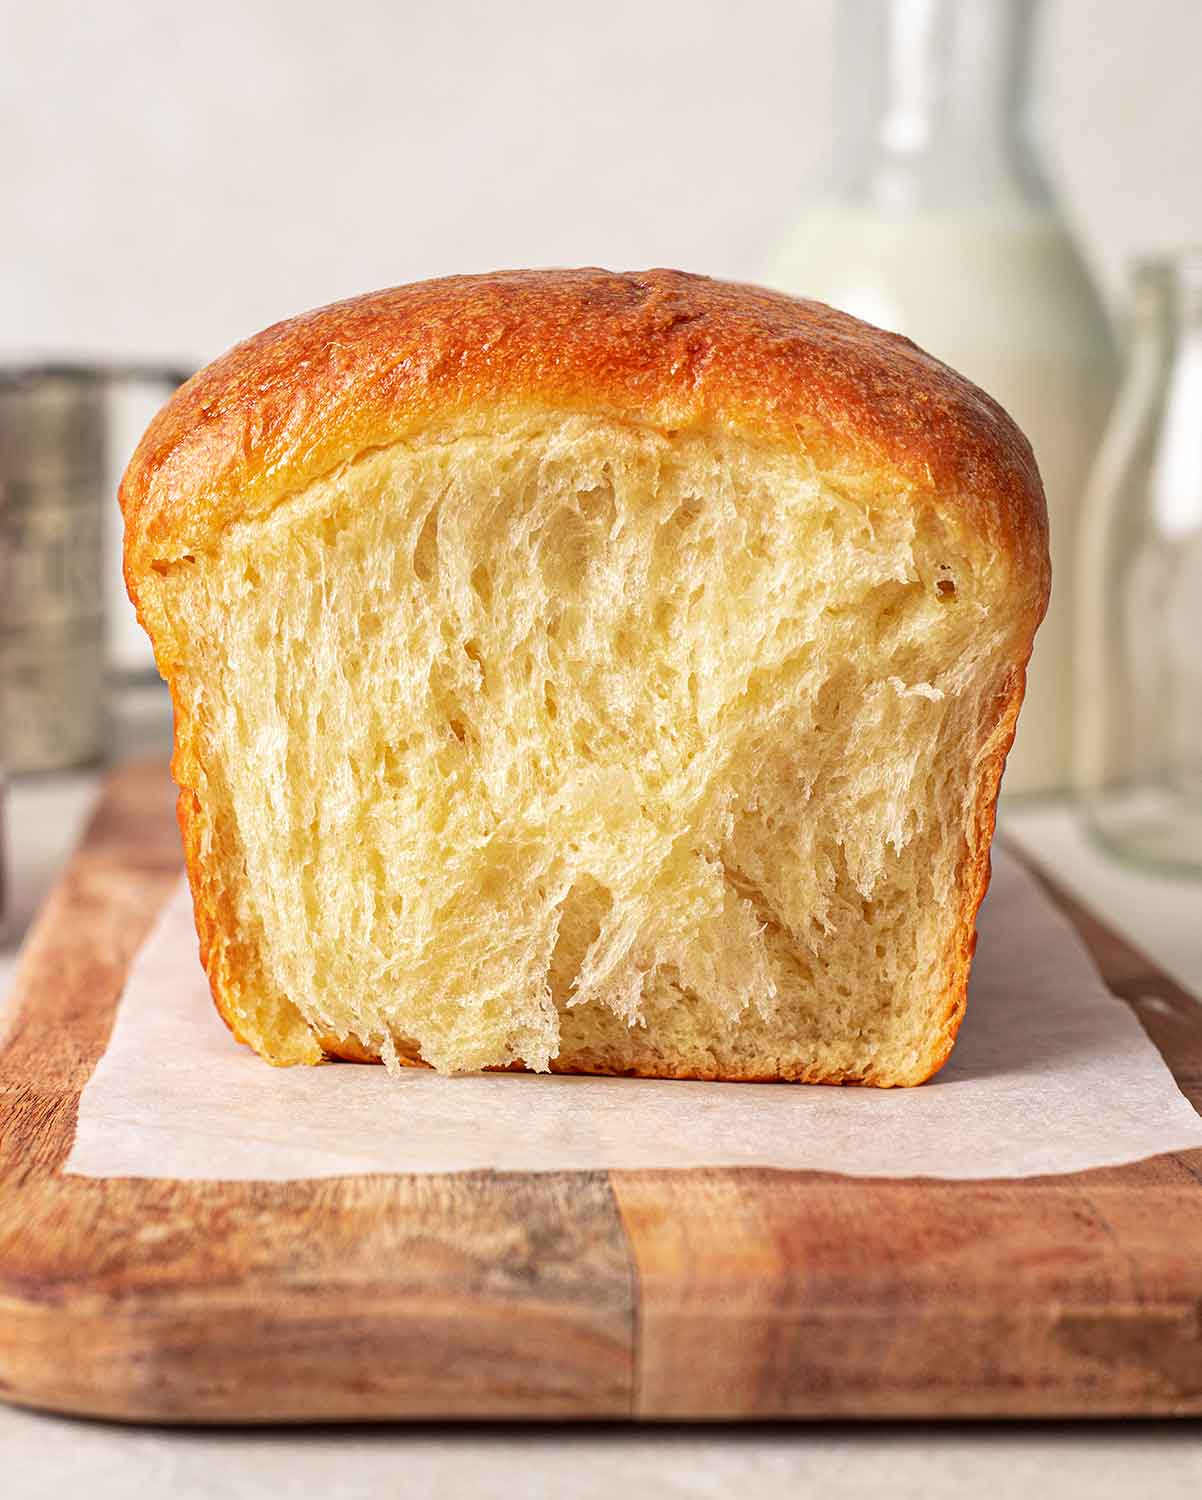
- Easy method where you knead all the ingredients at the same time. This takes 5-10 minutes and makes a soft and buttery brioche. If you’re kneading by hand, this is the best method for you (left picture).
- Traditional advanced method where you add the butter later on. This takes at least 20-30 minutes and makes the bread more feathery when you pull it apart (right picture).
For a step-by-step guide on both methods, watch the video earlier in this post.
Kneading tips for the fluffiest brioche
Initially, your dough will be sticky but avoid adding more flour. Kneading the dough strengthens its gluten structure and makes it come together in a smoother ball. If your dough is still sticky after 5-10 minutes, you can add more flour.
For the ‘advanced kneading method’, if your dough is too dry before adding the butter, add a dash of dairy-free milk. The dough may initially resist the butter when you start adding it, but just keep kneading.
The windowpane test is the best way to tell if you’ve kneaded your dough enough. To do this, grab a small piece of dough and stretch it between your fingers. The dough shouldn’t break and you should be able to see its ‘gluten membranes’. If the dough breaks, keep kneading.
Resting the dough
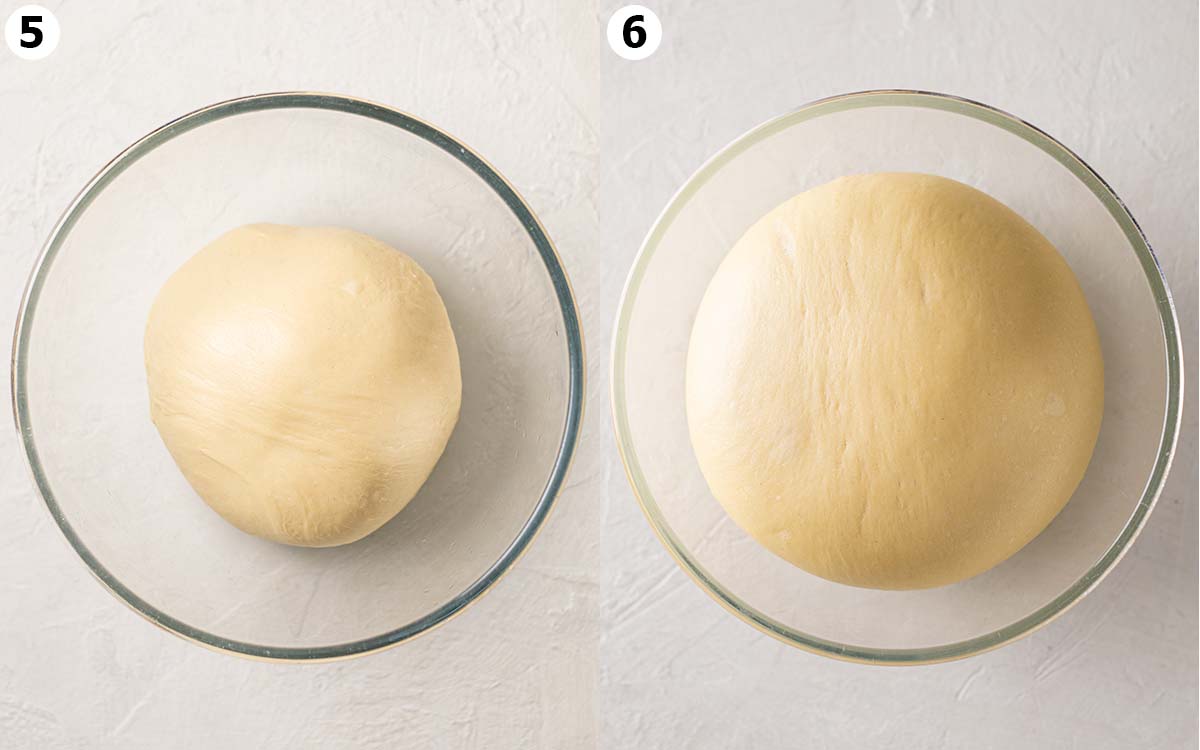
After kneading the vegan brioche dough, let it rest in a WARM place for 1 hour or until it’s doubled. Ideally, it should be somewhere that’s around 25°C (77°F). Brioche dough has a lot of butter which can slow down its rise, but if you keep the dough in a warm place, it’ll rise more efficiently.
If your dough is taking longer to rise, move it to a warmer spot in your home.
Shaping the brioche and second rise
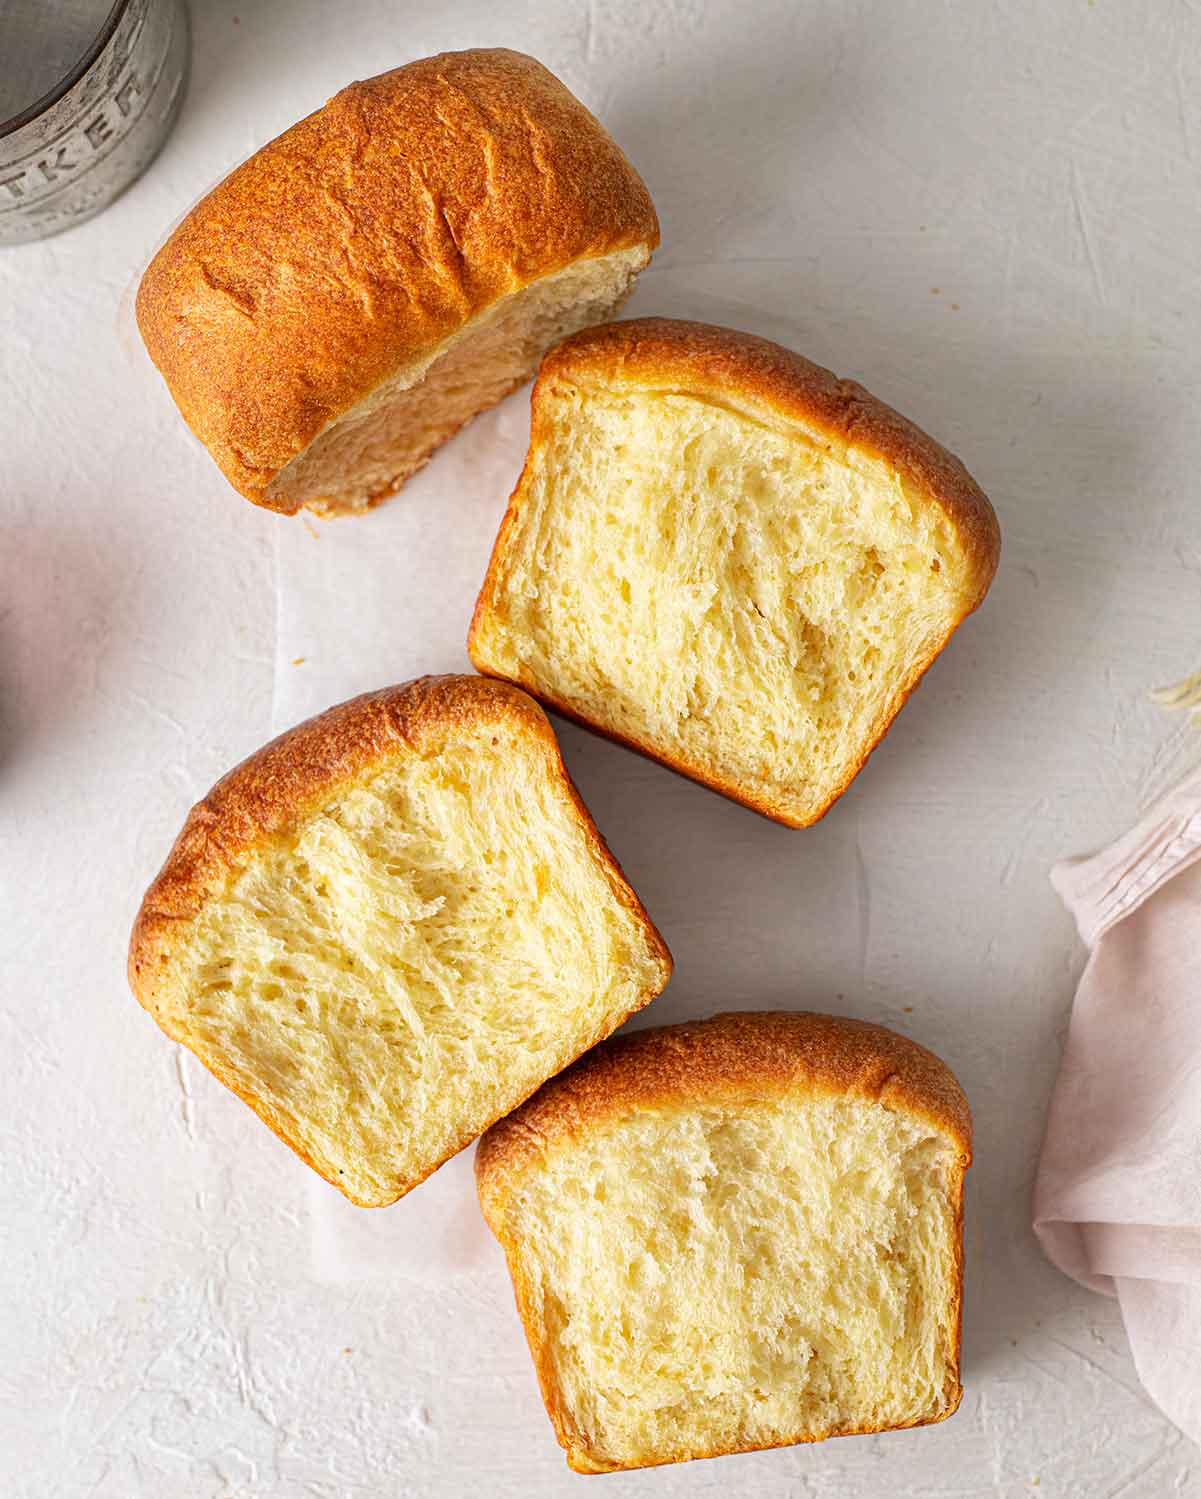
There are a few ways you can shape vegan brioche. These are just for presentation and don’t affect the texture or flavor of the bread:
- As one whole piece. Shape the dough into a large oval shape and place it your loaf pan.
- Divided into 3 to 10 equal pieces and arranged in your loaf pan.
- Braided into challah bread.
If you want to make a fancier shape, check out my cinnamon babka and raspberry jam wreath.
Finally, let your dough rest one more time. It’s ready when it grows in size by about 50% and looks puffy. If you poke the surface of the loaf, it should slowly spring back (known as the poke test).

When is my brioche done baking?
Here are a few ways to tell if your vegan brioche is fully baked:
- Remove the hot brioche from the pan and tap the bottom of the loaf. Your brioche will sound hollow when it’s baked through.
- Insert a toothpick into the middle, and collect some dough. If the dough is fully cooked, your brioche is ready.
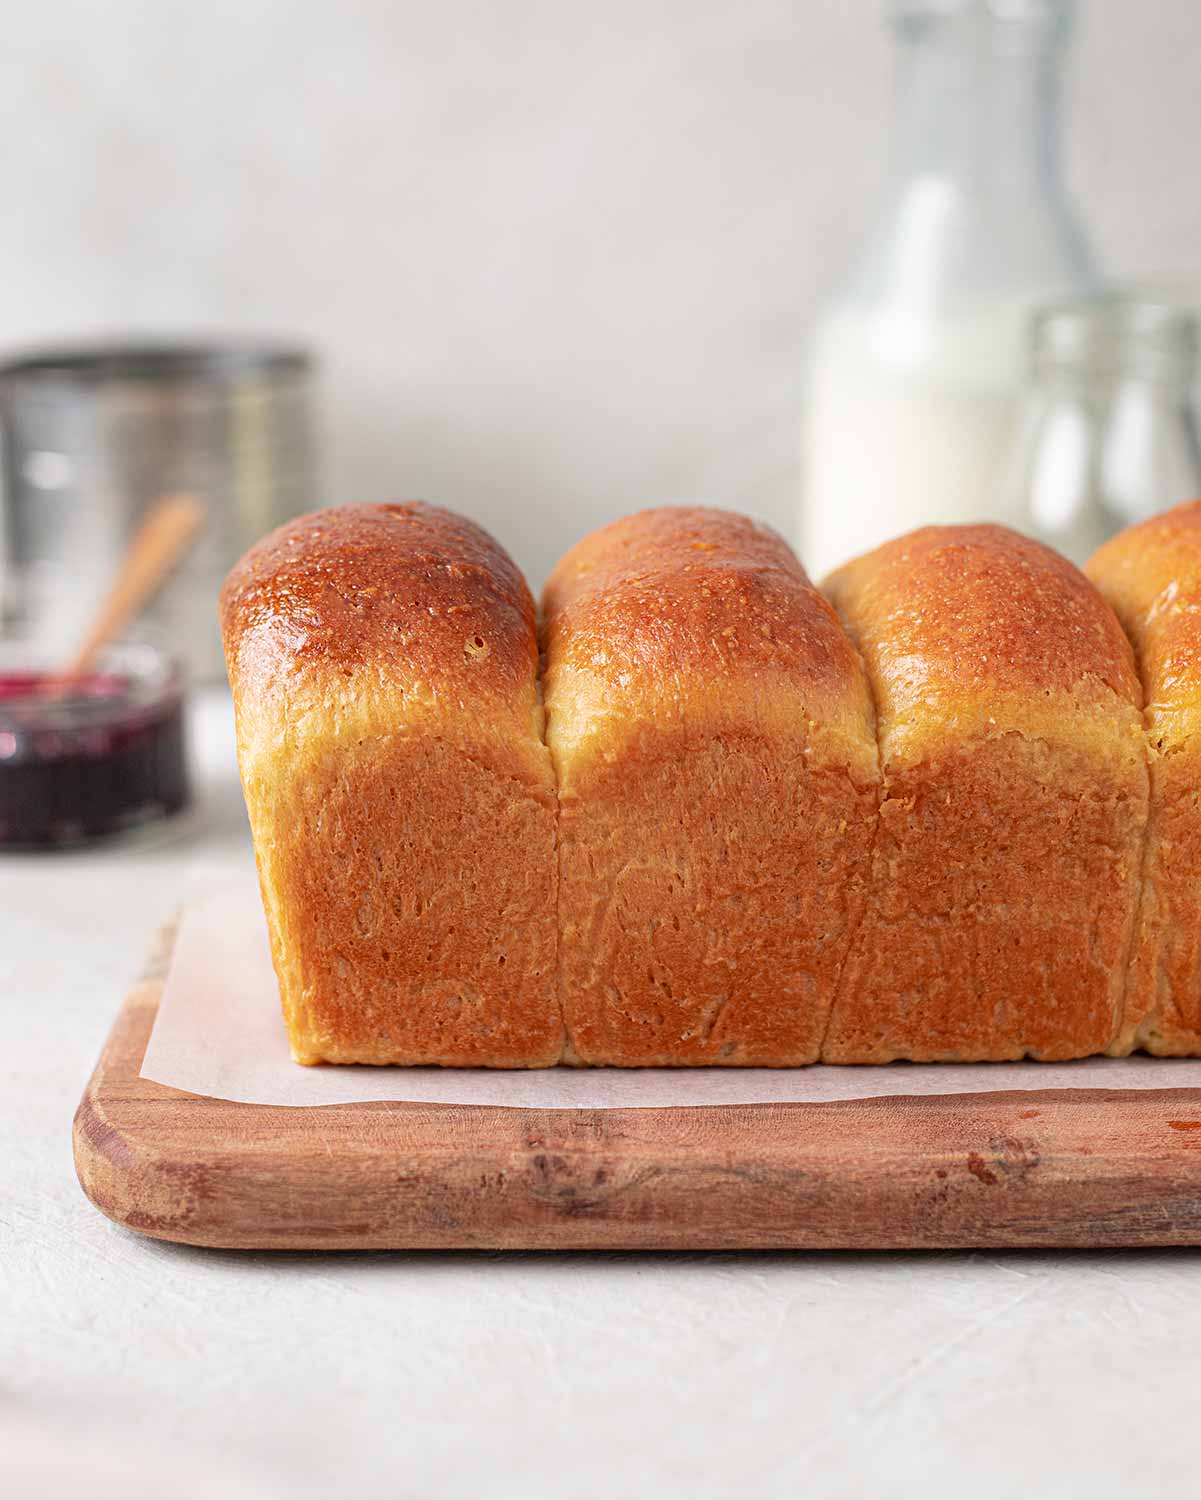
- The top of the brioche should be a deep golden brown.
Instead of using egg wash, brush a little maple syrup on top of the brioche while it’s warm. This will give the bread a beautiful golden shine!
See, it is 100% possible to make brioche vegan!

Customizing this recipe
Use whole wheat or spelt flour instead of all-purpose flour for a more wholesome and dense vegan brioche.
Replace vegan butter with extra virgin olive oil for a denser cakey bread.
Use coconut sugar or maple syrup to make this brioche refined sugar-free.
Use a sourdough starter instead of yeast. This recipe works well with 75-150g of an active sourdough starter with 100% hydration. For a stronger sourdough flavor, use more starter. Or make my sourdough cinnamon rolls!
For brioche dinner rolls and burger buns, check out my recipe for vegan brioche buns.
Unfortunately, this recipe won’t work with 1:1 gluten-free flour. I am working on a gluten-free version so watch this space!
Additional Tips
Yes, prepare the dough and store it in an airtight container in the fridge overnight. The next day, when the dough is not too cold, shape it as desired then let it rest. I don’t recommend shaping the brioche and storing it in the fridge because it can overproof which is more difficult to fix.
You can bake the brioche ahead of time. However, it is best enjoyed as close as possible to when it’s baked. To refresh the brioche, warm it up in the oven or microwave.
Make sure your dough is resting in a warm spot. Here are some other causes and fixes:
1. Your vegan brioche dough is too dry, maybe from incorrectly measuring the flour. You can still add more dairy-free milk to your dough and knead it in. Make sure your final dough is smooth and stretchy.
2. Your yeast is old and no longer active. Don’t worry, this is still fixable! Mix some active yeast with warm milk and a pinch of sugar. Wait until it bubbles then knead the mixture into the dough.
Serving suggestions
This vegan brioche is amazing when it’s warm from the oven. However, here are some other ways to enjoy it:
- Toast a slice and serve it with jam, cream, or any sweet spread.
- Use stale leftovers for vegan french toast casserole. You deserve it!
- Crumble the brioche, bake it at low heat and crumble it on ice cream.
More vegan bread recipes


Or check out my other bread recipes that use this brioche as a base!
Follow Rainbow Nourishments on Instagram, Facebook, TikTok and Pinterest, and subscribe via email to receive all of our latest recipes!

Buttery Vegan Brioche
Ingredients
Vegan Brioche Bread
- 3 cups (375g) bread flour, or all-purpose plain flour (note 1)
- ¾ cup (190g) dairy-free milk, warm, plus more if needed
- ⅔ cup (150g) vegan butter, room temperature (note 2 for olive oil version)
- ¼ cup (50g) granulated sugar, or coconut sugar
- 3 teaspoons instant dry yeast, (note 3 for active dry yeast)
- 1 teaspoon vanilla extract, optional
- ½ teaspoon salt, if using unsalted butter or oil
To glaze
- 3 tablespoons maple syrup, or any other light-coloured liquid sweetener
Instructions
Knead the dough:
- EASY METHOD: Add all the ingredients (except the maple syrup) to the bowl of a stand mixer with the dough hook attachment. Knead for 10 minutes or until the dough is smooth, soft and elastic. You can also mix the ingredients in a large bowl then knead the dough on a floured surface, but it will take a little longer. The dough is ready when it's smooth and tacky but comes away from the sides of the bowl. If your dough is too dry, add a little more dairy-free milk and knead well.
- ADVANCED METHOD: Add all the ingredients except the butter and maple syrup to a stand mixer with the dough hook. Knead until the mixture is well combined (at least 5 minutes). If your dough isn't coming together, add a little dairy-free milk. While the dough is kneading, gradually add the butter, around 3 tablespoons (40g) at a time. Knead until the dough is very smooth and comes away from the sides of the bowl (at least 15 minutes).
- Place the dough in a clean bowl and cover with a tea towel. Let the dough rest in a WARM spot for at least 1 hour or until it doubles in size (note 4).
Shape the vegan brioche:
- Line an 8-inch (20cm) loaf pan with parchment paper or dust with flour.
- Divide the dough into 4 equal portions, shape each into a ball and arrange them in your loaf pan. Cover the loaf pan with a tea towel and leave it in a warm spot to rest for at least 1 hour. The dough should grow by 50% – 100% and become puffy again.
Bake the vegan brioche:
- When you're ready to bake, preheat the oven to 180°C (350°F).
- Bake the brioche for 30-40 minutes or until the top is deep golden brown. The loaf is fully cooked when you can tap the bottom of the loaf and it sounds hollow. If you poke a skewer in the middle, it shouldn't collect any raw dough. If your brioche is browning too quickly but is not baked through, reduce your oven to 160°C (320°F) and tent the brioche with aluminum foil.
- While the brioche is still hot from the oven, brush the top with maple syrup. Rest the bread in the pan for 15 minutes then transfer it to a wire rack to cool.
- Serve the brioche warm. Store leftovers in an airtight container at room temperature for up to 3 days, in the fridge for 5 days or in the freezer for up to 1 month. Leftover brioche is best enjoyed warmed or toasted.
Video
Notes
- Bread flour gives you a chewier brioche whereas all-purpose flour results in a cake-like brioche. You can use whole wheat flour or white spelt flour, but I suggest adding an extra dash of plant milk.
- Instead of vegan butter, you can use ½ cup (125g) of olive oil. This makes a softer dough and you may need to add a little extra flour. And, don’t skip the salt as it mimics a ‘buttery’ taste.
- Instant yeast doesn’t need to be ‘proofed’ beforehand. If you use active dry yeast, mix it with the warm milk from the recipe and a pinch of sugar in a small bowl beforehand. Wait until it bubbles then use it in the recipe.
- The dough can take anywhere from 1-4 hours to rise, depending on the temperature of your home and your dough. If your dough doesn’t grow, place it in a warmer spot in your house. Read my post above for some tips.
This post was originally published in August 2019 and has been updated a few times with an improved recipe that is more similar to traditional French brioche.
This post may contain affiliate links. As an Amazon Associate, I may earn a small commission from qualifying purchases at no additional cost to you.

Worked well for us with Earth Balance sticks. I rubbed the butter in after combining the first ingredients, and when it made a fuss, I let it rest for 15 minutes & then mixed everything together with ease for another 10. The extra rest-and-knead time benefitted the crumb a lot, too. Thanks for sharing. Really easy to make a quality plant-based brioche after all.
Thanks for sharing your method! We’re thrilled it came together smoothly and that the crumb benefited from the extra rest. So happy you enjoyed making this brioche ☺️
First of all, thank you for the recipe Anthea! I’m using Caputo Fioreglut flour which is wheat based but gluten free and hands down the best gluten free flour in the world. Amazing for all sorts of bakes from cakes to breads. The brioche is currently in the proofing stage but the dough has come together nicely (needed a bit more (soya) milk than the recipe suggested). I’ve done similar bakes before and I’m sure it will be a winner.
Hi Steffy, you’re so welcome! I’ve heard great things about Caputo Fioreglut flour and am really curious to see how this brioche bakes with it. I’m so glad that the dough came together well with it too! Please let me know how you go 🙂