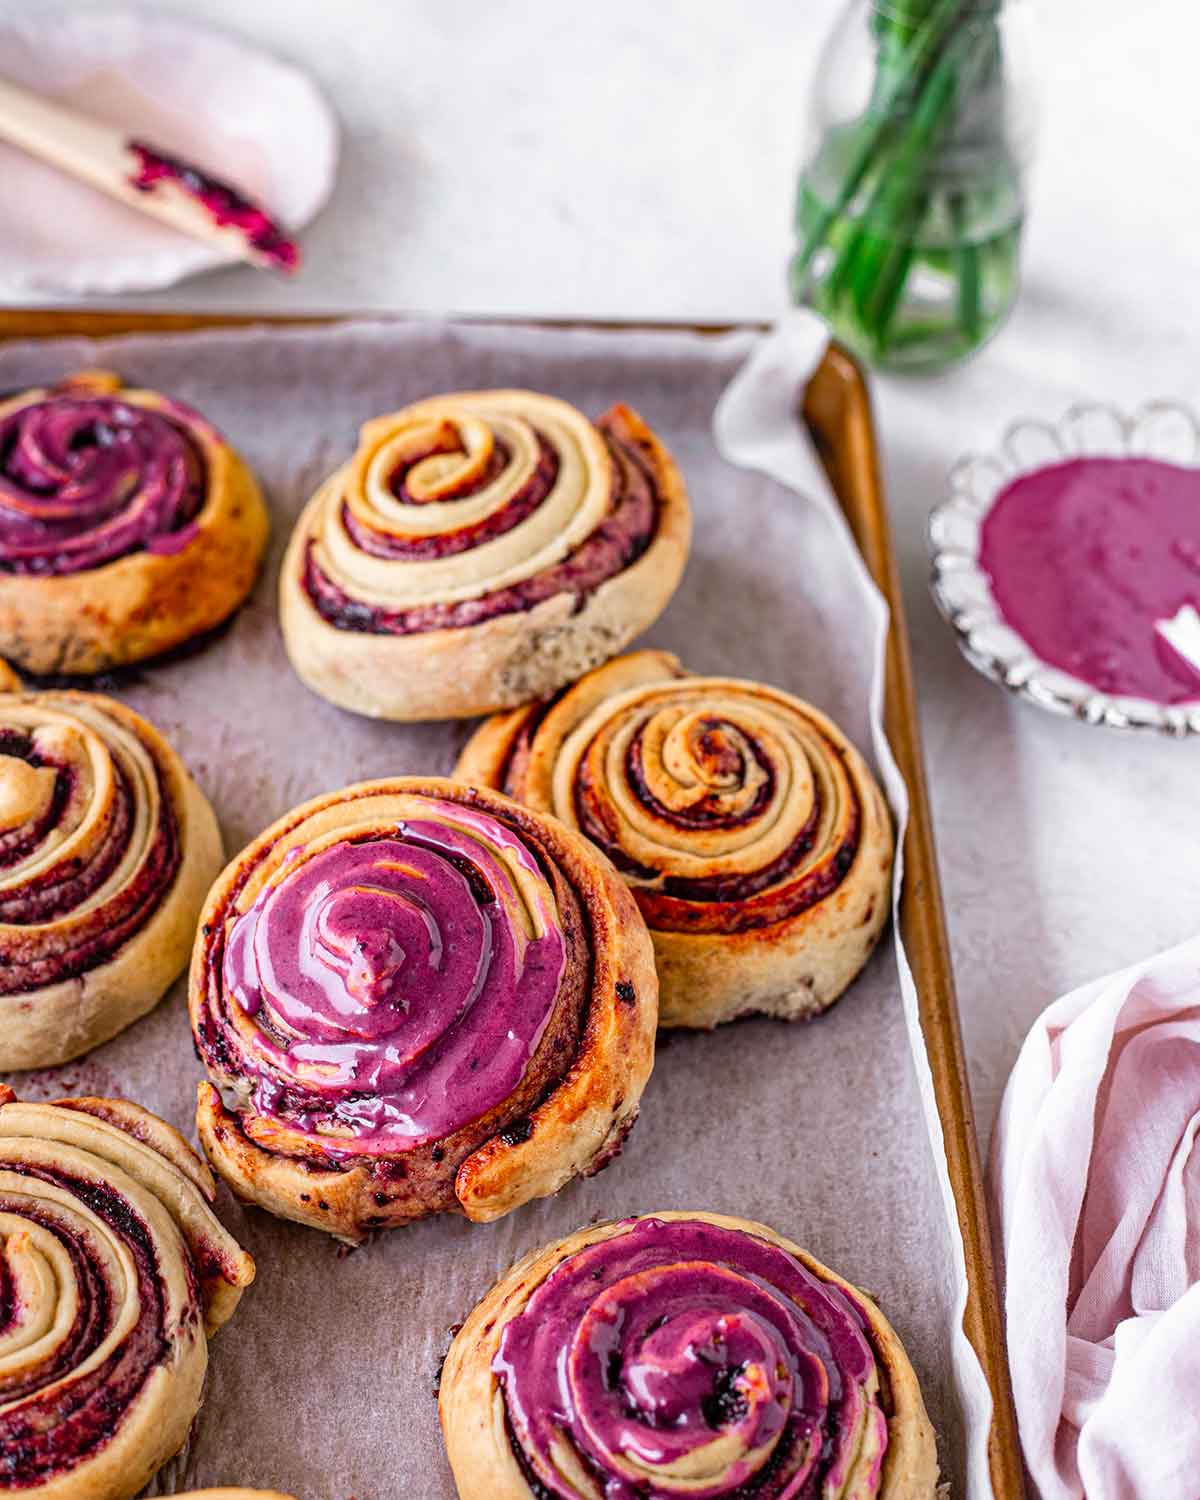
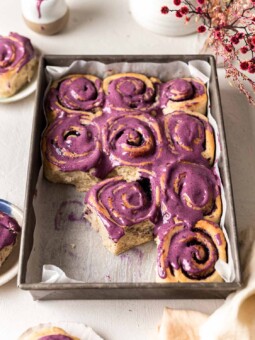
Berry swirl rolls (vegan)
Berry swirl rolls with a vegan brioche dough, lashings of fruity jam and a beautiful purple glaze. Step-by-step photos are included!
What to expect from these berry cinnamon rolls
These are like vegan cinnamon buns but with a thick berry jam and a slightly different rolling method. The brioche dough is partially ‘laminated’ with the berry jam. This makes a BEAUTIFUL and mesmerising roll with more layers than a conventional vegan cinnamon roll!
These laminated rolls are also slightly more dense and have a crunchier exterior than cinnamon rolls. However, being able to tear away more layers makes them fun to eat!
I got the inspiration for these buns from Anna Banana who made some gorgeous hazelnut swirl buns which I fell in love with at first sight. The process was similar to my vegan rugelach so I knew it’d be easy to make!
However, if you’re looking for simplier and fluffier vegan berry buns, check out my blueberry cinnamon rolls.
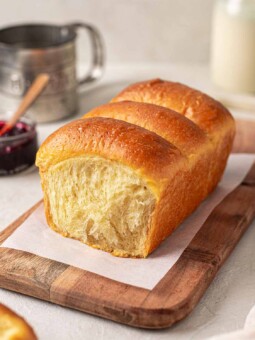
Ingredients for the vegan brioche dough
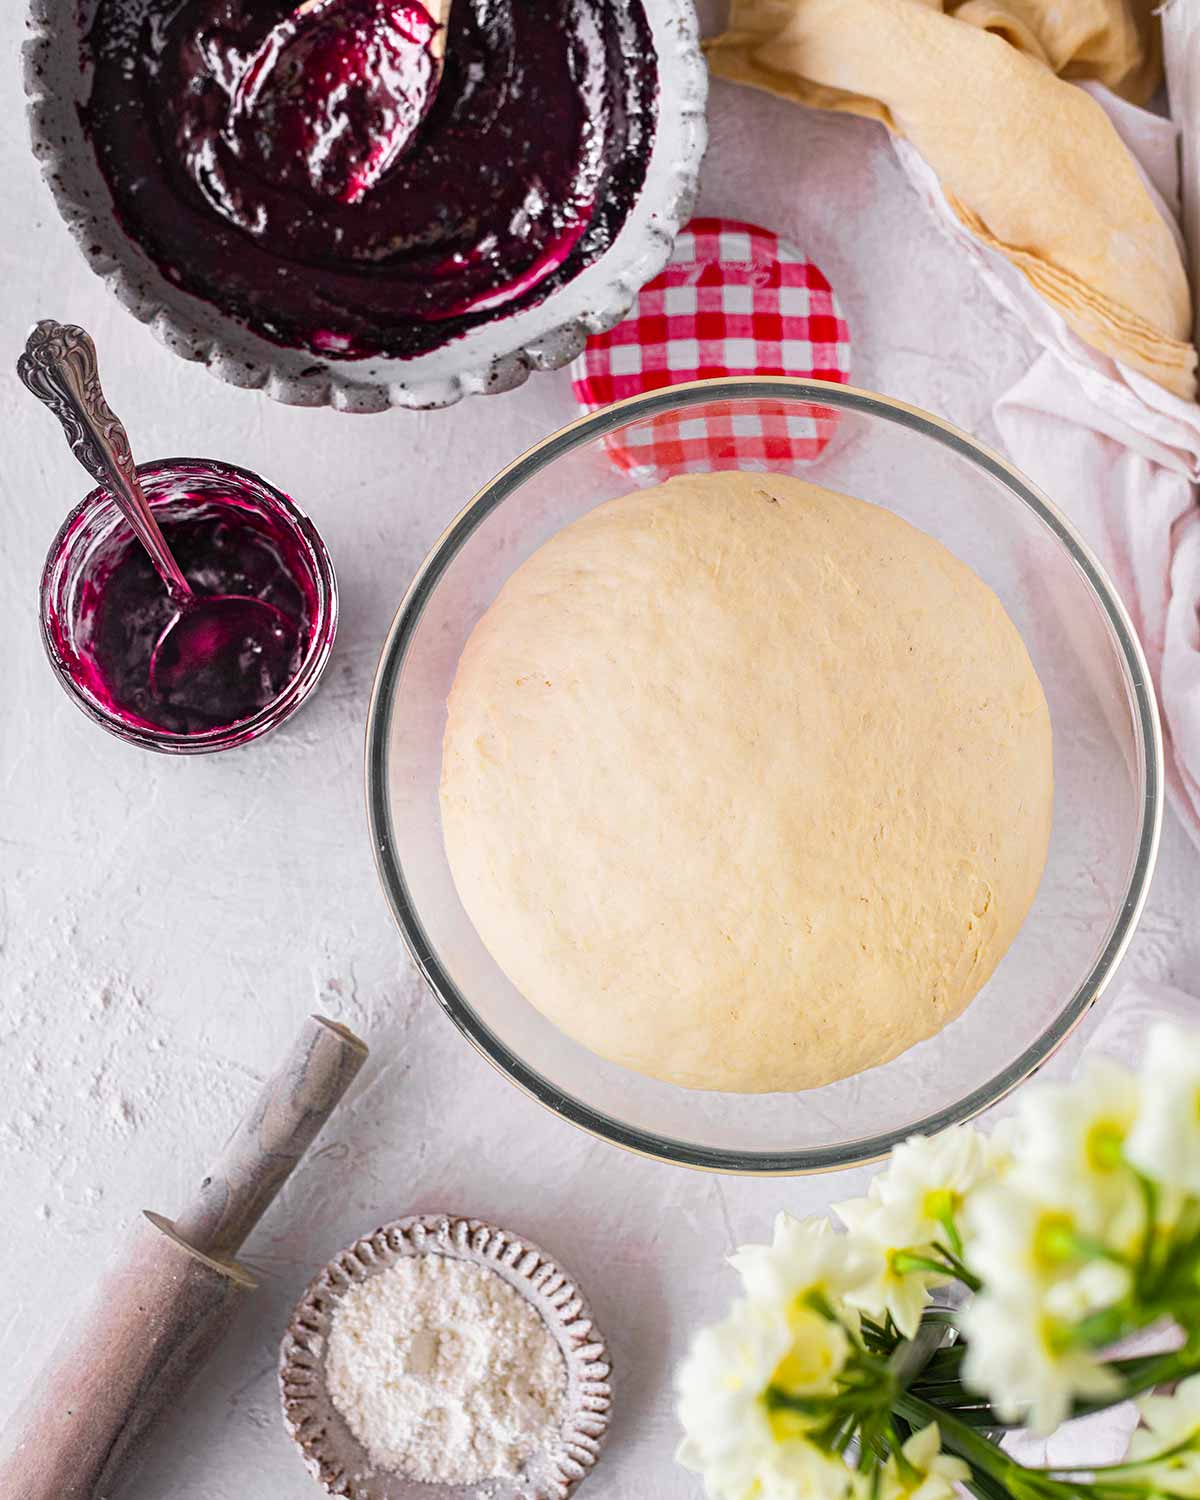
The dough is essentially a variation of my vegan brioche and cinnamon bun dough and consists of:
- Plain aka all-purpose flour
- Plant-based milk, such as soy, coconut or almond
- Cane sugar or coconut sugar
- Brown sugar or coconut sugar
- Instant dried yeast
- Vegan butter or margarine
The full list of ingredient quantities and instructions are in the recipe card at the bottom of this post.
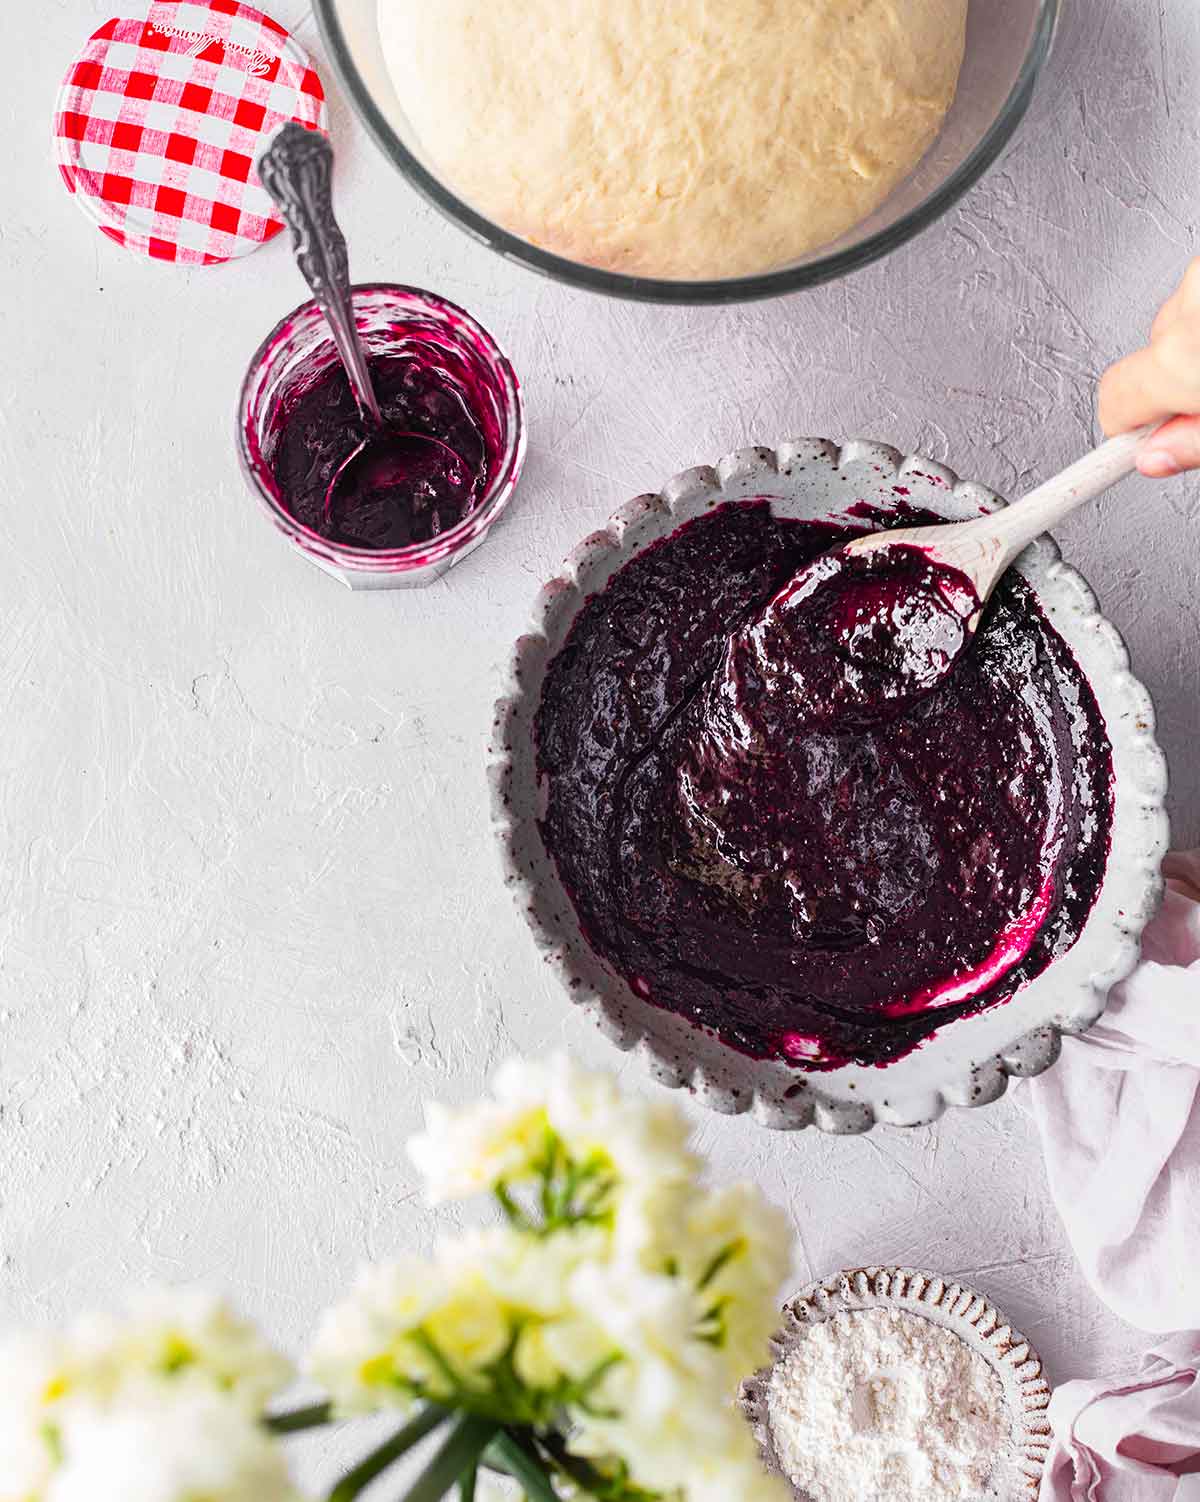
The filling
The filling is store-bought fruit conserve and blueberries which I reduced on the stove-top. Reducing the jam/conserve makes it easier to roll and prevents it from spilling everywhere when baking it. In the below picture, you can see that the jam is VERY thick.
You can really use any jam to make these. I have used blackcurrant and raspberry which work really well! A lighter-colour jam like apricot will also work but the swirls won’t be as obvious.
How to assemble berry rolls
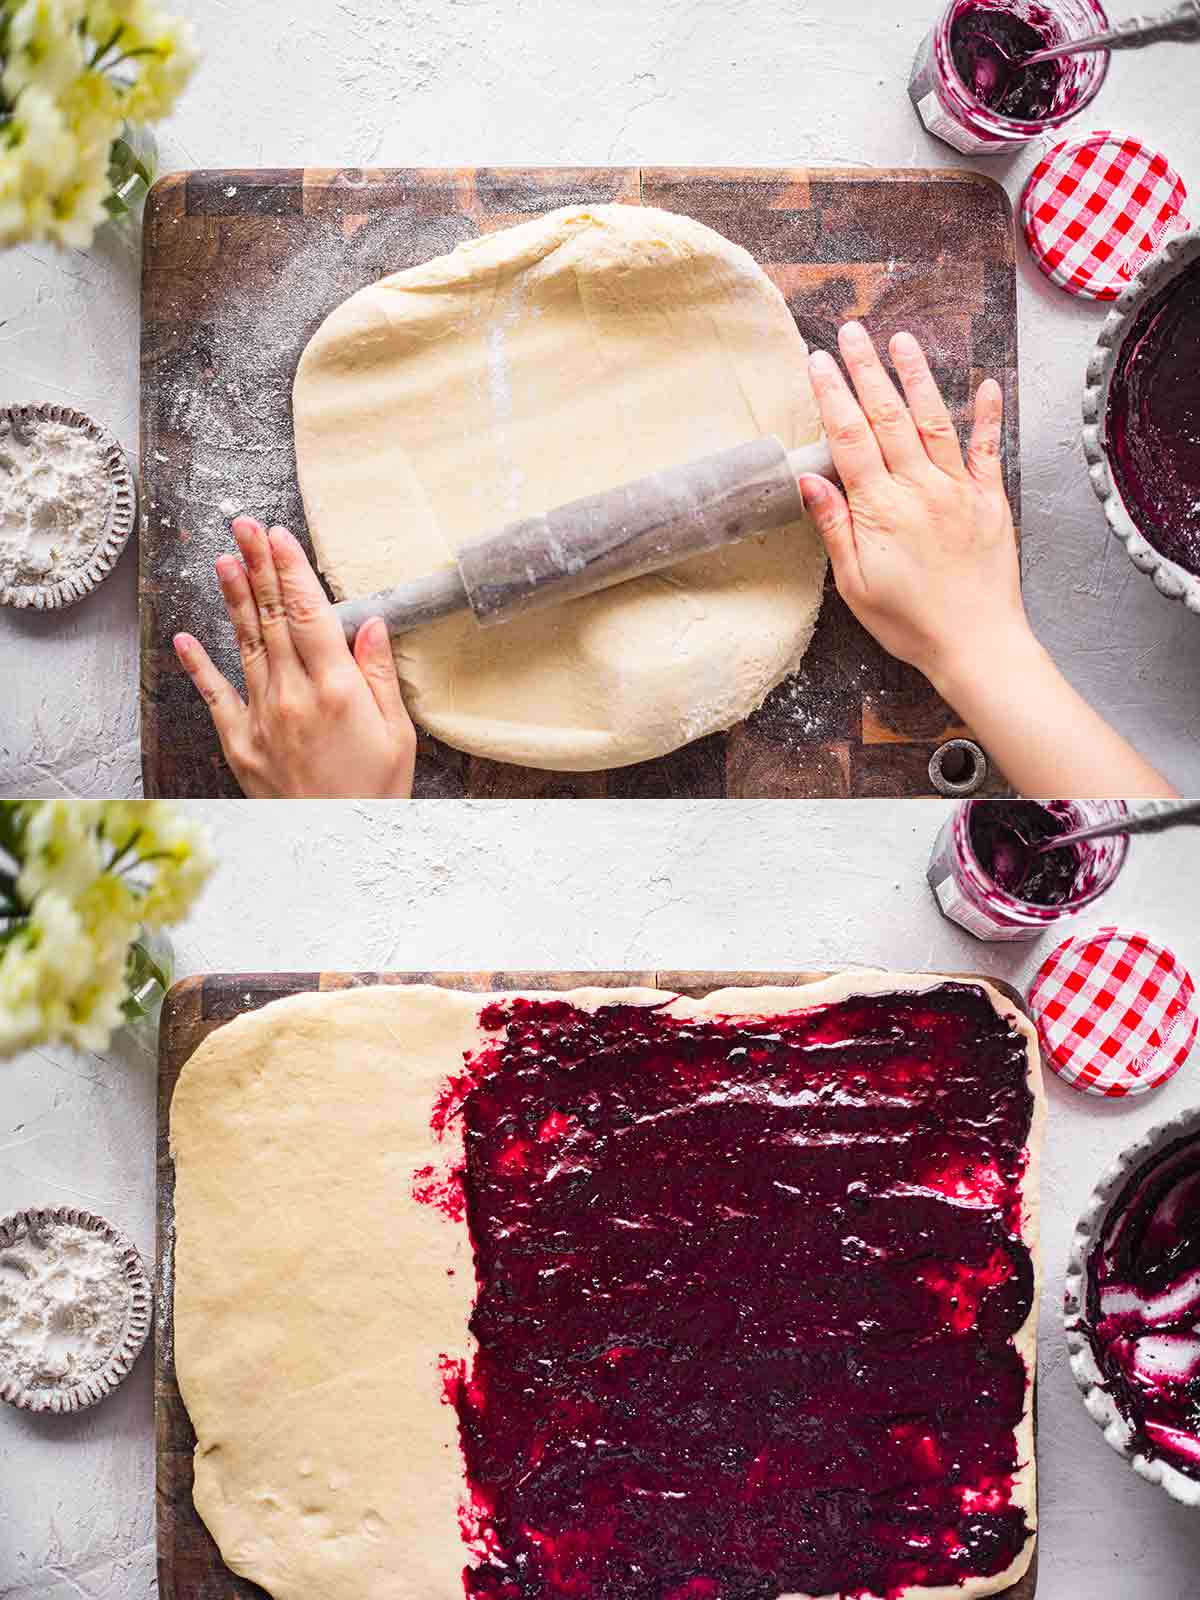
After you’ve made your dough and let it rise once, roll it on a floured surface.
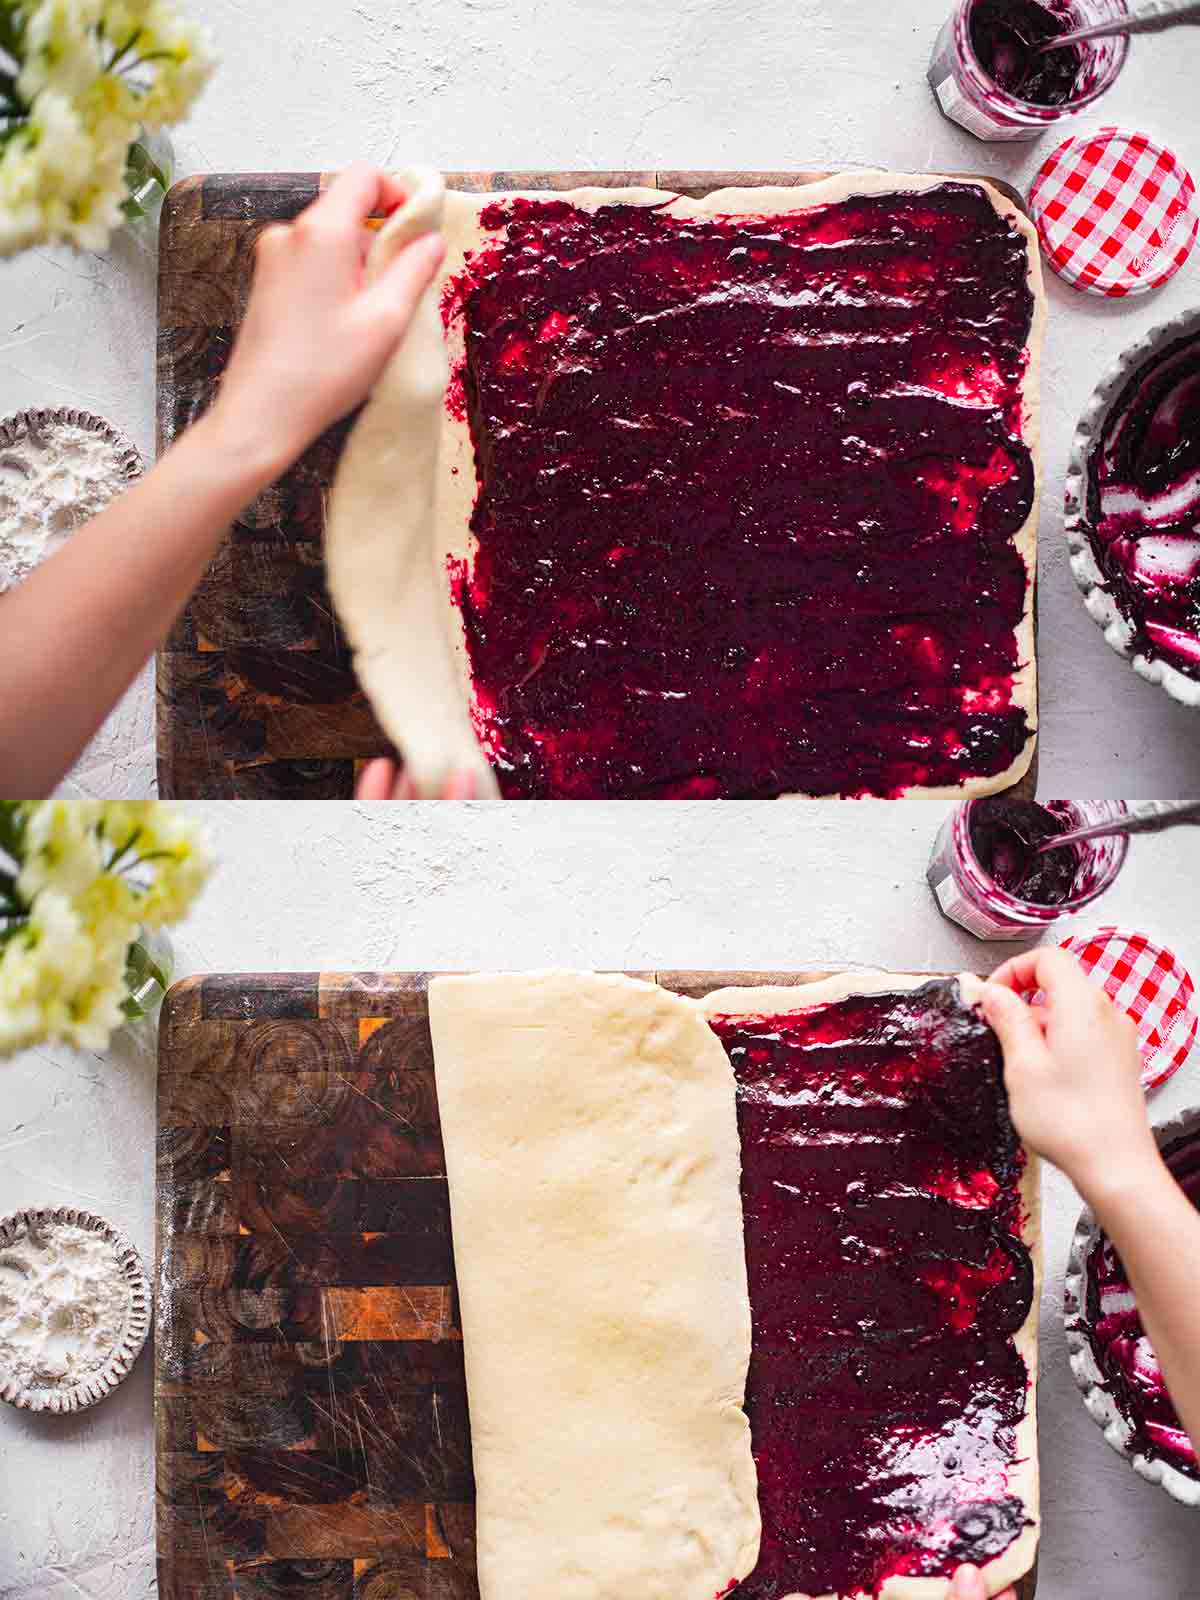
At the next few stages, it helps to think of the dough in 3 parts – the LEFT side, MIDDLE and RIGHT side. Spread the thick jam on two thirds of the dough. This can be the left and middle OR right and middle. It doesn’t matter!
Tip: don’t spread the jam to the edges like what I did… when I folded it, the jam oozed out everywhere and it was quite…. messy!
Once the jam is on two-thirds of your dough, fold over the side of the dough which has no jam on it.
Then fold over the other side. This will give you an ‘envelope’ or ‘pocket’ of jammy dough!
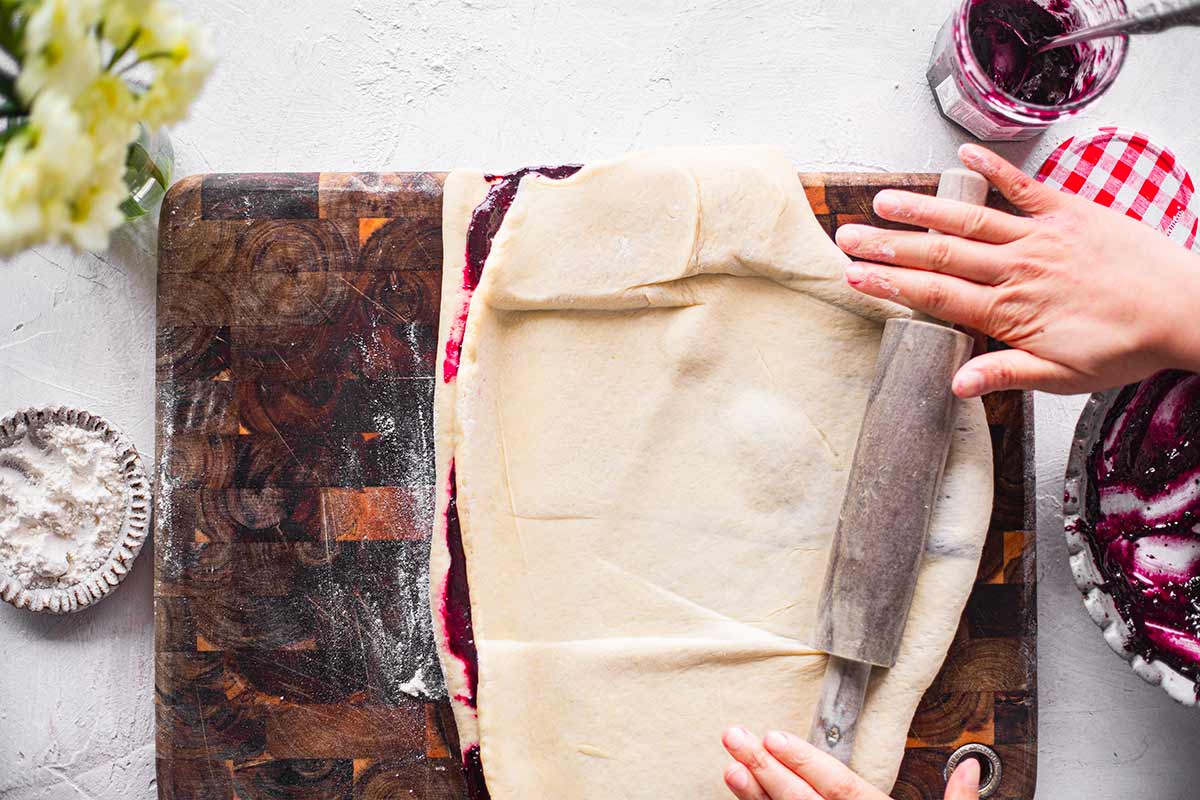
With your envelope/pocket, carefully roll out the dough into a rectangular shape again. This step can be a little messy if your jam isn’t thick enough or you spread the jam to the edges of your dough.
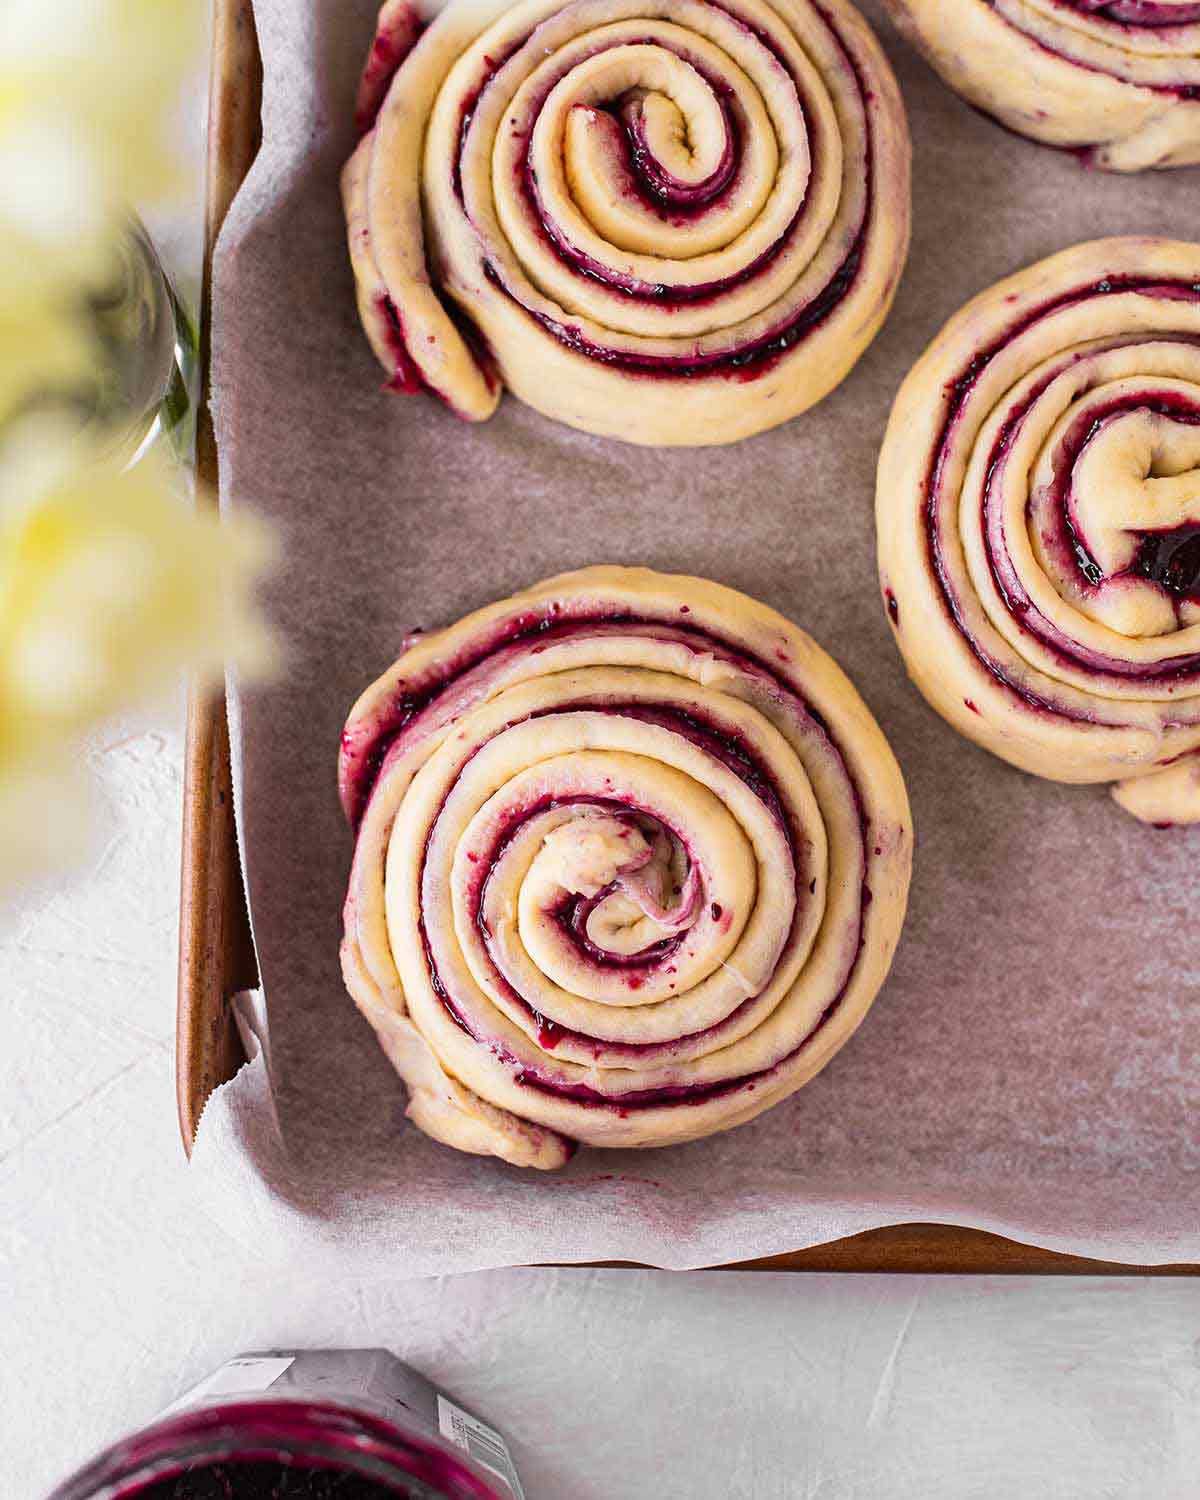
Next, get a sharp knife or pizza cutter and cut 2cm or 1 inch strips out of the dough.
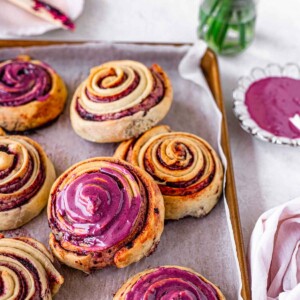
Then roll each strip into a berry roll! The rolls are bigger than conventional cinnamon buns, but I ain’t complaining!

Place all the berry rolls on a lined baking tray then set aside in a warm spot until they increase in size.
Baking and decorating the berry rolls
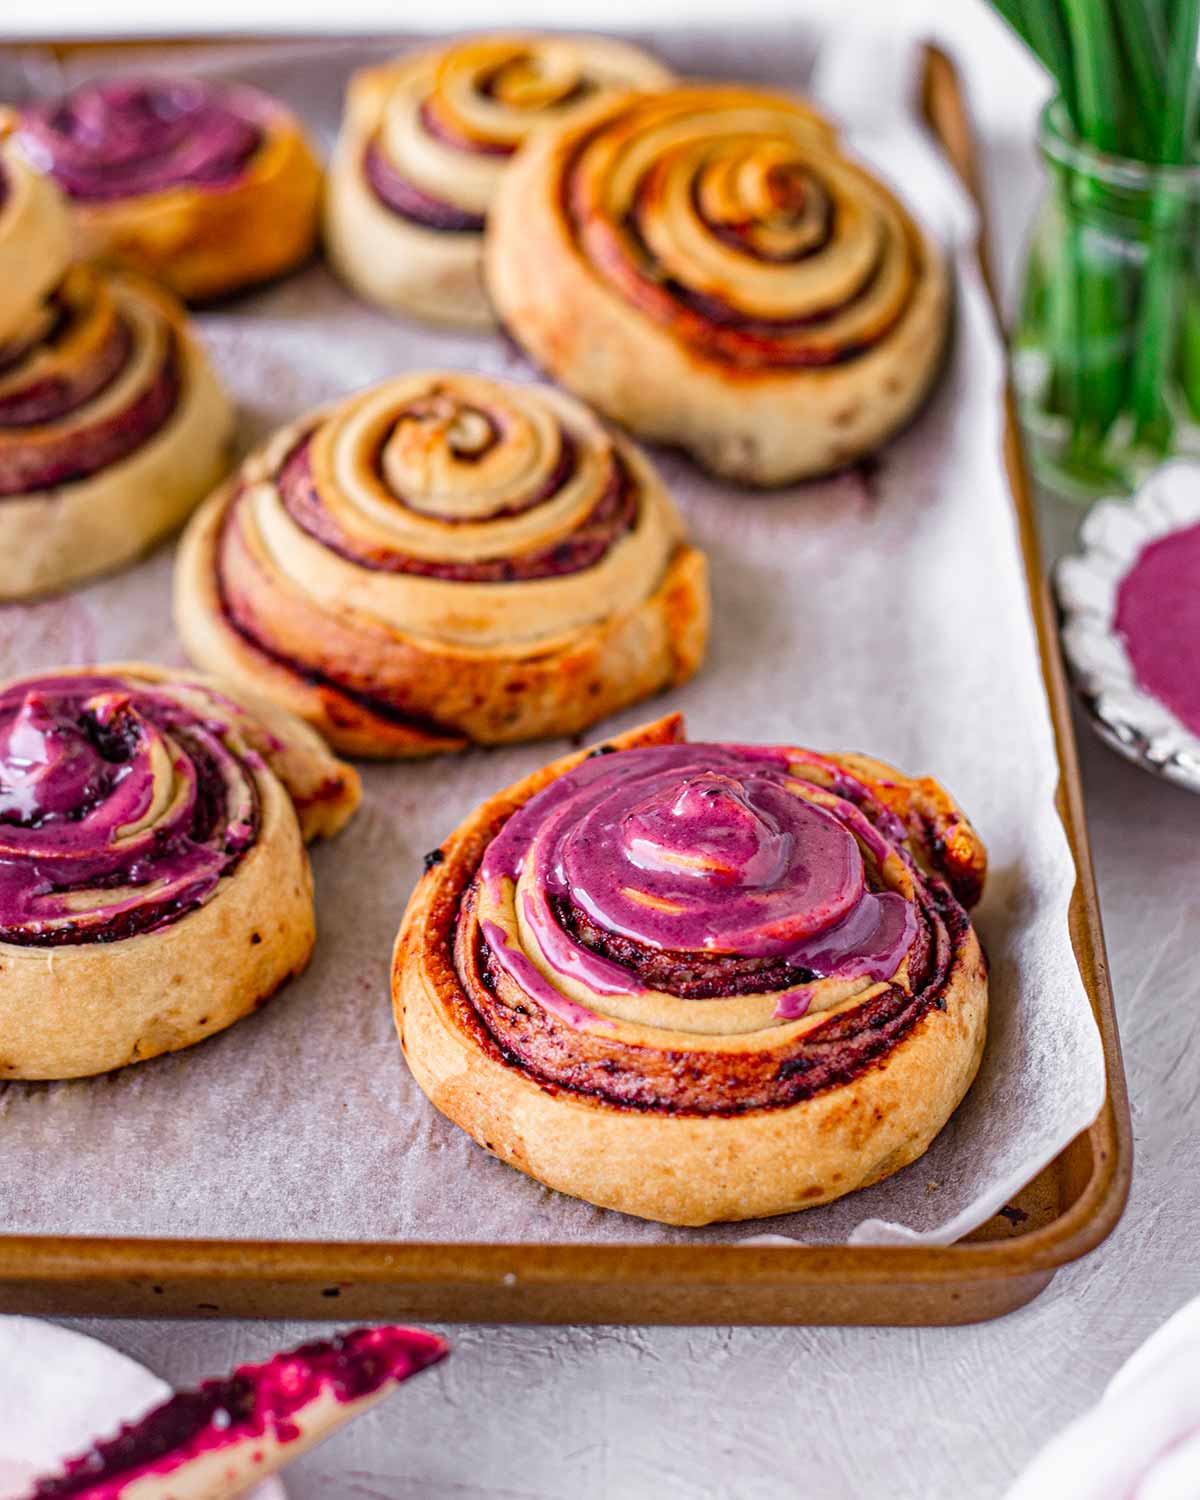
You’ll need bake the berry rolls in the oven 180°C (350°F) until they are golden brown on top.
I made a simple berry glaze using powdered/icing sugar, jam and mylk. However, the glaze is totally optional!
More vegan bread recipes


Follow Rainbow Nourishments on Instagram, Facebook, TikTok and Pinterest, and subscribe via email to receive all of our latest recipes!
Berry Swirl Rolls
Ingredients
Buns
- 3 cups (375g) all-purpose plain flour, plus more for dusting
- ⅔ cup (165g) dairy-free milk, warm
- ½ cup (115g) vegan butter or margarine, room temperature
- 3 tablespoons (40g) granulated sugar, or coconut sugar
- 1 tablespoon (9g) instant dry yeast
- 1 teaspoon ground cinnamon
- Pinch of salt, if you're not using salted butter
Bun filling
- ½ cup (160g) berry jam of choice, or blackcurrant jam
- 1 cup (75g) fresh or frozen berries, such as blueberries or raspberries
Berry glaze
- 1 cup (100g) powdered sugar / icing sugar
- 1 tablespoon (20g) berry jam of choice, or blackcurrant jam
- 1 tablespoon (15g) dairy-free milk
- Beetroot powder, raspberry or strawberry powder, optional for colour
Instructions
To make the buns:
- Combine all the ingredients in a large bowl or stand mixer and mix until it comes together. Knead the mixture until it forms a smooth and stretchy dough. Add a little more milk if the dough is too dry or a little more flour if the dough sticks to the bowl.
- Cover the bowl with a damp tea towel. Set it aside in a warm spot for at least 1 hour or until the dough has doubled in size. If it doesn't double, place the dough in a WARMER spot until it does.
To prepare the filling:
- Add both ingredients to a small saucepan over low heat. Simmer until the berries have broken down and the mixture is very thick and jammy. Puree with a stick blender (or mash well with a fork). Set aside to cool.
To assemble the buns:
- Dust a clean surface with flour. Scoop the dough onto the surface and roll it out into a large rectangular shape.**
- Spread all the berry mixture on two-thirds of the dough (see the blog post for pictures). Fold the outer two-thirds of the dough over. Use your rolling pin to flatten the layered dough into a large rectangle again.
- Use a sharp knife or pizza cutter to cut around 8 long strips out of the dough. Roll each strip into a bun shape. Arrange the buns on a lined or greased baking tray, leaving a little space in between. Place a damp tea towel over the buns and set aside to rise for at least 1 hour until the rolls are puffy again.
Baking the buns:
- When you're ready to bake the buns, preheat the oven to 180°C (350°F).
- When the oven is hot, bake the buns for 15-20 minutes. The buns are ready when their surface is slightly golden brown. Set aside to cool.
Decorating the buns (optional):
- Add all ingredients to a bowl and mix until smooth. Add more sugar if the frosting is too thin and more milk if the frosting is too thick. It should be a thick drizzlable consistency. If you'd like your glaze to be richer in colour, add a little beetroot powder and mix until combined
- Drizzle the glaze on the buns. If desired, set aside for the glaze to dry (or enjoy immediately haha).
- The buns are best eaten the day they are baked. Alternatively, store them in an airtight container at room temperature for 1-2 days or in the fridge for 3-4 days. Warm up the buns before you enjoy them.
Notes
This post may contain affiliate links. As an Amazon Associate, I may earn a small commission from qualifying purchases at no additional cost to you.

My 12 y/o daughter made these and we loved them! Thank you!
Aw that’s so sweet! Thanks so much for your comment! 🙂
I absolutely adored these! Thank you so much for the recipe, a brilliant take on the classic cinnamon swirl
Can you sub AP flour for GF?
I haven’t tried it and it really depends on the GF flour. If you try it, let me know how you go!