Vegan Biscoff Ice Cream (no-churn)
Easy no-churn vegan Biscoff ice cream made with only 3 ingredients. This non-dairy ice cream is so creamy and seriously easy to make. It’s also completely nut-free!

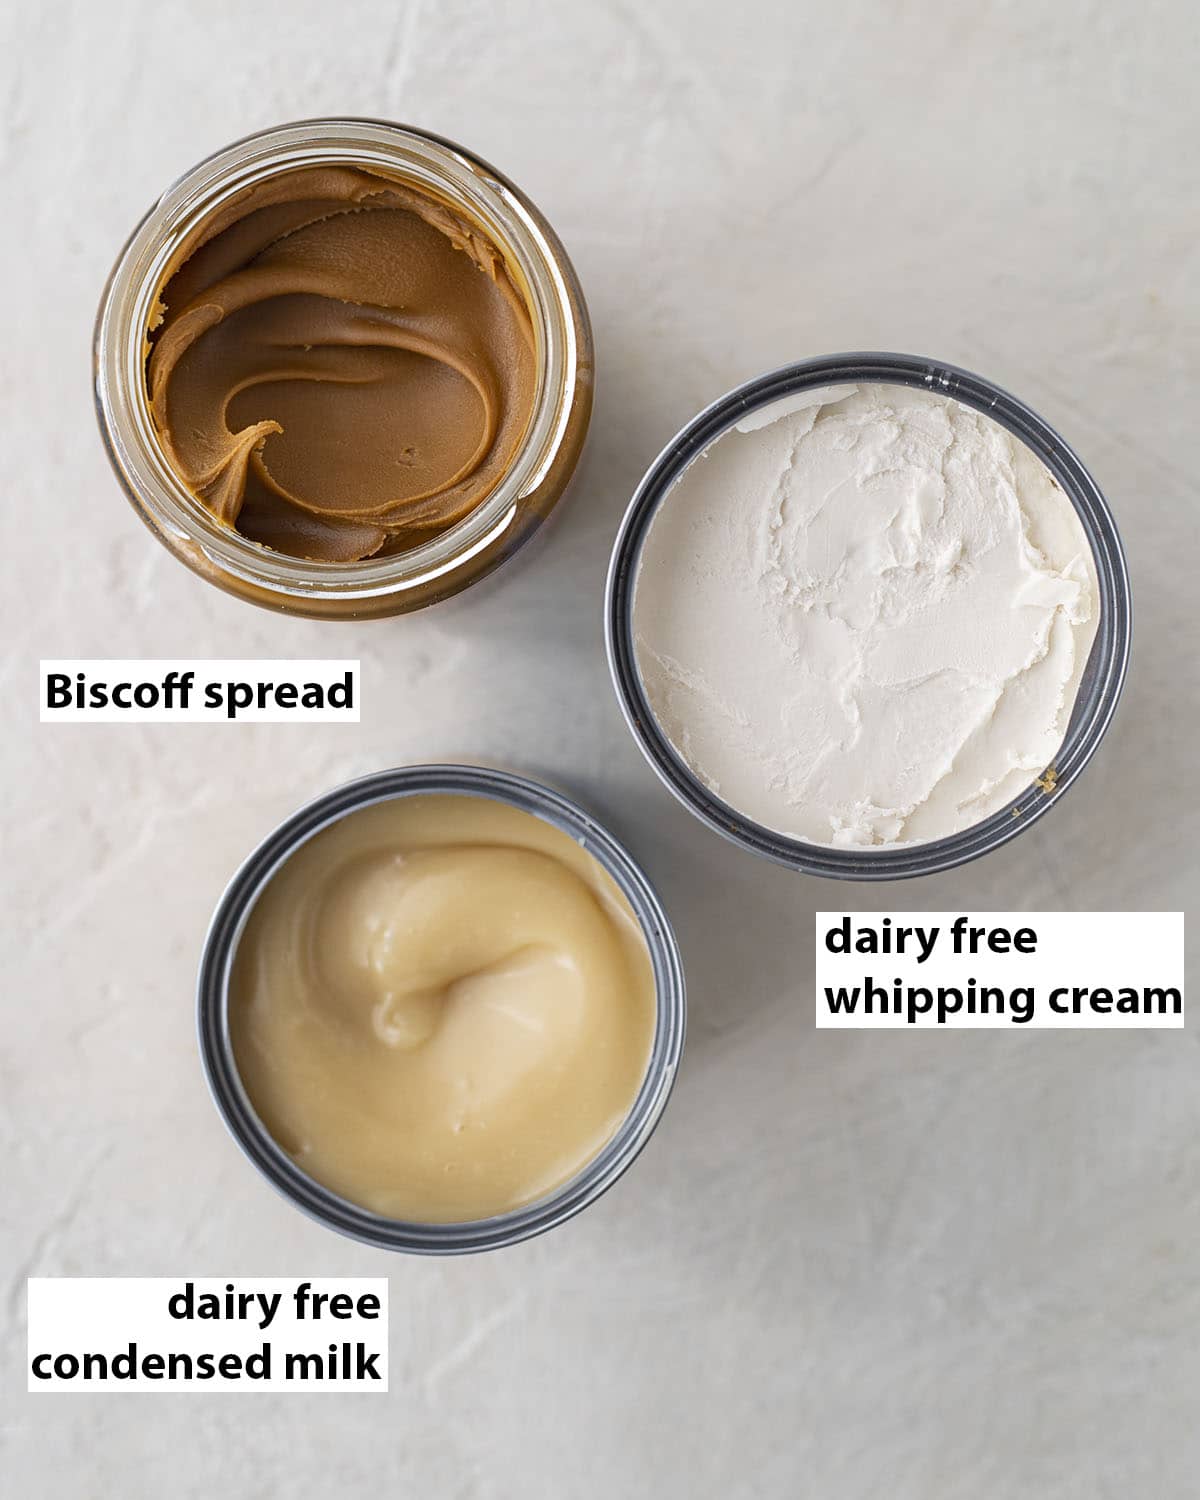
3 ingredients you’ll need
The full list of ingredient quantities and instructions are in the recipe card at the bottom of this post.
Ingredient notes
Dairy-free whipping cream. This recipe works well with either a liquidy dairy-free whipping cream, or coconut whipping cream such as the one from Nature’s Charm. Whipping cream allows us to incorporate air into the ice cream without using an ice cream machine. And, as Biscoff is quite dense, this recipe uses a little more whipping cream to balance it out.
Dairy free condensed milk such as coconut, soy or oat. The condensed milk is already sweetened so you don’t need to add extra sugar.
Smooth biscoff spread which makes the ice cream ridiculously delicious.
How to make no-churn vegan ice cream
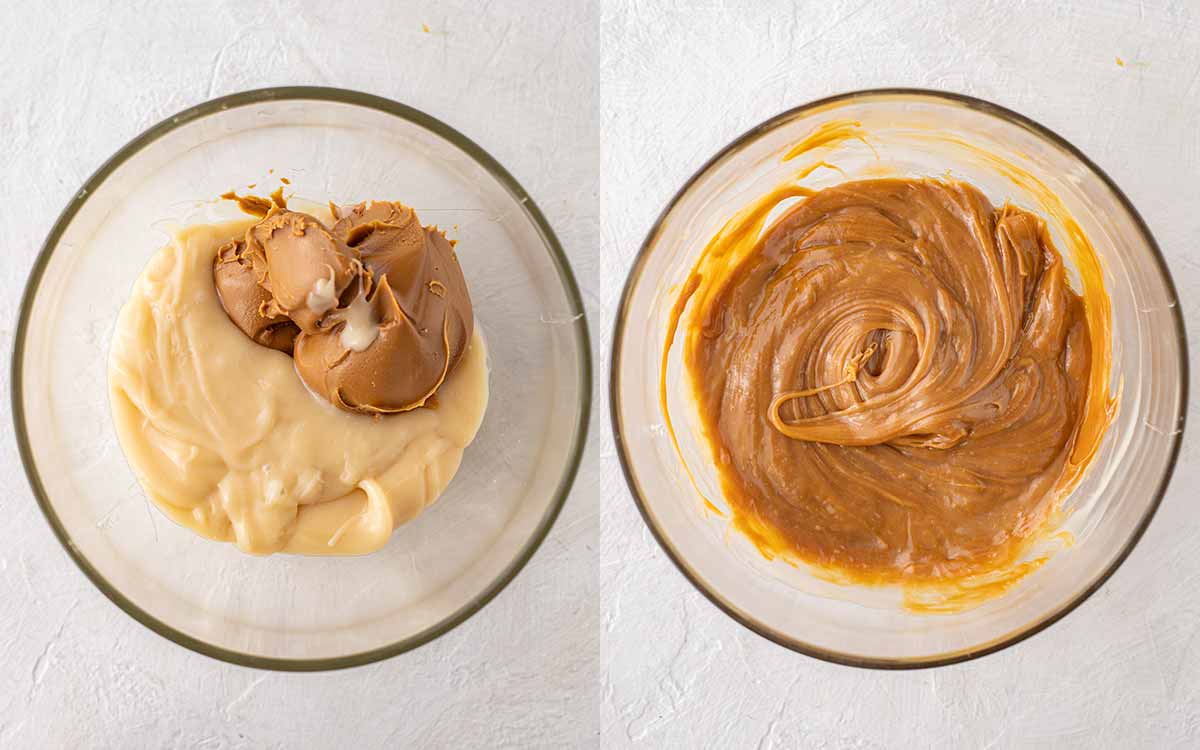
First, we need to mix together the Biscoff spread and condensed milk in a bowl. This helps break down the thick Biscoff spread. If you’re having trouble mixing it, you can warm up the mixture in the microwave or stove-top (as long as you let it cool before the next step).
You can mix the two ingredients with an electric whisk, or just a spoon.
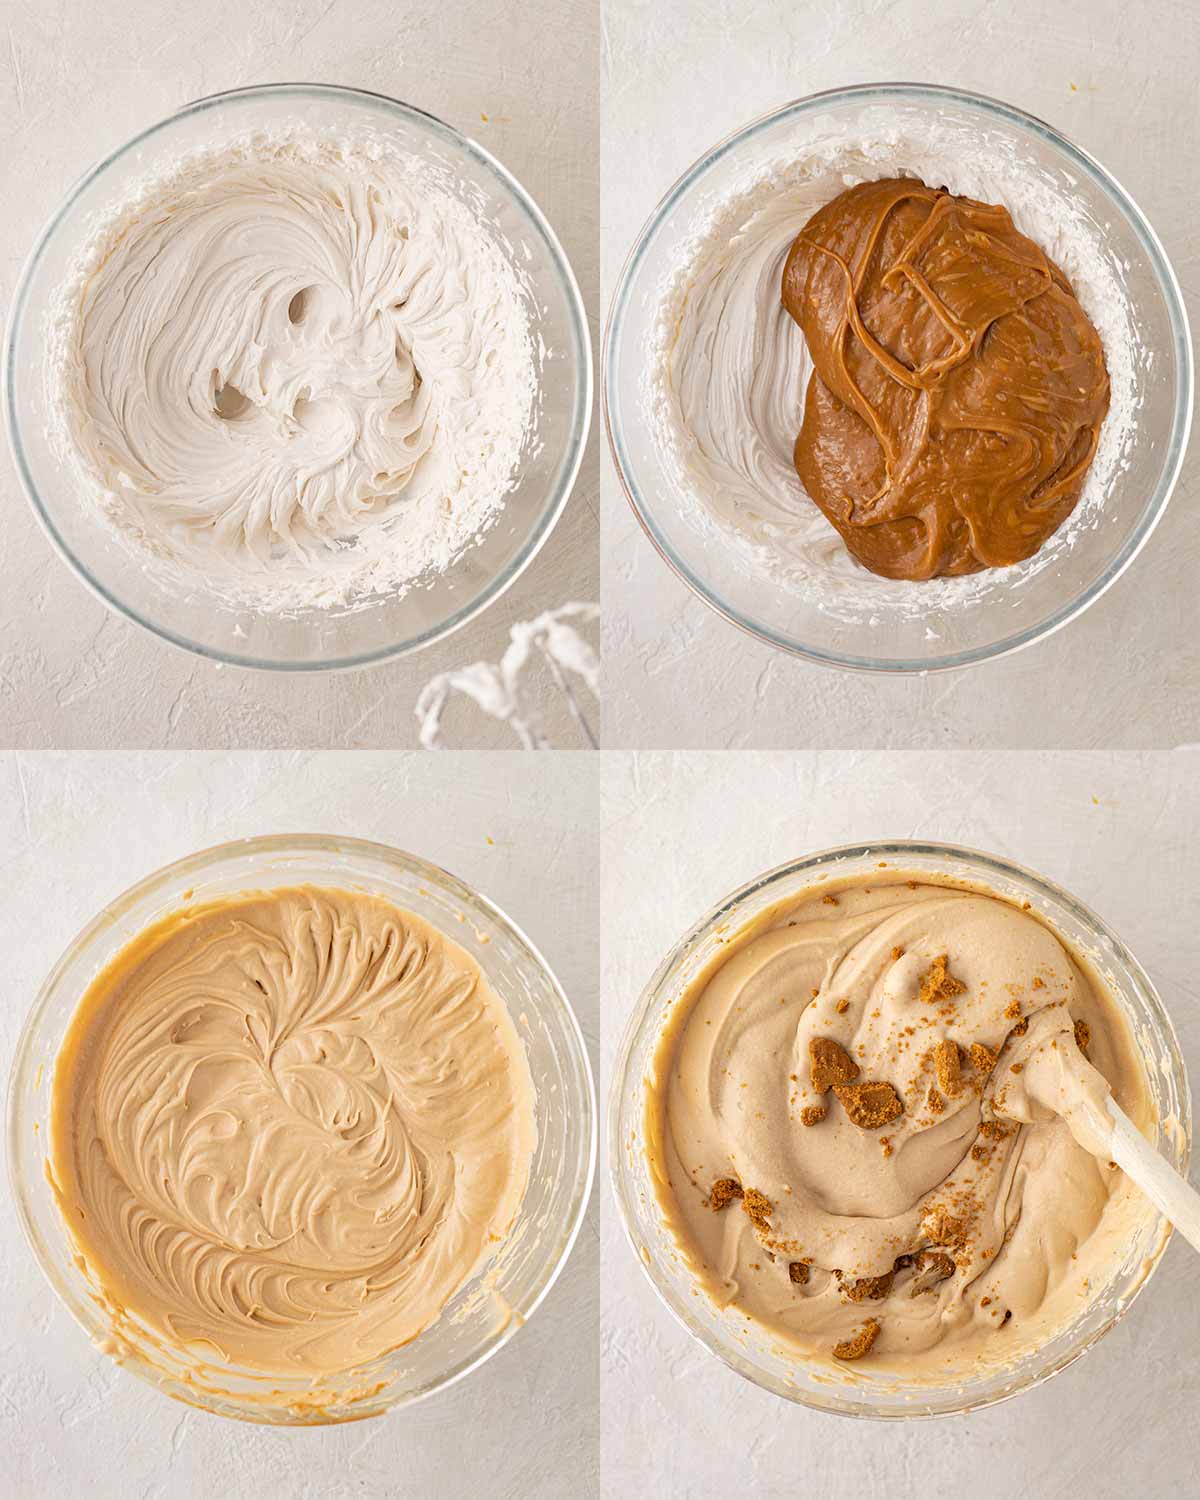
Next, add the whipping cream to a large bowl and whip using an electric beater or mixer. You can also whip it up by hand, but it will be very tedious. The cream is ready when it reaches soft peaks. If your cream is runnier, your ice cream will still work, but it will be a little denser.
Then add your Biscoff mixture and whisk the mixture together. The mixture may deflate a little which is fine. Eventually, you’ll have a delicious Biscoff mixture with the texture of mousse.
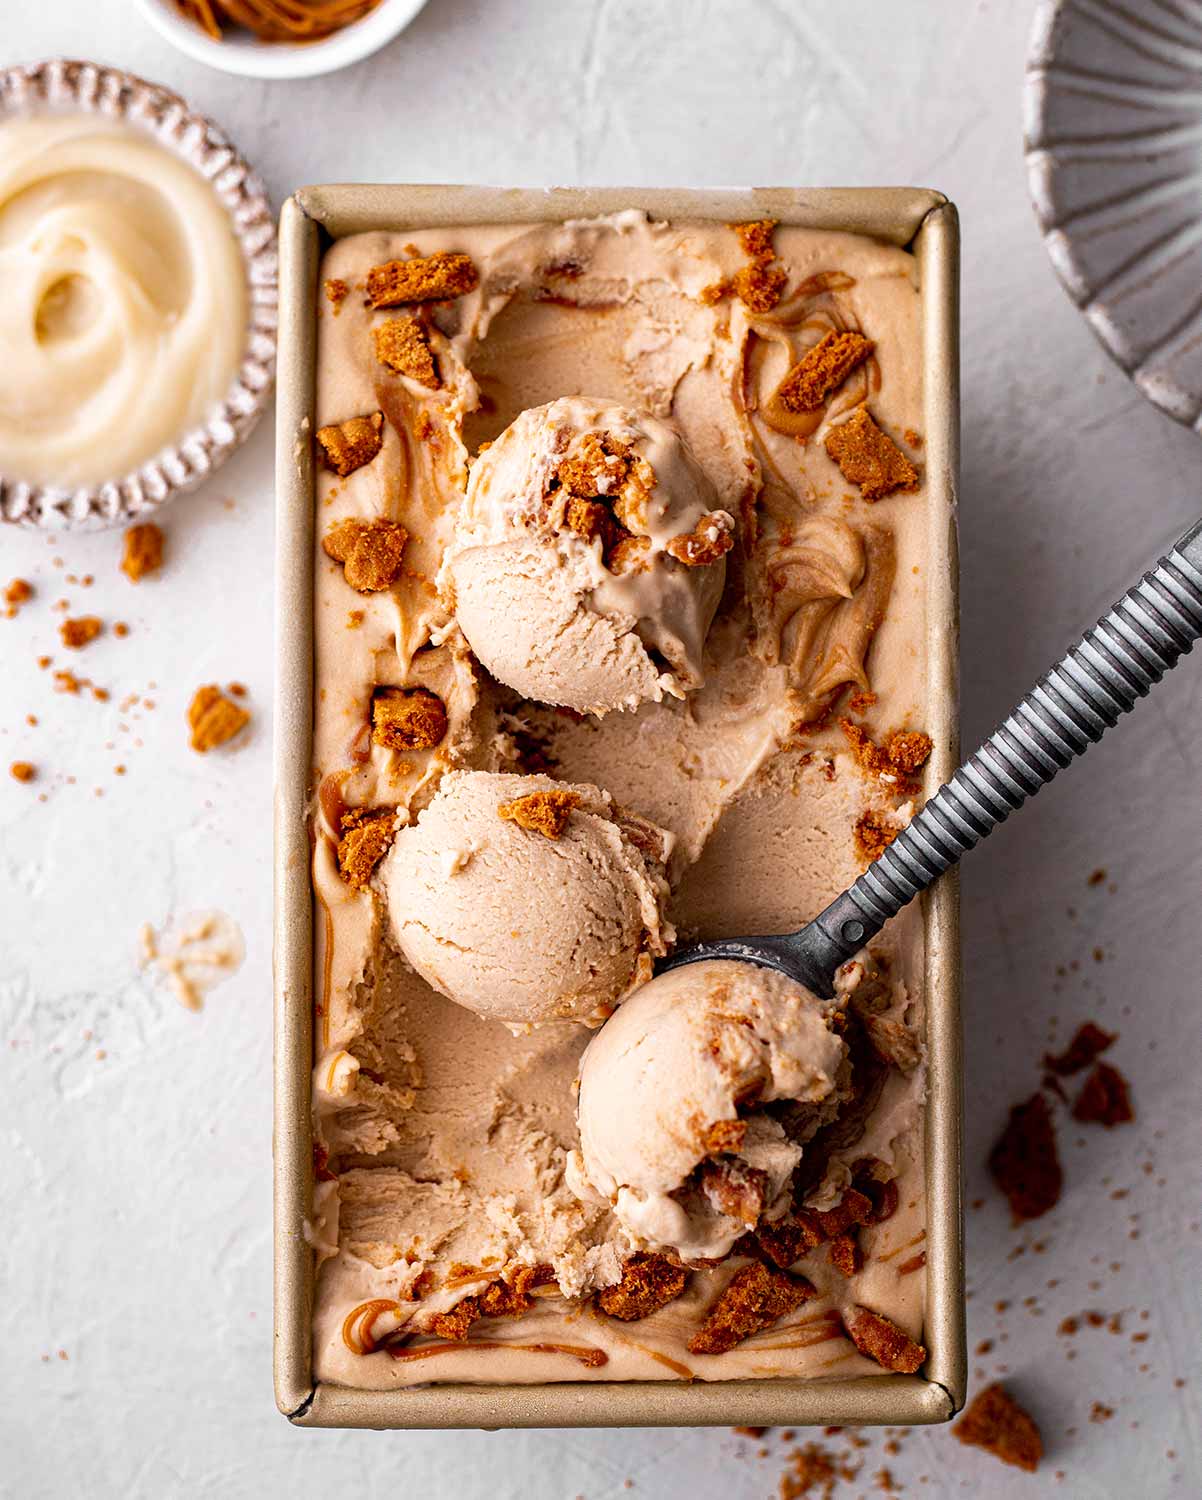
If you’d like to add any biscoff cookies or chocolate chips, I’d recommend folding them into the ice cream mixture at this stage.
Freezing the ice cream
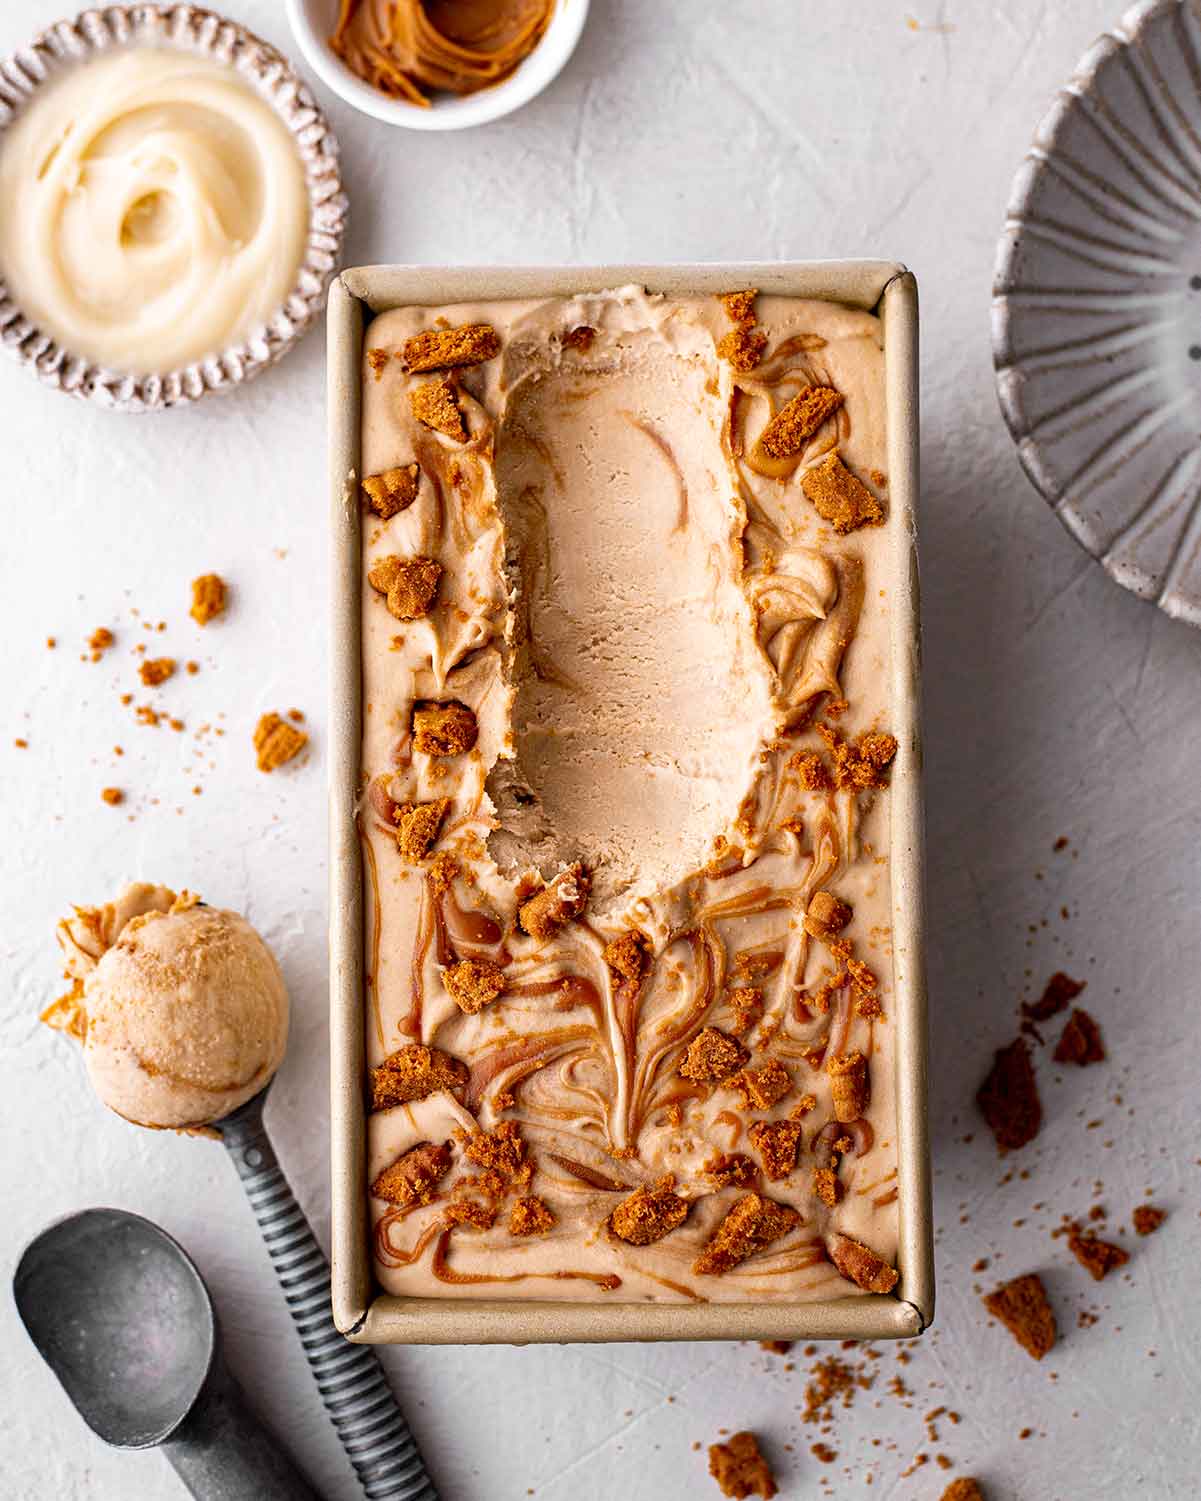
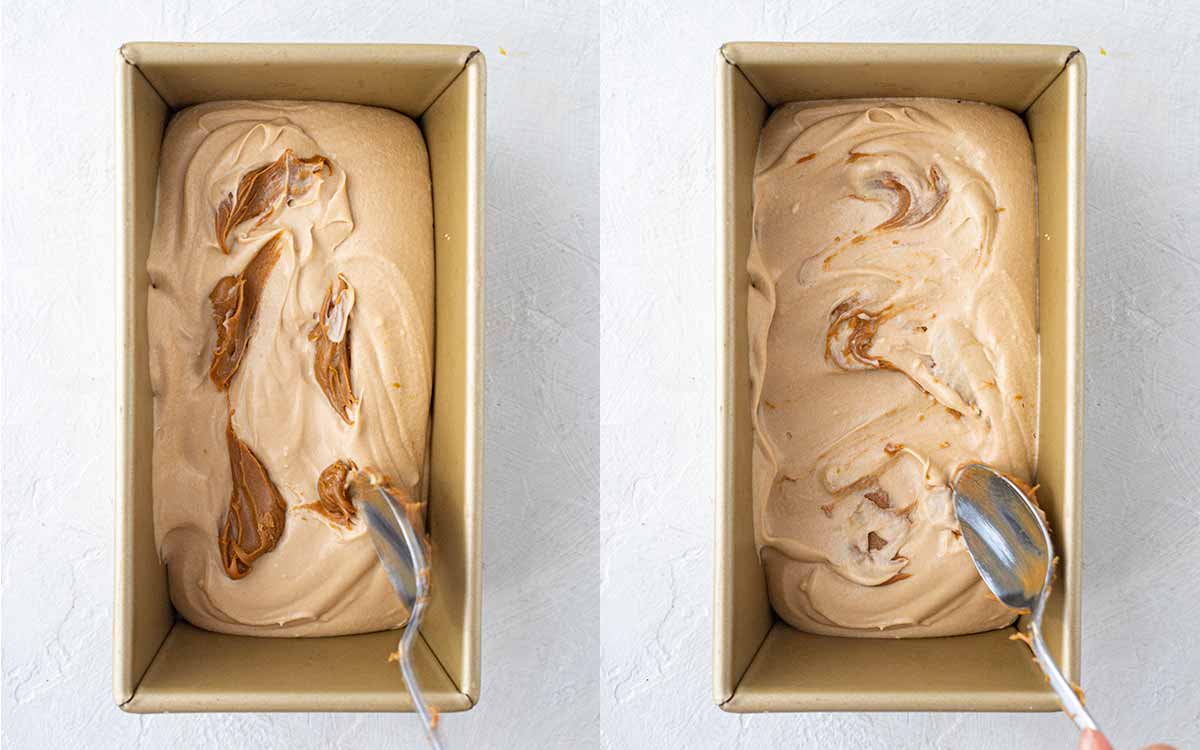
Finally, pour the Biscoff ice cream into a freezer-safe container and freeze.
If you’d like extra Biscoff flavor and texture, you can add half of the ice cream to your container then swirl through some Biscoff spread and/or cookies. Add the remaining ice cream and repeat with additional spread/cookies.
Serving the ice cream
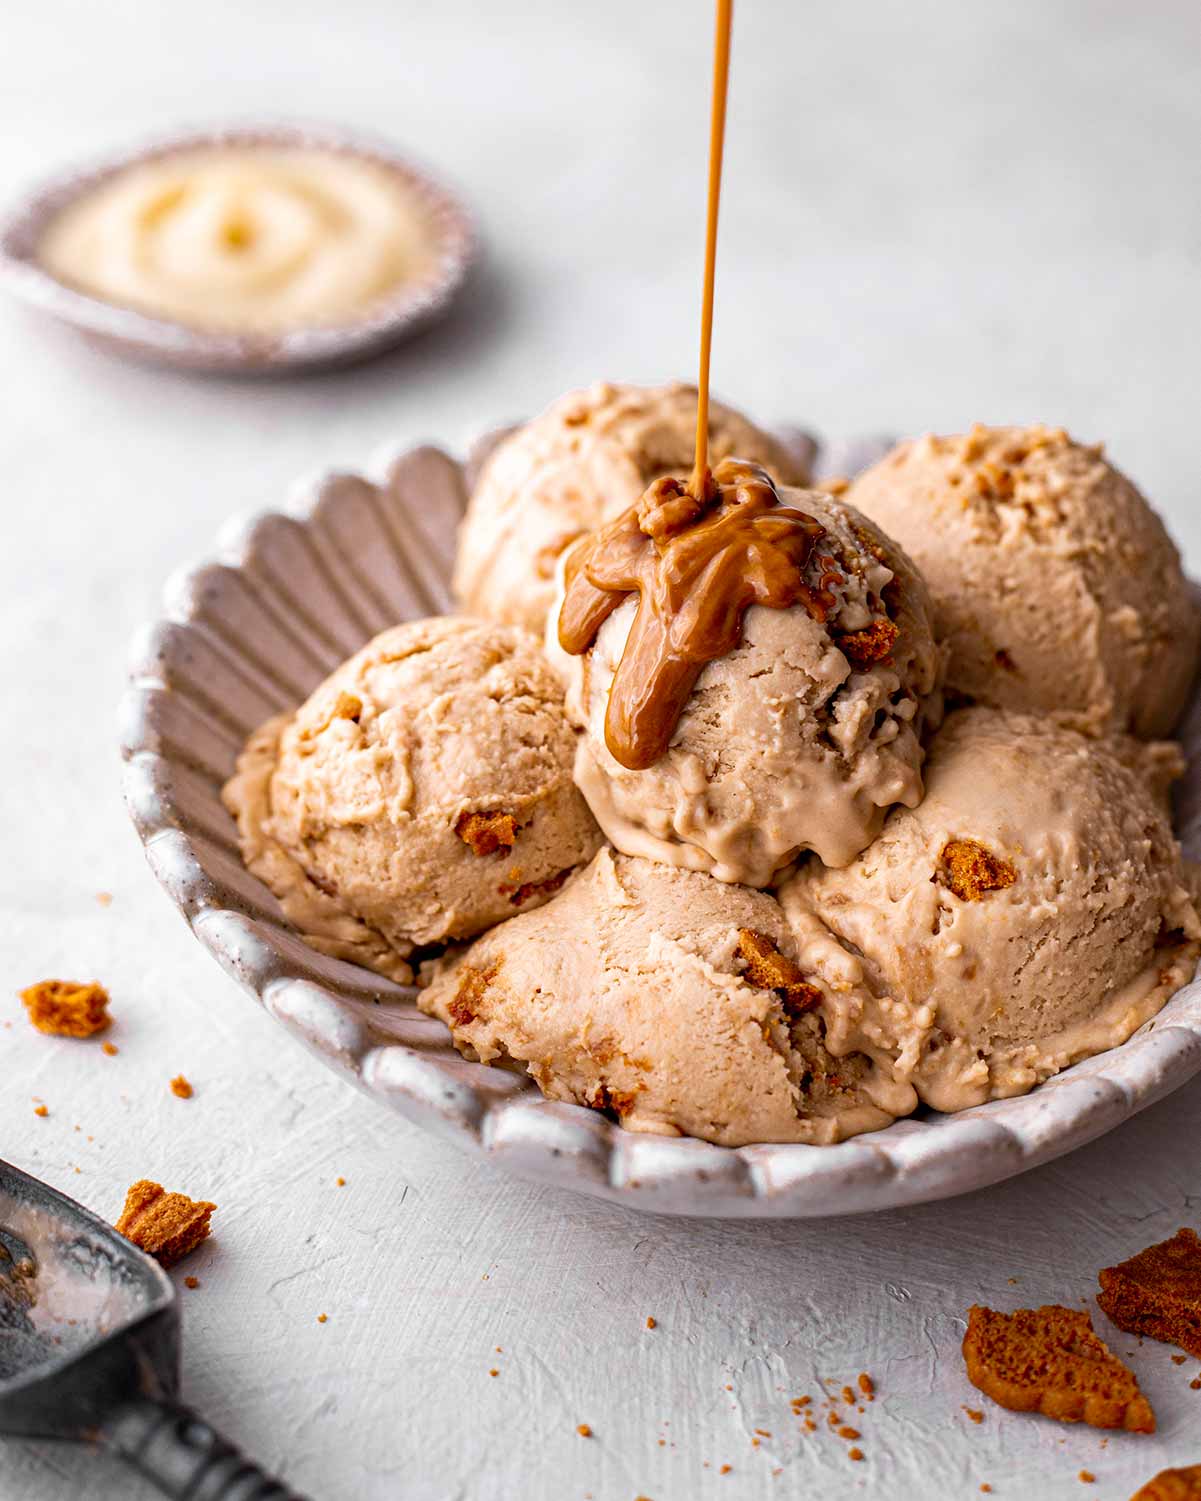
This no-churn ice cream is quite decadent and wonderful by itself in a bowl or in a cone. However, you can use it in ice cream sandwiches, or as a side to your favorite dessert!
Customizing this recipe
Yes, for extra depth of flavor, you can mix in some vanilla extract or salt! I love serving the ice cream with extra Biscoff cookies, as it reminds me of cookies and cream ice cream.
For an extra indulgent dessert, you can add chocolate chips!
If you’d like to make vegan vanilla ice cream, omit the Biscoff and reduce the whipping cream to 1 1/2 cans (600g).
Check out my no-bake vegan Biscoff cheesecake!
More vegan ice cream recipes


Follow Rainbow Nourishments on Instagram, Facebook, TikTok and Pinterest, and subscribe via email to receive all of our latest recipes!

Vegan Biscoff Ice Cream (no-churn)
Ingredients
- 1 ½ cups (300g) Biscoff spread
- 1 x can (320g) dairy-free sweetened condensed milk
- 2 x cans (800g) dairy free whipping cream, chilled overnight (note 1)
Optional add-ins
- 1 teaspoon vanilla extract
- ¼ teaspoon salt
- 8 x Biscoff cookies
Instructions
- Combine 1 cup (200g) of Biscoff spread and all of the sweetened condensed milk in a bowl until combined. If you're using vanilla and salt, mix them in as well. Set aside.
- Add the chilled whipping cream to a bowl and whip until soft to firm peaks form. Add the biscoff mixture to the bowl and whip until combined.
- Pour all the Biscoff ice cream mixture into a freezer-safe tin or container and smooth the top. For added texture/flavor, pour half of the mixture into a container, swirl through some of the remaining Biscoff spread and cookies, and then repeat with the remaining ice cream mixture and spread/cookies.
- Cover the ice cream and freeze for 4 hours or until firm. Serve and enjoy!
- The ice cream can be stored in the freezer for up to 2 weeks but it usually doesn't last that long!
Notes
- This recipe works well with a runny dairy-free whipping cream (such as Flora, Elmea, Country Crock etc) or coconut/oat canned whipping cream.
This post may contain affiliate links. As an Amazon Associate, I may earn a small commission from qualifying purchases at no additional cost to you.

Scrumptious. I made it with all the extras, biscoff swirl, biscoff crumbs,vanilla and salt. It’s just delicious 😋. Simple and fun to make. Thank you very much for the recipe 🌻
Oh I’m getting hungry just thinking about this! Thanks so much Mike 🙂
I love biscoff spread so It was pretty much guaranteed that I would love this Ice Cream. I just tasted it after it’s been freezing overnight. YES it’s awesome ! The recipe was easy to follow and licking the spoons and beaters was sooo good. I didn’t have the Nature’s Charm Brands Coconut Whipping Cream and condensed milk. I used a mix of Honest to Goodness and Tender Table brands. I had everything very cold, bowls in the freezer milks in fridge etc. I didn’t quite get to stiff peaks, not sure if that is because it’s coconut milk instead of dairy ? I was not very patient to mix for a long time and was worried it would collapse if it got too warm. I have no experience with coconut whipping cream so would very much appreciate some feedback on this. Anyway, thankyou so much for the recipe and keep up the good work. Kind regards Mike.v
Hi Mike! I’m so thrilled that you loved this ice cream and I totally commend the licking of beaters haha :). With the whipping, it honestly can depend on the brand or individual cans of cream (I’ve used those brands before and they are great, so I’d say it was probably just the cans). The Flora brand works well too – even though the refrigerated cream is really runny, it whips up well. Nevertheless, I’m so glad that you enjoyed the ice cream, and thanks a million for your feedback!!
This vegan ice cream sounds so amazing and is especially important for me to make since my grandson is allergic to milk products and egg. But unfortunately we do not have vegan condensed milk where I live. We have almond, soya, oatmeal milk substitutes. How can I make vegan condensed milk on my own?
Thank you for any help.
Sara
Hi Sara, it’s definitely possible to make your own vegan condensed milk! It normally just requires cooking some milk and sweetener on the stovetop for a while, or until it reaches a thick consistency. I don’t have any recipes on my website but you’ll be able to find some on the internet. I hope that helps!
Hi, this looks delicious but I will have to think about a substitution for the Biscoff spread as it contains wheat flour.
Cheers
If you’re based in Australia, Pana Chocolate’s Cashew Caramel Spread is very very similar!