Vegan Chocolate Mousse Tart
Vegan chocolate mousse tart made with less than 10 ingredients! The no-bake tart features a silky smooth tofu chocolate mousse, customizable crust and tangy layer of raspberry jam.
The tart is also gluten-free, has no refined sugar, no coconut and no cashews! It tastes like a classic French silk pie!

Why you’ll LOVE this tart
This vegan chocolate tart was the MOST POPULAR item when I held market stalls for my cake business. Customers frequently asked for the recipe and vegans and non-vegans alike would come back for seconds. It was so popular that I published the original recipe in my cookbook!
I simplified the vegan chocolate tart to make it easier for you to make at home. The mousse filling is soft but sturdy enough to be kept at room temperature for a few hours. And I’ve included a few ways to customize the tart to your tastes.
The tart is easier to make than a traditional chocolate pie. There’s no pastry, no rolling pins and no baking.
Ingredients you’ll need
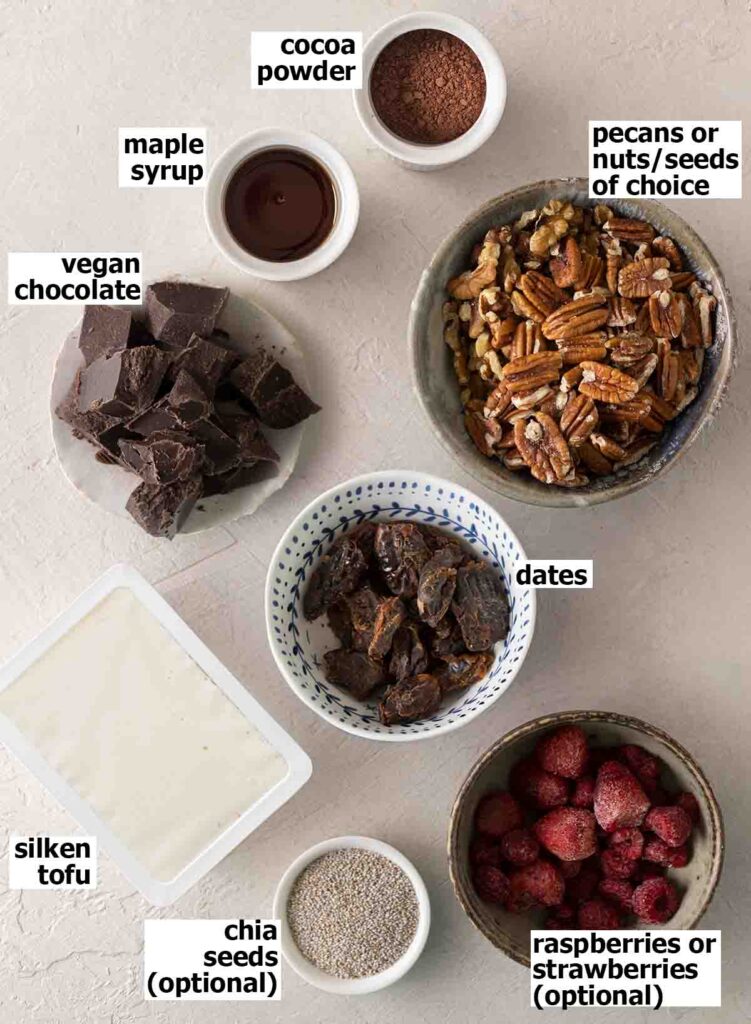
The full list of ingredient quantities and instructions are in the recipe card at the bottom of this post.
Notes about the ingredients
Soft silken tofu is the MAGICAL ingredient of this vegan chocolate tart. When you blend silken tofu with chocolate and flavorings, it turns into the silkiest and creamiest chocolate mousse ever. You won’t taste the soy at all! Even my tofu-hating partner loves this tofu chocolate mousse!
Vegan chocolate (preferably dark chocolate) helps the tart filling set. Using a little extra chocolate means that we don’t need coconut oil, agar or cashews. I’d recommend using a brand of chocolate that you enjoy eating by itself because it’s the main flavor of the mousse. Dairy-free milk chocolate will also work but may result in a softer filling as it contains less cocoa solids.
Pecans (or any nut/seed) which are combined with dates to make the brownie-like crust. Alternatively, you can make a chocolate cookie base which I’ll talk about at the end of this post.
Raspberries and chia seeds to make a tangy jam layer. Alternatively, you can use store-bought jam, make a quick 3-ingredient homemade jam-free or just skip the jam! More on that later.
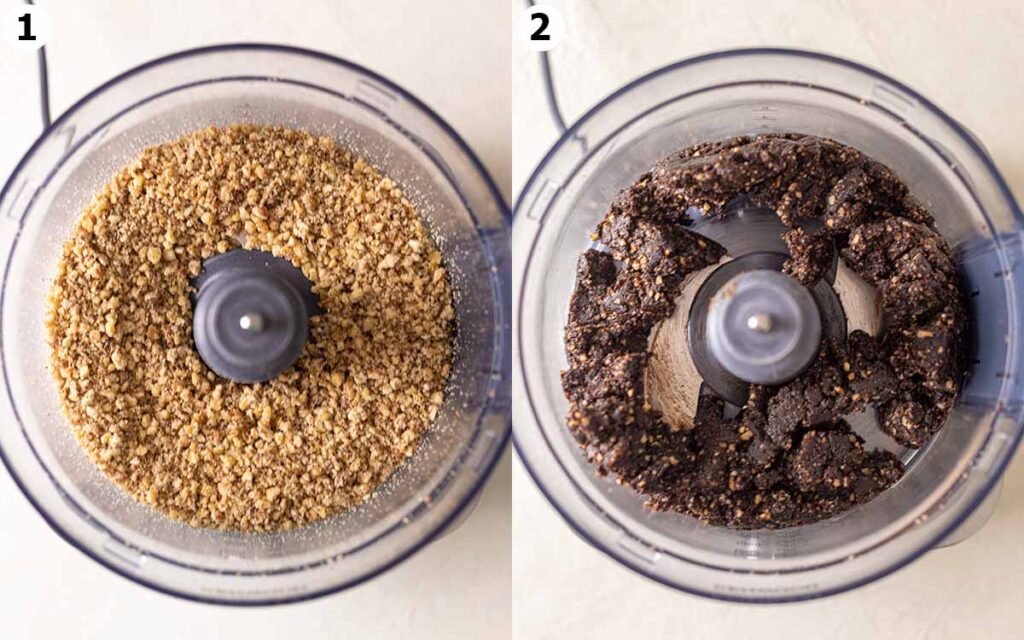
No-bake brownie base + tips
The chocolate base tastes soo good that you can eat it by itself, in the form of no-bake brownies!
First, the dried dates need to be soaked in water for a few hours! If you forgot to do this, simply cover your dried dates with boiling water for 5 minutes or until they are soft. Or you can just use Medjool dates!
Pulse all the nuts (or seeds) in a food processor until they form coarse crumbs. Drain the dates and add them to the food processor with the cocoa powder. Process until the mixture comes together and can be pinched between two fingers without breaking.
If the mixture is too dry, add a dash of water. If the mixture is too wet, add some extra nuts, seeds or even almond flour.
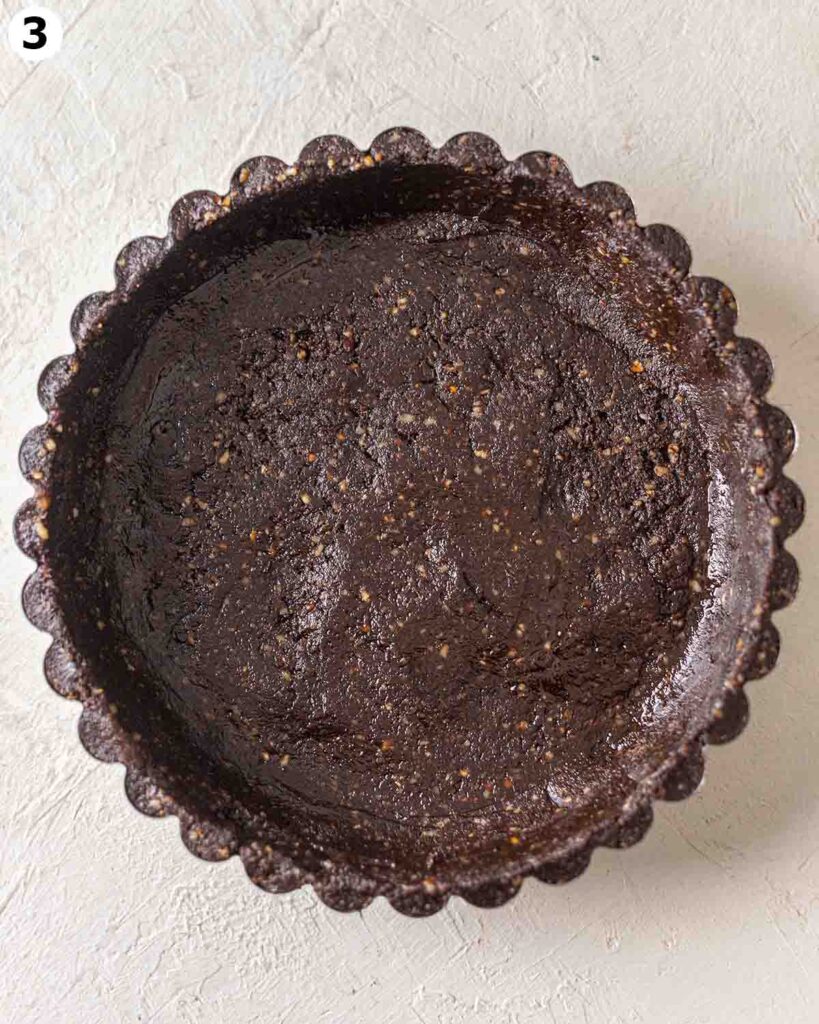
Firmly press the mixture into your tart pan or pie dish.
If your tart pan isn’t non-stick, I highly recommend lining the bottom with parchment paper or greasing the bottom and sides. The no-bake crust can be a little sticky so lining the pan makes it easier to remove your vegan chocolate pie! Or use a pie dish and call it a day.
Raspberry jam layer
Although it’s optional, the raspberry jam takes this vegan chocolate tart to the next level. Its tangy flavor cuts through the richness of the mousse filling!
Simply add all the ingredients to a large bowl, mash with a fork and stir until combined. Set aside to thicken.
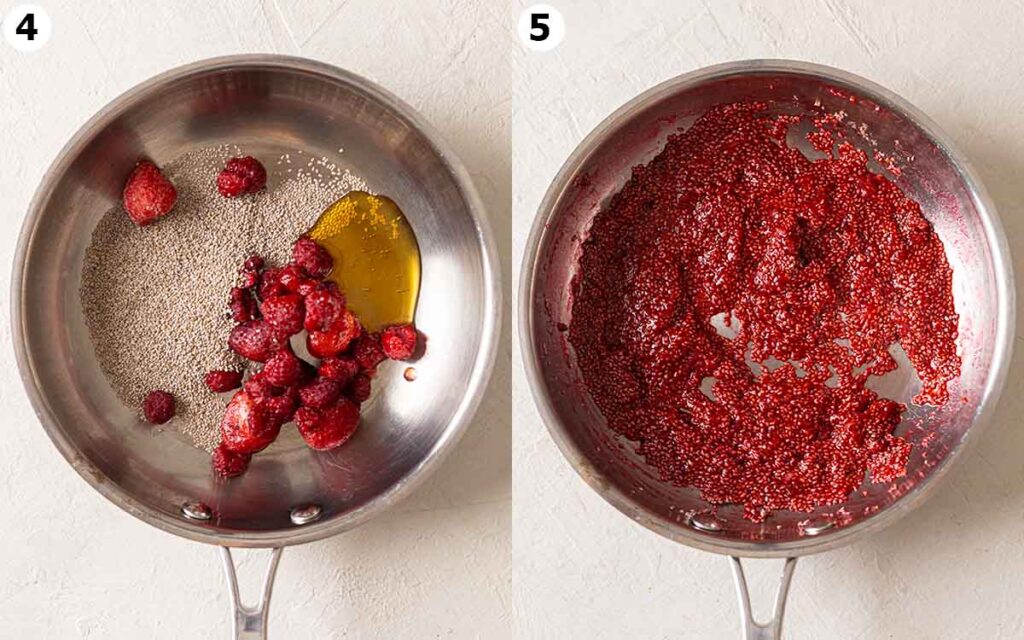
When the jam has thickened to a spreadable consistency, generously spread it on the bottom and sides of your tart or pie crust!

Tofu chocolate mousse filling
My most important tip is to make sure the tofu isn’t too cold! Remove it from the fridge for at least 30 minutes before using it. When chilled tofu is combined with chocolate, the difference in temperature may cause some of the chocolate to set which can result in a grainy mousse.
To make the mousse, simply add all ingredients to your processor or blender and blend until the mixture is as smooth as possible. If you only have a stick blender, you can blend the ingredients in a large bowl!
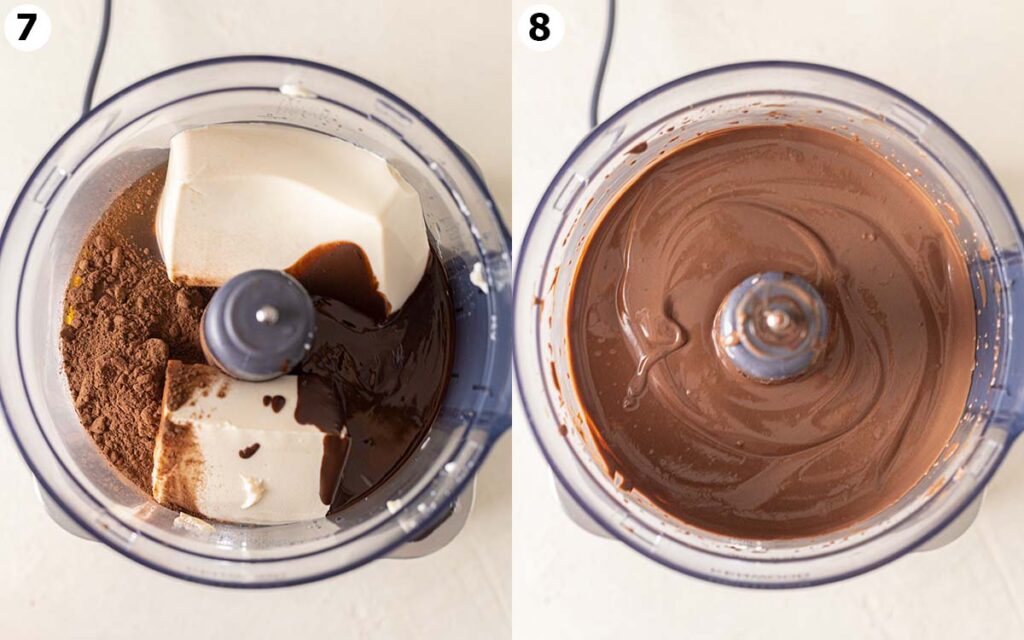
The vegan chocolate mousse should be very smooth, creamy and may have some air bubbles. The thickness or consistency of your mousse will depend on the temperature of your ingredients and home! Don’t worry if your mousse is thinner or thicker than pictured.
If you’d like to add extra flavor to your filling, you can also add:
- A few tablespoons of peanut butter or almond butter
- Dash of espresso powder
- Flaked sea salt
- More cocoa powder or maple syrup
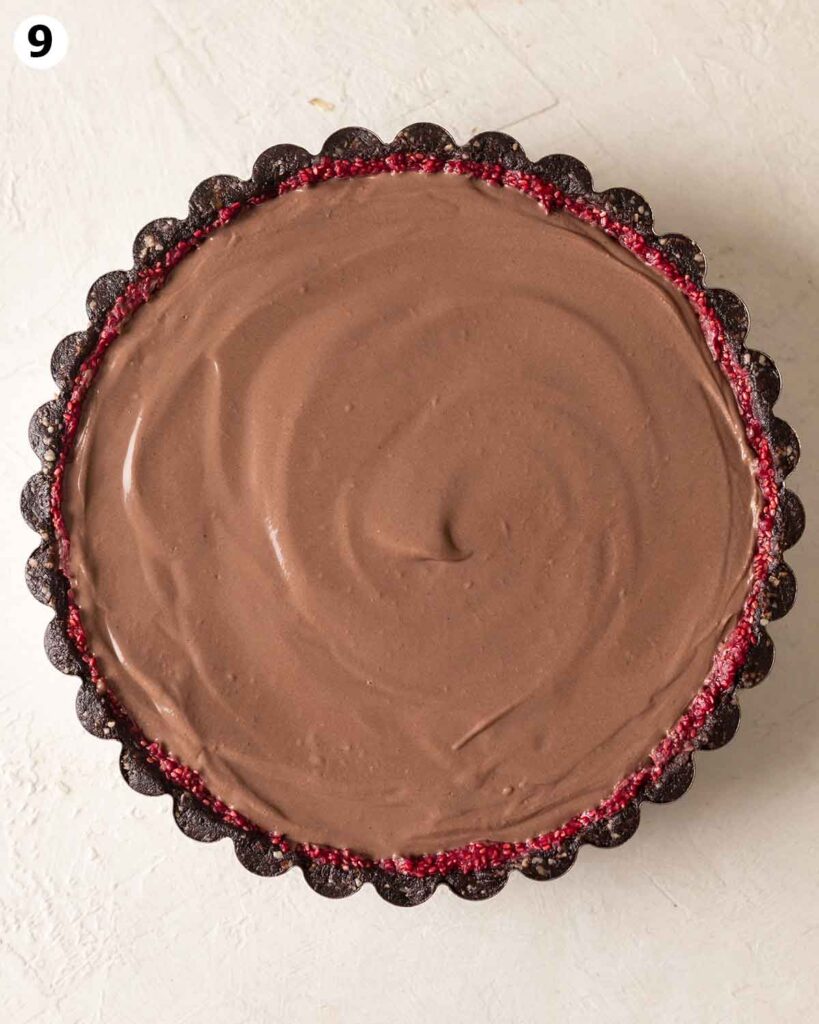
Pour the chocolate mousse onto your tart/pie and smooth the surface with a spoon. Store it in an airtight container in the fridge for at least 4 hours or until set (overnight if you want to be extra safe).
Customizing the vegan chocolate pie
Yes! I’d recommend making the crust from my vegan peanut butter pie. For stability, I’d suggest baking the crust!
For a QUICK 3-ingredient homemade jam, I’d recommend making the raspberry jam in my vegan peanut butter pie.
You may use store-bought raspberry or strawberry jam. However, store-bought jam isn’t as thick and vibrant as homemade jam. You can use store-bought jam as is or reduce it on the stovetop until it’s thickened.
Tofu can’t be easily substituted. If you’re concerned about flavor, the soy flavor is not noticeable with the right ingredients.
My partner doesn’t like tofu but this tart is his favorite dessert from my blog! And when I had a cake business, body-building omnivores wouldn’t believe me when I said that tofu is in this tart!
The chocolate can be combined with coconut cream and milk to make a chocolate ganache filling. However, I haven’t tested quantities so can’t vouch for results. Alternatively, check out my chocolate avocado mousse tart.

Expert tips
This happens if your mousse ingredients are too cold or very different in temperature.
If you have a high-powered blender, simply continue blending the mousse. The friction from the blades will eventually warm up the mousse and will melt any bits of chocolate.
Alternatively, you can pour the mousse into a large pot over low heat until the mixture melts and emulsifies. Your mousse will turn a darker color but it’ll still be delicious!
Yes, this tart freezes well, thanks to the high amount of chocolate in the filling! I’d recommend freezing it without any berries on top.
When eaten straight from the freezer, the tart has a thick and fudgy texture and is the perfect Summer dessert! Alternatively, you can defrost it in the fridge and enjoy it later.

More vegan chocolate recipes


Follow Rainbow Nourishments on Instagram, Facebook, TikTok and Pinterest, and subscribe via email to receive all of our latest recipes!

Vegan Chocolate Mousse Tart
Ingredients
No-bake chocolate brownie base (note 1 for alternative)
- 2 ¼ cups (225g) pecans, walnuts, or any nut/seed
- 1 ½ cups (120g) pitted dried dates, soaked in water for at least 2 hours (note 2 for quick version)
- 2 tablespoons (15g) cocoa or raw cacao powder, or to taste
- Pinch of salt
Raspberry chia jam (optional, note 3 for alternatives)
- 1 cup (125g) fresh or frozen raspberries, or strawberries (defrosted if needed)
- 2 tablespoons chia seeds
- 1-2 tablespoons sweetener or sugar, of choice and to taste
Chocolate tofu mousse filling
- 255g dark semi-sweetened vegan chocolate, roughly chopped, or chocolate chips
- 21 ounces (600g) silken tofu
- ¼ cup (85g) maple syrup, or granulated sugar of choice, to taste
- 2 tablespoons (15g) cocoa or raw cacao powder, or to taste
- 1 teaspoon vanilla extract or vanilla bean powder, optional
- ⅛ teaspoon salt, optional
To decorate (optional)
- 1 cup (150g) fresh berries
Instructions
- Line or grease a deep 8-inch tart pan with a removable bottom, a regular 9-inch tart pan or 9-inch pie dish.
Chocolate brownie base:
- Add the pecans (or nut/seed of choice) to a food processor. Process until it forms coarse crumbs.
- Drain the dates. Add the dates and remaining base ingredients to the food processor and process. The mixture is ready when it can be pinched between two fingers without breaking and there are no more chunks of dates.
- Press the mixture into your tart pan or pie dish.
Raspberry chia jam:
- Add all ingredients to a small bowl. Mash the mixture with a fork until the raspberries. If your raspberries aren't defrosted, add all ingredients to a small saucepan over low heat. Mix until combined then set aside to thicken.
- Spread the chia jam along the bottom and sides of the crust.
Chocolate tofu mousse filling:
- Melt the chocolate in a double boiler. Allow the chocolate to cool slightly (or come to room temperature).
- Add the melted chocolate and rest of the filling ingredients to a food processor. Process the mixture until it forms a very smooth mousse (note 4).
- Pour the chocolate mousse into your tart/pie. Use a spoon to smooth the surface.
- Place the tart/pie in an airtight container and chill in the fridge for at least 4 hours or until set.
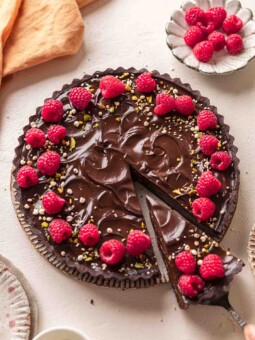
To serve:
- Decorate the vegan chocolate tart with berries or as desired. Serve!
- Store leftovers in an airtight container in the fridge for up to 3 days. The tart (without the berries) can be frozen for up to 1 month.
Video
Notes
- Alternatively, I’d recommend making the chocolate cookie base from my peanut butter mousse pie recipe.
- To soften your dates quickly, place them in a heat-safe bowl and cover them with boiling water for 5 minutes. Drain the dates and use them in the recipe. Alternatively, you can use around 10 medjool dates.
- Instead, you can make the quick raspberry jam from my peanut butter mousse pie recipe. Store-bought jam will also work but it won’t be as vibrant and thick as the original recipe, unless you reduce it on the stovetop.
- Taste test the mousse at this stage. If you’d like it to be sweeter or richer, add more maple syrup, cocoa powder, vanilla or salt to taste. I find that the flavor intensifies after it’s chilled. As mentioned in the blog post, you may also add some espresso powder, almond butter or peanut butter, to taste.
This recipe was originally published in 2018 and was updated in 2022 for ease and simplicity.
This post may contain affiliate links. As an Amazon Associate, I may earn a small commission from qualifying purchases at no additional cost to you.

Super easy to make and delicious
Hi Sara, I’m so glad you enjoyed this tart!