A super easy and healthy pear tart with layers of flaky filo pastry, pear jam and caramelised pears!
This pear tart is one of my favourite recipes on my blog from this year! It is:
- super easy to make and child-friendly
- a dessert you can make with no special equipment
- crispy and perfect with ice cream!
What are the layers in this filo pear tart?
To help you understand how this tart should be assembled, this tart has:
- Four layers of filo pastry
- A layer of pear jam sprinkled with almond meal
- Another four layers of filo pastry
- Another layer of pear jam sprinkled with almond meal
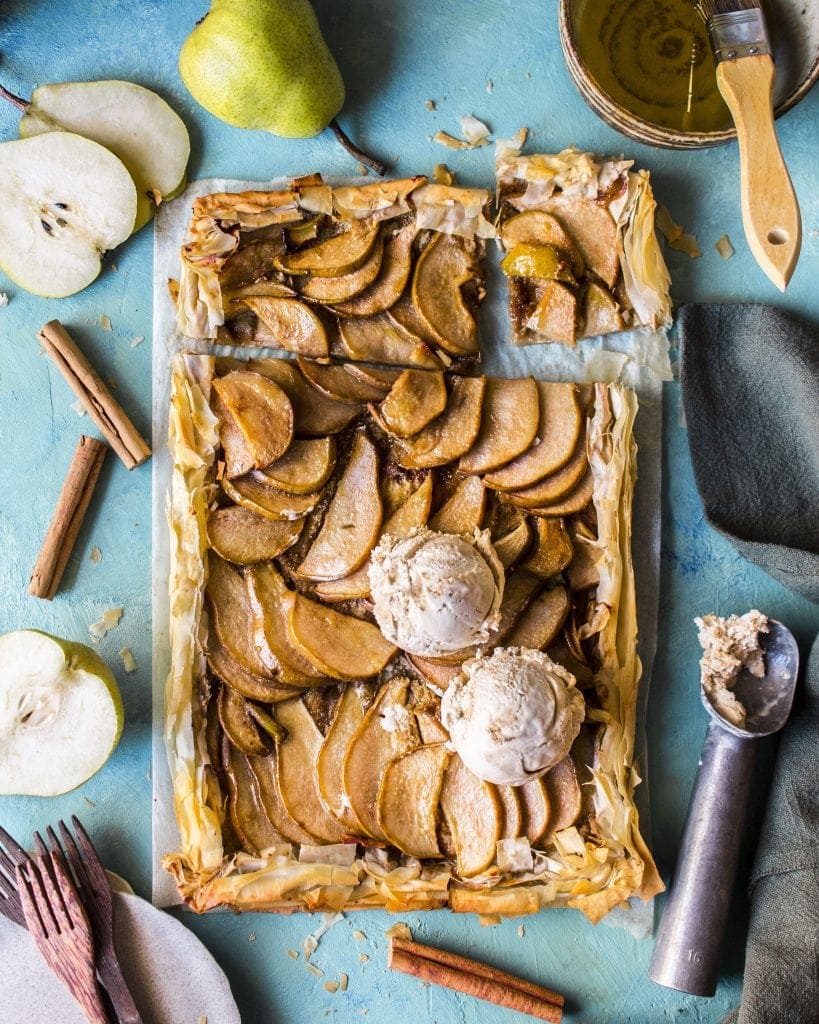
- Slices of pear
The pear jam throughout the tart makes sure that you get some of that delicious spiced fruitiness on every bite. And the almond meal adds texture and substance!
Oh but filo pastry is scary!
Please don't feel intimidated by the filo pastry! My filo pastry always BREAKS a lot but you can patch it up (or cover it) with LAYERS.
So if a few pastry layers have completely broken, all you have to do is:
- Rearrange the pieces of filo pastry back into a rectangular shape
- Brush oil on top of the pieces
- Cover it with more filo!
- Pretend nothing has happened ;).
When all the pastry is together in the tart, those random pieces of filo will stick together and you won't be able to tell what is what!
But how do you make a vegan filo tart?
Easy! Instead of dairy butter, use vegan oil or butter :).
Filo pastry is normally made with just flour, water and maybe vinegar so it's naturally vegan. I use this local brand of filo pastry.
Does all of this sound good? Let's get baking!
See my vegan apple dessert recipes:

No Fuss Filo and Pear Tart
Ingredients
Pear Jam Filling*
- 1 (~180g) medium-size pear, cored and roughly chopped
- 2 tbsp ground cinnamon
- 2 tbsp coconut sugar, or other sweetener, to taste
- 1 tbsp cornstarch / corn flour
- 1 tsp vanilla extract
- Pinch of salt
- ½ cup (50g) almond flour / blanched almond meal
Pastry
- 8 sheets of filo pastry, defrosted or chilled according to packet instructions
- ¼ cup (60g) extra virgin olive oil
Topping
- 3 (~540g) medium-size pears, cored and thinly sliced
- Drizzle of any liquid sweetener, such as maple syrup or coconut nectar, optional
Instructions
- To make the pear jam filling: Add the chopped pear and a dash of water to a small saucepan over medium heat. Cover the saucepan with a lid and allow the pear to cook for 10 minutes. When the pear has softened (you should be able to insert a knife into the pear without much resistance), add the remaining ingredients except the almond meal. Use a stick blender to puree the ingredients. Continue to cook for 5 minutes or until the jam has thickened. Set aside to cool.
- Preheat the oven to 180°C (350°F). Line a baking tray with baking paper.
- To prepare the pastry: Place one sheet of filo pastry on the lined baking tray. Brush the top of the pastry with oil and place another pastry on top. Repeat until you have 4 sheets of pastry. Spread half of the pear jam on the pastry, leaving a 2cm (1-inch) space from the sides. Sprinkle half of the almond meal on top. Continue to layer and oil the remaining 4 sheets of pastry.
- To fill the tart: Spread the remaining the pear jam on the pastry, leaving a 2cm (1-inch) space from the sides. Sprinkle the remaining almond meal on top. Arrange the pear slices on the filling as desired.
- Final touches: Roughly fold the edges of the pastry to enclose the pear filling. If desired, drizzle the pears with maple syrup or any liquid sweetener.
- Bake the tart in the oven for 20-25 minutes or until all of the pears are cooked through.
- Enjoy the tart immediately. Alternatively, store it in an airtight container in the fridge for up to 5 days. To crisp up the pastry, reheat the tart in the oven 160°C (320°F) for 10 minutes
Notes
Nutrition
This post may contain affiliate links. As an Amazon Associate, I may earn a small commission from qualifying purchases at no additional cost to you.
Leave a Comment and Rating!