

Vegan Gingerbread Cake
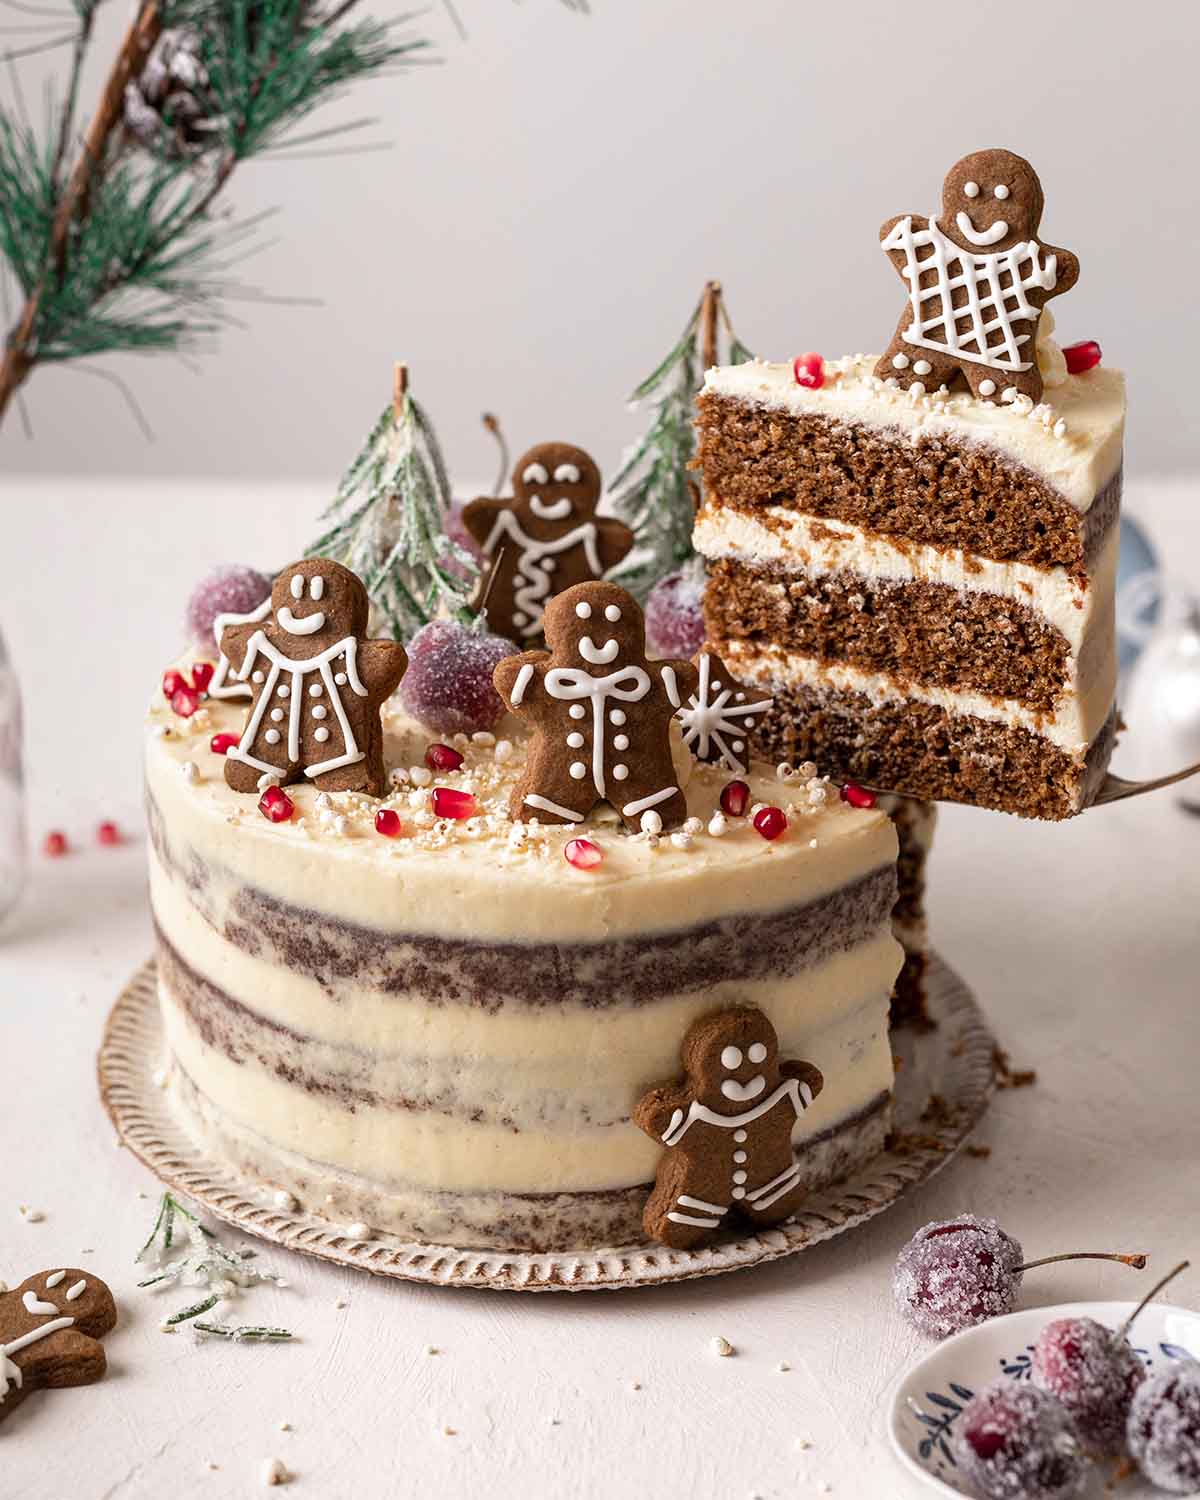
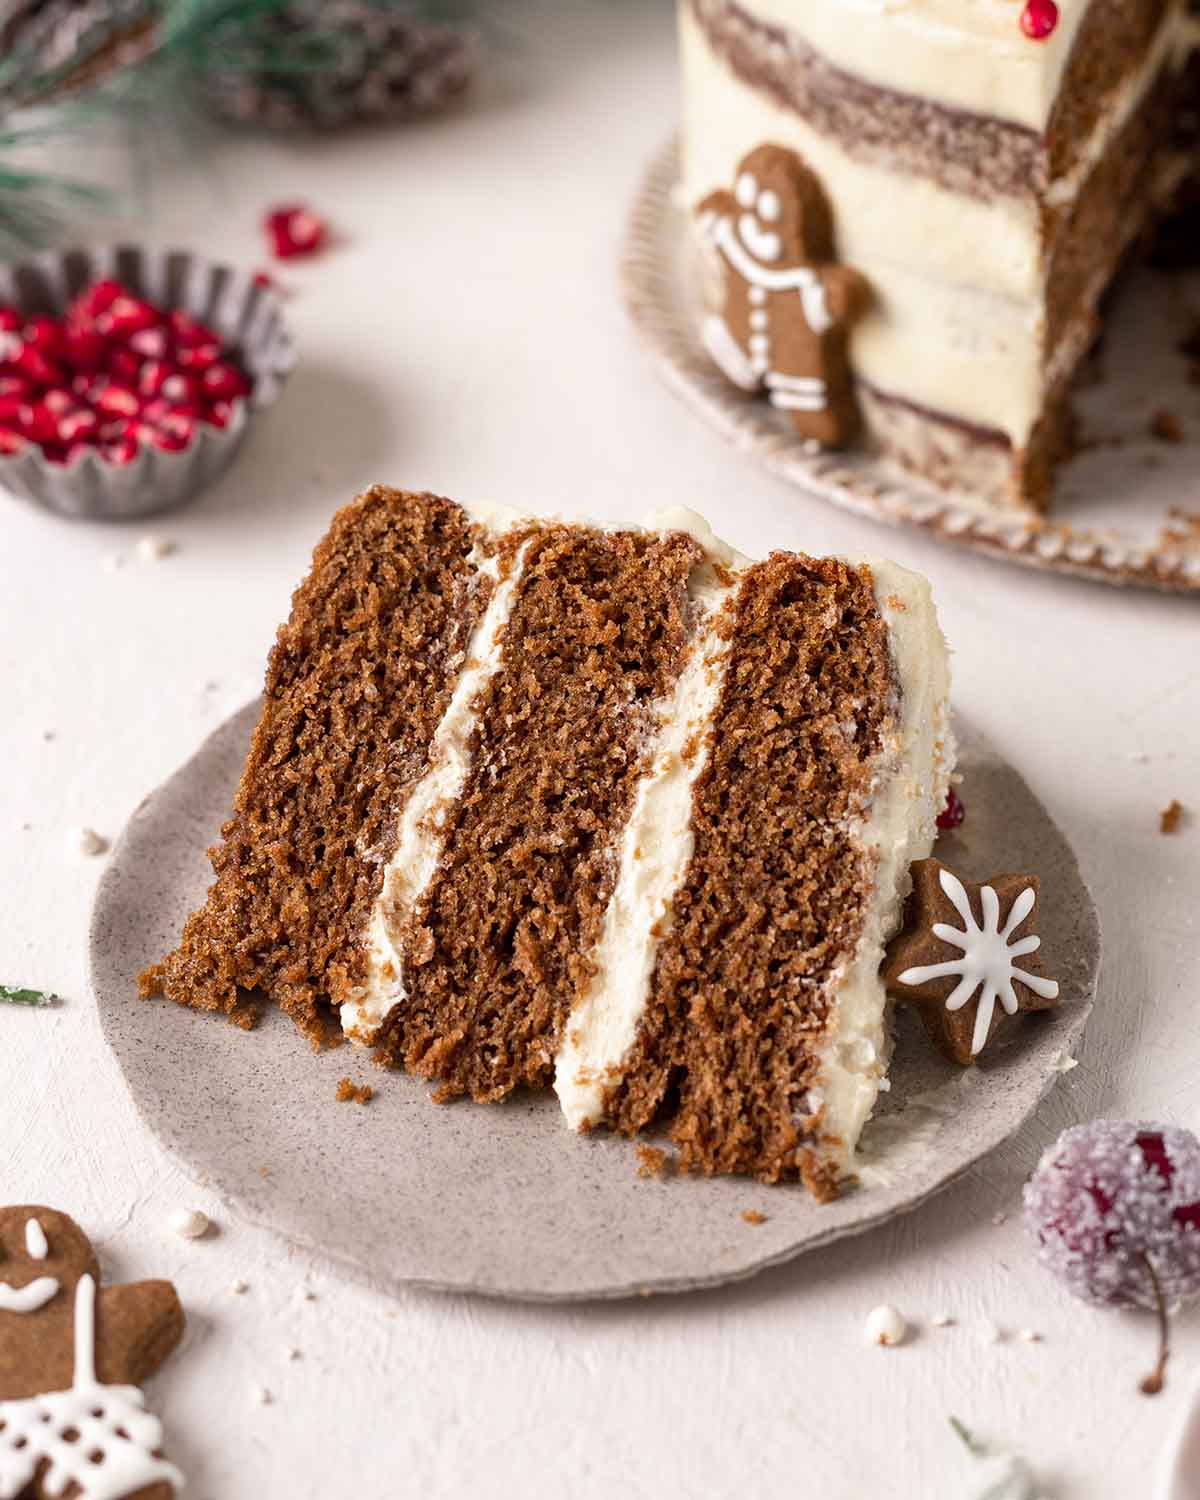
This vegan gingerbread cake is wonderfully fluffy and moist with lots of warm spices and cozy notes of molasses. It is easy to prepare and is the perfect dessert for any Christmas table this holiday season!
Why you’ll love this cake
PERFECTLY BALANCED FLAVORS: I’ve tested this recipe many times to ensure it’s well-spiced, with warm undertones of molasses and caramel. It’s basically gingerbread cookies in cake form! If you’re not a fan of molasses, I’ve also included an option for you.
EASY TO PREPARE. Like many of my cakes, the batter for this cake comes together in one bowl! And it’s decorated with a really simple American-style buttercream. The frosted cake keeps very well in the fridge, which means you can make it ahead of any festive event.
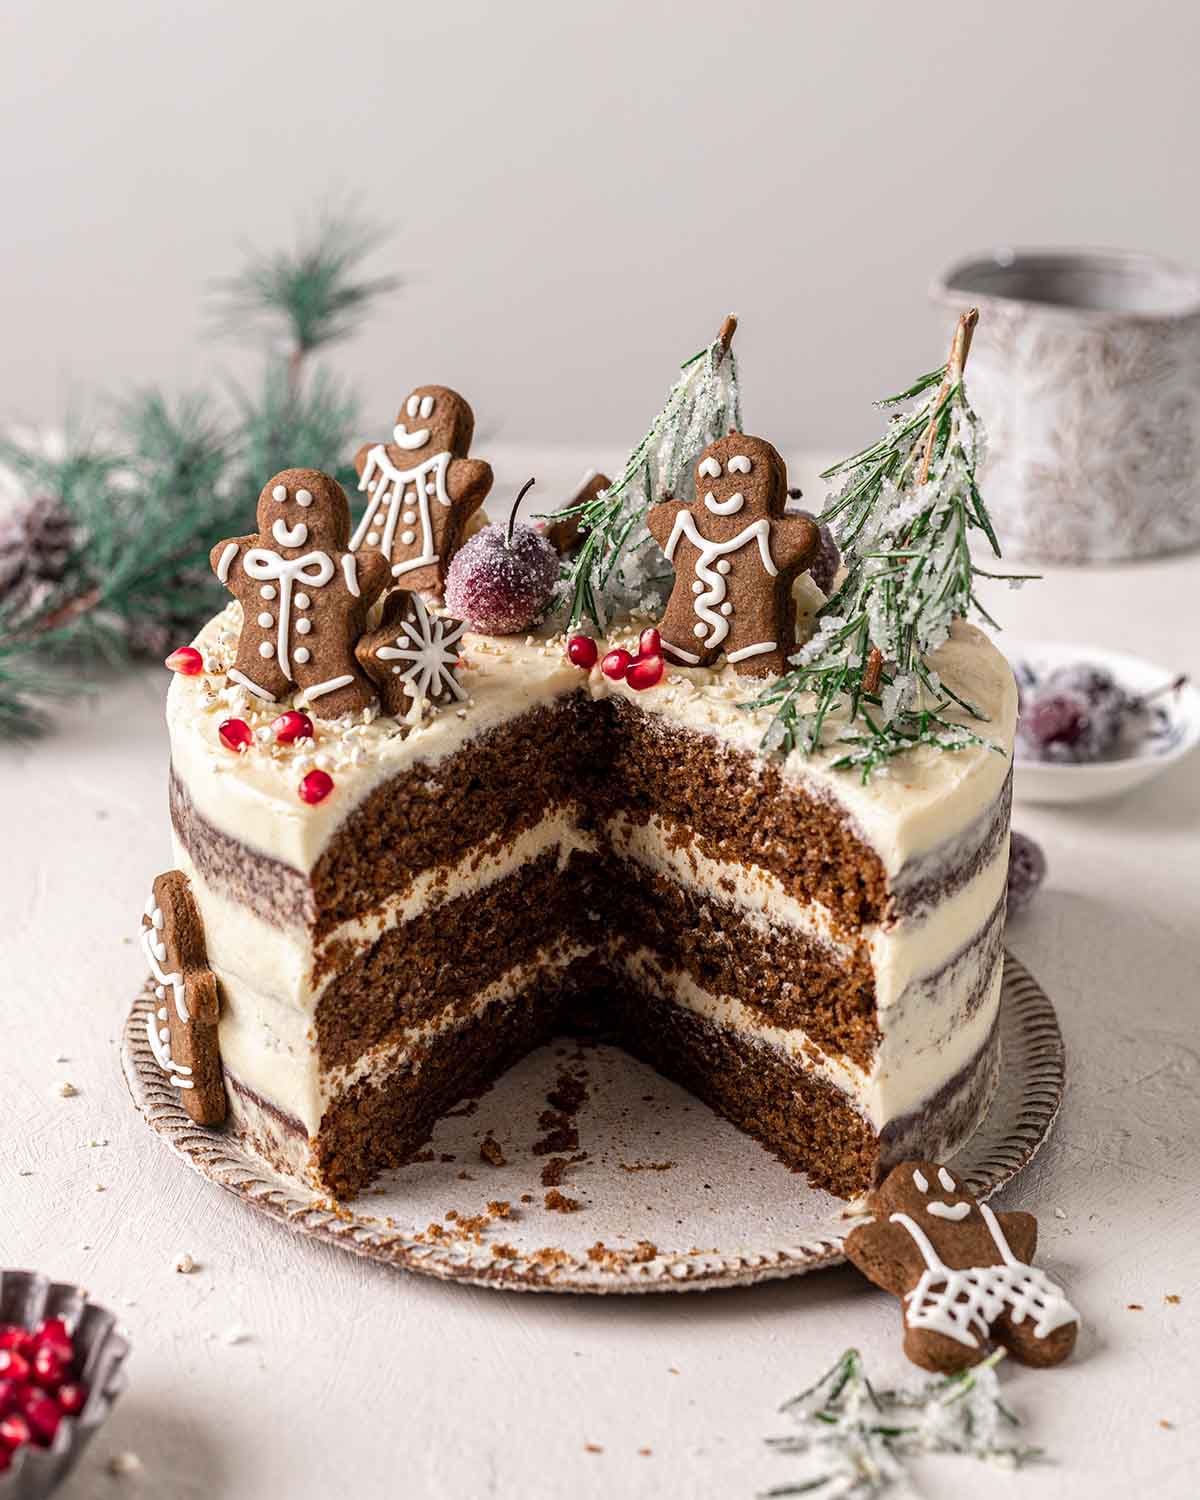
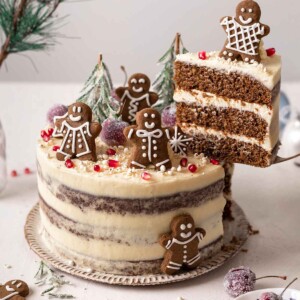
CUSTOMIZABLE: This cake works beautifully as a single-layer sheet cake, a 2-layered cake or a 3-layered cake (pictured).
Simple Ingredients You’ll Need
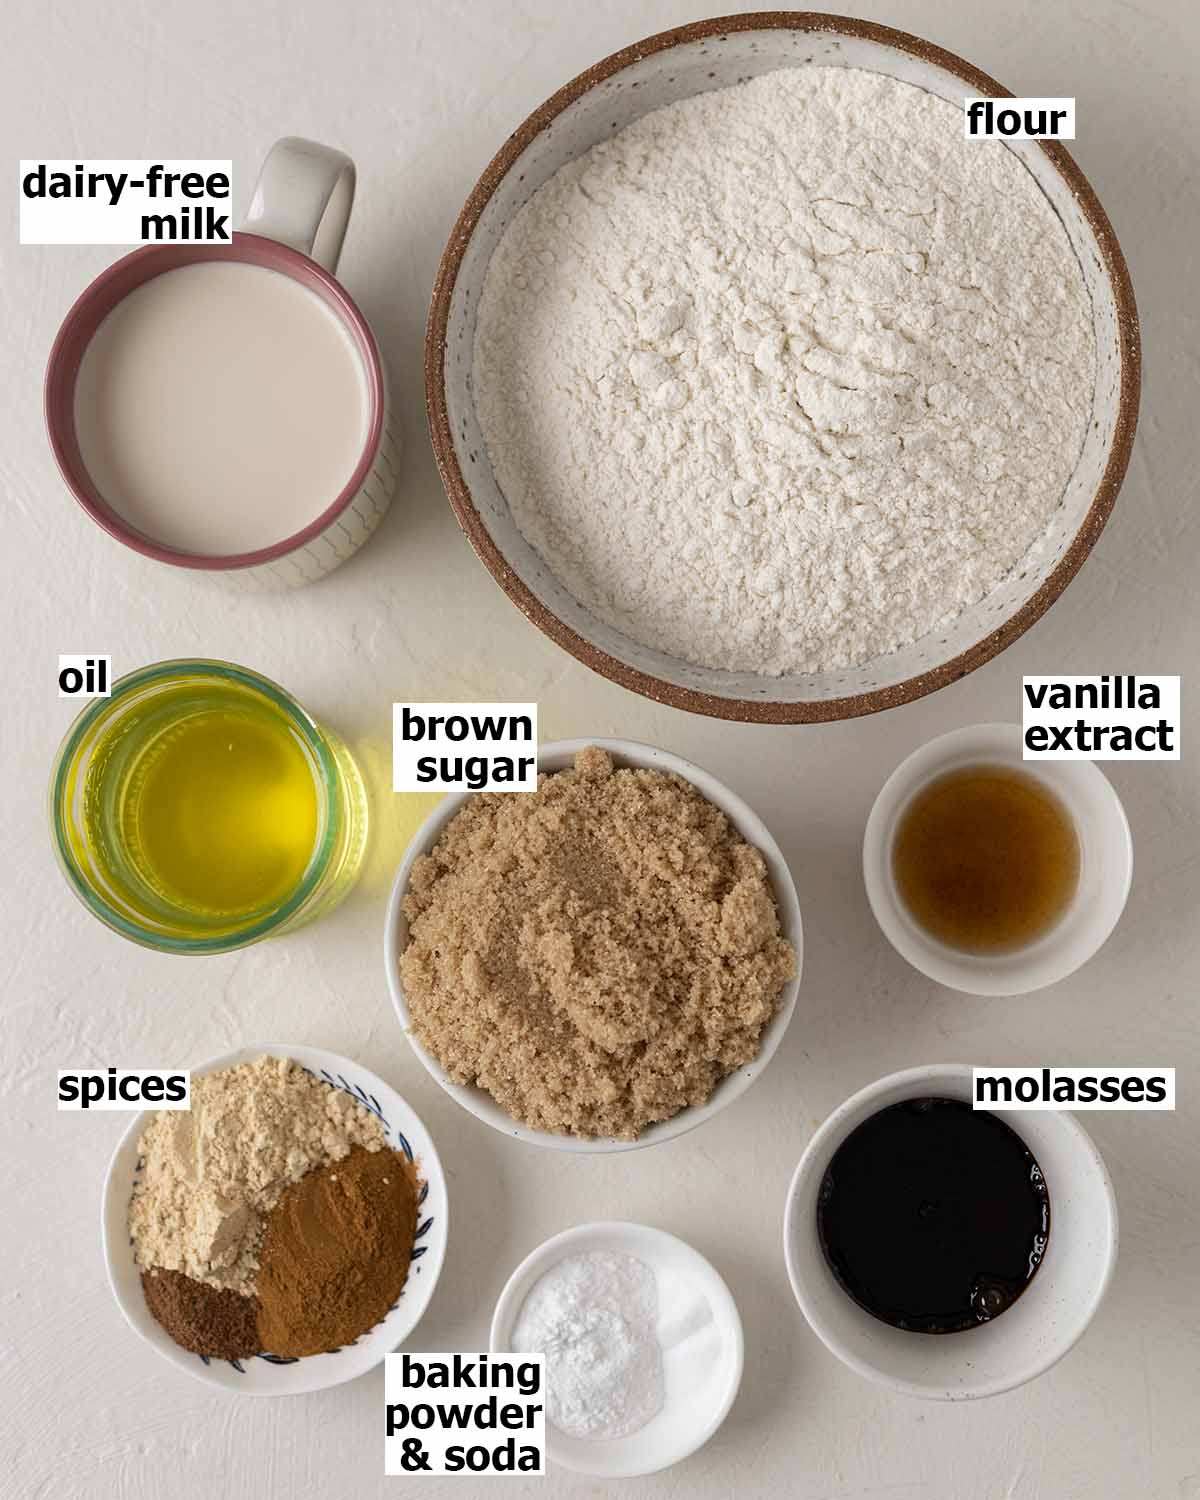
The full list of ingredient quantities and instructions are in the recipe card at the bottom of this post.
Notes About the Ingredients
All-purpose flour. This vegan gingerbread cake also works well with King Arthur’s gluten-free measure for measure flour! Readers have said it also works with Namaste gluten-free flour, although I haven’t tested it myself.
Light brown sugar for flavor and moisture. Alternatively, you may use regular sugar (for a lighter-colored cake) or coconut sugar (for a darker-colored and less sweet cake).
Molasses imparts a classic gingerbread flavor and helps bind the ingredients together (like an egg replacer). If you don’t have molasses, you can use golden syrup or omit it with a few adjustments (see the notes in the recipe card for details).
LOTS of spices. We’re using a total of 1/4 cup of spices for this large cake! This gives a lovely gingerbread flavor without being overpowering.
Preparing this Gingerbread Cake
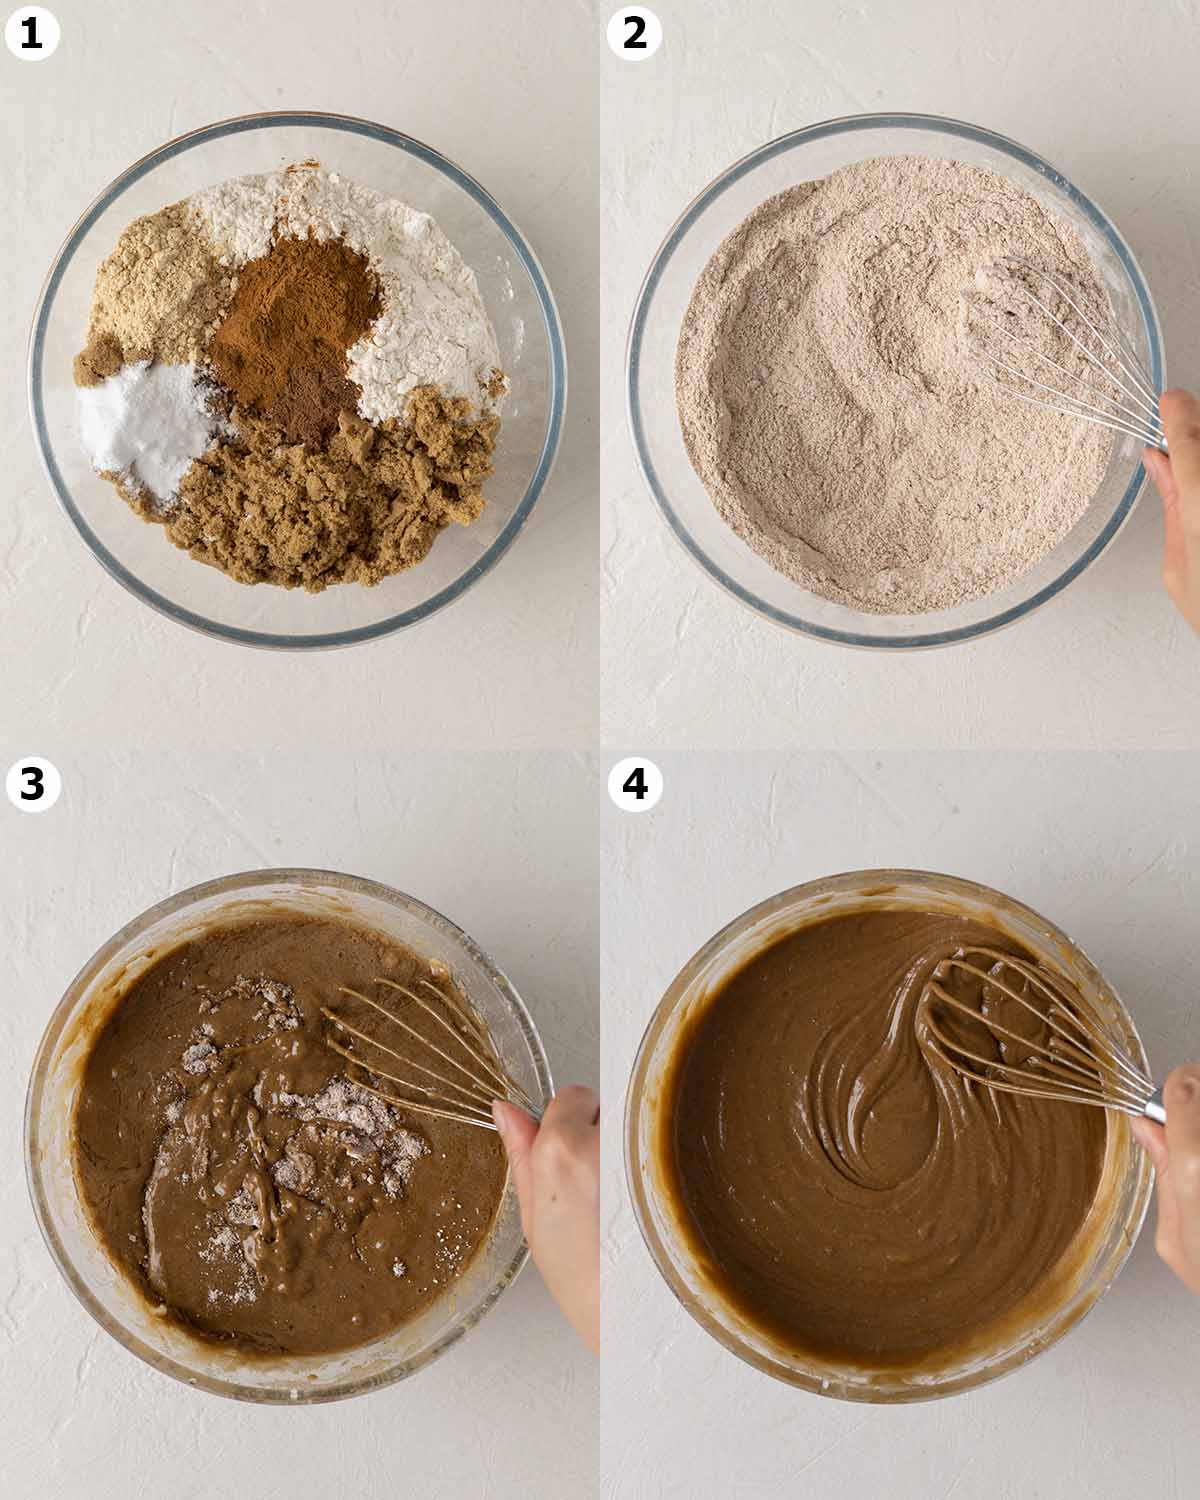
Making the batter couldn’t be easier! Whisk your dry ingredients in a large bowl, stir in the wet ingredients and you’re set!
For the best results, here are my top tips:
- Mix the cake batter with a whisk or hand mixer. Molasses is sticky and viscous but a whisk will help disperse it.
- Avoid overmixing the batter. Overmixing any cake batter will make the cake tough and dense.
If you’re making the cake without molasses, the batter should be a little runny like pancake batter.
Tips for Baking This Cake
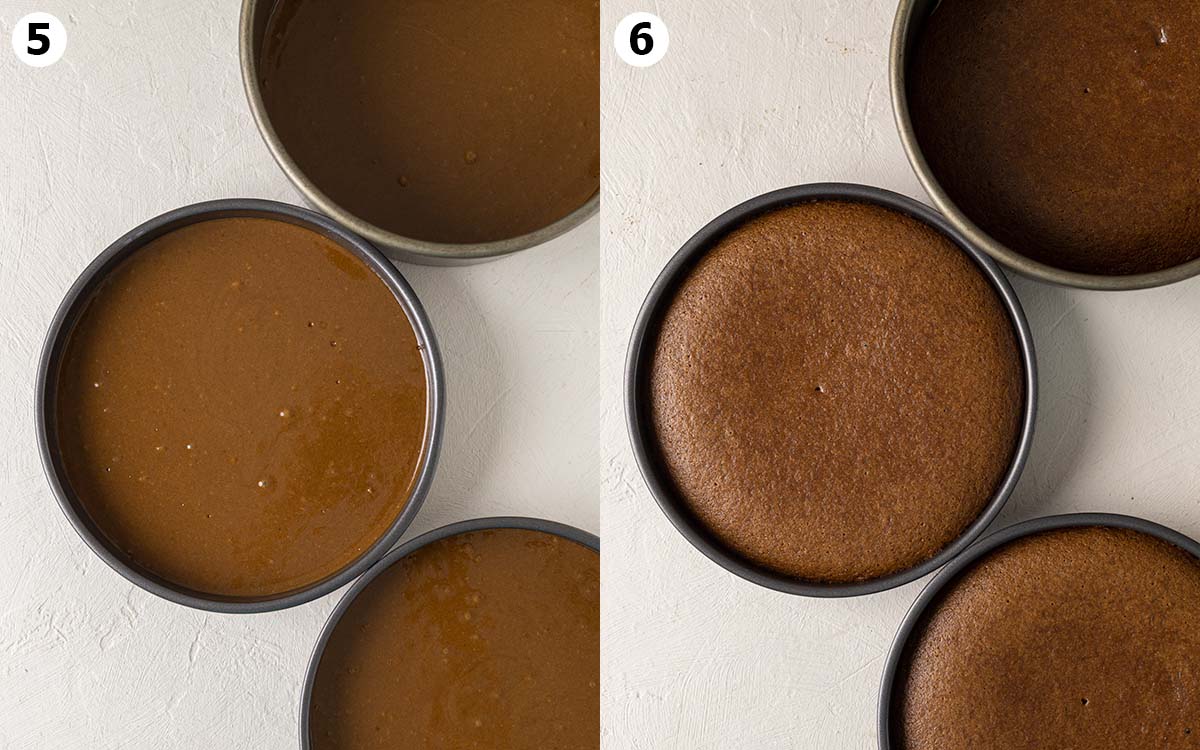
I recommend baking this vegan gingerbread cake at a slightly lower temperature (160°C or 320°F) as this will help create flatter cake layers that are easier to stack.
If possible, double-check your oven temperature – an oven thermometer is really handy here! An oven that runs too hot causes cake layers to dome (and trickier to stack), while an oven that’s too cool can cause the cakes to sink. But don’t stress if your cakes aren’t perfectly level as you’ll be covering it with frosting anyway!
These cake layers are quite delicate right after baking, especially if you’re making a 3-layer cake. So, I recommend leaving them in their pans for at least 20 minutes so they can firm up and cool slightly.
Decoration Tips
Once the gingerbread cake layers are at room temperature, they’re ready to stack and decorate.
Even though we baked these cakes at a lower temperature, they may still dome. If so, use a serrated knife to carefully cut the domes off.
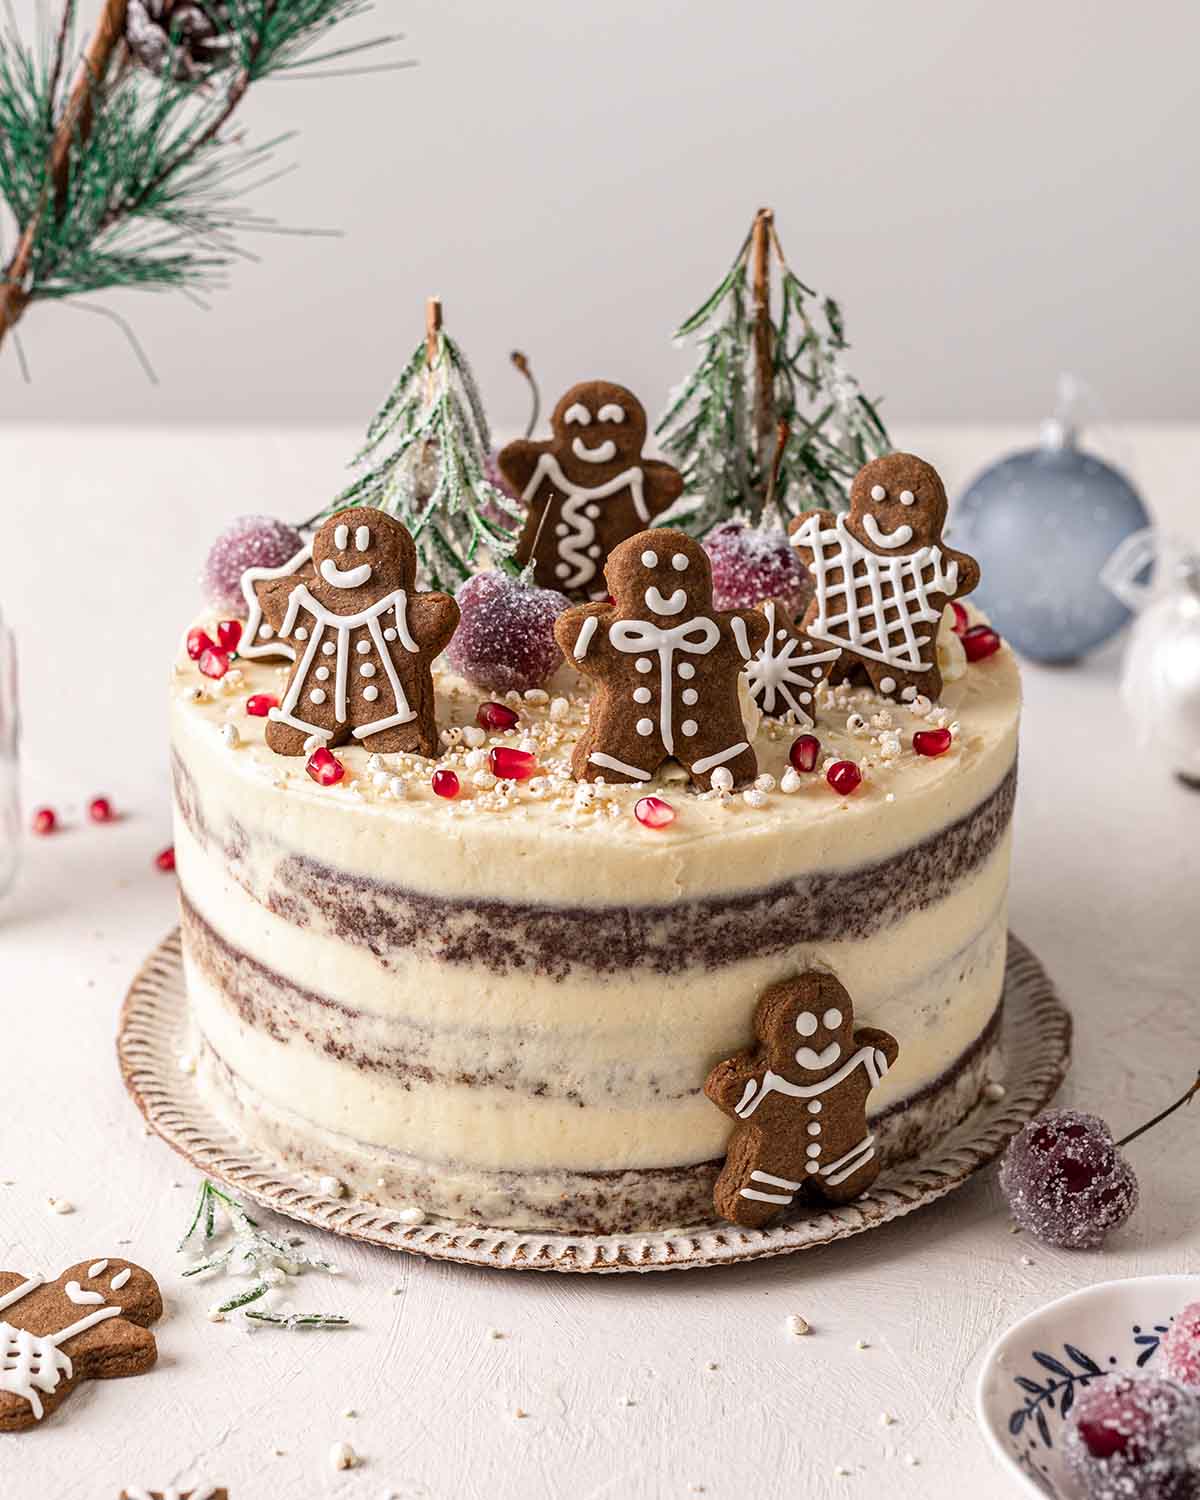
I decorated my cake like a rustic ‘naked-style’ cake where the sides have a minimal frosting as I love the contrast between the dark cake and the light frosting! If you prefer a fully-frosted cake, you’ll need to increase the amount of buttercream.
I topped my cake with gingerbread cookies, sugared rosemary, sugared cherries and pomegranate arils. Other topping ideas include:
- Dried coconut. Coat your whole cake in coconut to mimic snow.
- Fresh or sugared cranberries
- Mini gingerbread house
- Crushed gingerbread cookies
Making the Cake and Decorations Ahead of Time
1-2 days ahead. Make and store the cake layers at room temperature. You can also make the frosting but store it in the fridge. The frosted cake (with no decorations) also keeps well in the fridge for 1-2 days. The frosting works as a great ‘shield’ between the cake and the fridge! However, I still recommend placing the frosted cake in an airtight container.
The cake and frosting can also be prepared a few weeks in advance and frozen. If you do this, I recommend storing the cake and frosting separately in an airtight container or food wrap. 1-2 days before serving, allow the cake and frosting to thaw in the fridge. The cakes can be chilled when you stack them but make sure the frosting is at room temperature. You may need to re-whip the frosting for a few seconds to give it back some life.
Gingerbread cookies can be made 1-2 weeks in advance and stored in the fridge or freezer. The sugared rosemary and cranberries or cherries can be made 1 day in advance and stored at room temperature.
Baking the Gingerbread Cake in a Different Pan
If you’d like to make a sheet cake, this cake will bake wonderfully in a 13 x 9 inch pan. Bake it for around 35-40 minutes and let the cake cool completely in the pan.
For a small 1-layer cake, check out my easy vegan ginger cake which is baked in an 8-inch square pan.
For a 2-layer cake, prepare the batter as is and divide it into two 8-inch or 9-inch round pans. Bake them for around 30-35 minutes or until done.
To make a gingerbread loaf (in an 8-inch loaf pan) scale the ingredient quantities down to ’13 serves’ and bake for around 1 hour.
Customizing This Recipe
Yes! This vegan gingerbread cake without molasses is lighter and fluffier than the original recipe. However, there’s less depth of flavor compared to the original. If you want to omit molasses, see the notes in the recipe card.
For a zesty cake, substitute 1/2 cup (120g) of dairy-free milk with the same amount of orange juice.
For a more robustly spiced cake, add ground cloves and increase the quantities of spices. See the notes of the recipe card for details.
My vanilla buttercream is the most stable frosting option for this vegan gingerbread cake.
Alternatively, you can use a vegan cream cheese frosting. This tends to be quite soft so I recommend adding a stabilizer such as cornstarch and vegetable shortening/coconut oil. Check out the frosting recipe in my vegan mango cake recipe.
You can also add some cranberry jam between the cake layers! If you do, please create a ‘dam’ of frosting otherwise, your jam will ooze out.
More Vegan Gingerbread Dessert Recipes


Follow Rainbow Nourishments on Instagram, Facebook, TikTok and Pinterest, and subscribe via email to receive all of our latest recipes!
Vegan Gingerbread Cake
Ingredients
Dry ingredients
- 3 ½ cups (440g) all-purpose plain flour, spoon and leveled (note 2 for tips and gluten-free)
- 1 ¼ cups (250g) packed brown sugar
- 2 tablespoons ground cinnamon, (note 3)
- 2 tablespoons ground ginger
- 1 teaspoon ground nutmeg
- 3 teaspoons baking powder
- ½ teaspoon baking soda
- ½ teaspoon salt
Wet ingredients
- ½ cup (170g) molasses, not blackstrap molasses (note 4 to omit molasses)
- 1 ½ cups (375g) dairy-free milk, room temperature
- ⅔ cup (165g) neutral flavored oil
- 1 tablespoon apple cider vinegar, or white vinegar
- 1 tablespoon vanilla extract
Frosting
- 1 ½ cups (340g) vegan block butter, room temperature (note 5)
- 4 – 6 cups (440g-660g) powdered sugar / icing sugar, (start with less and add more to taste)
- 1 tablespoon vanilla extract
- Dash of dairy-free milk, as needed
To decorate (optional)
- gingerbread cookies
- Sugared cherries, or cranberries
- Sugared rosemary
Instructions
Make the gingerbread cake:
- Preheat the oven to 160°C (320°F). Line 3 x 8-inch (20 cm) round cake pans with parchment paper.
- Add all the dry ingredients to a large mixing bowl or stand mixer and mix until well combined and there are no lumps. Add all the wet ingredients to the bowl. Loosen the molasses with your whisk, then mix all ingredients until just combined.
- Evenly divide the cake batter into your 3 prepared pans. Bake for 20-25 minutes or you can insert a toothpick in the center of each cake and it comes out clean. Allow the cakes to cool in the pans for 20 minutes, then carefully transfer them to a cooling rack.
Make the frosting:
- Add the vegan butter to a stand mixer with the whisk attachment or to a large bowl (if using a hand mixer). Beat on high speed for 3-5 minutes until the butter is pale in color.
- Add 4 cups (440g) of powdered sugar and vanilla to your mixer or bowl. Beat on low for 30 seconds or until the sugar is fully incorporated. Increase to high speed and beat the frosting for another 5 to 10 minutes or until it's light and fluffy. For a firmer or sweeter frosting, add more sugar as desired.
Assemble the cake:
- If the cake layers have domes, carefully use a serrated knife to trim off the domes. Flat cakes are easier to stack!
- Place one cake layer on a serving plate and spread about 3/4 cup buttercream on top. Place another cake layer on the frosting, making sure it is level. Repeat until you've stacked all 3 cake layers.
- Spread a thin layer of frosting on the sides and top of the cake. Use a spatula or cake scraper to smooth the surface, as desired.
- 1-2 hours before serving, decorate your cake with gingerbread cookies or as desired. If you have any leftover buttercream, use it to keep your decorations in place.
- Store leftover cake in an airtight container at room temperature for 1 day, in the fridge for up to 3 days, or in the freezer for up to 1 month. Allow the cake to come to room temperature before serving
Notes
- Make ahead instructions: The cake layers can be prepared 1 day in advance and stored at room temperature in an airtight container. The frosting can be prepared 1 week ahead of time and stored in the fridge. Alternatively, you can make and frost the cake and store it in the fridge for 1-2 days without decorations. The sugared fruit can only be made 1 day in advance and should be kept in a container at room temperature. See the blog post above for more details.
- To spoon and level your flour, fluff up the flour in its container, use a spoon to add flour to your measuring cup, and level it off with a knife. Using your measuring cup to scoop flour out of the container will pack too much flour into your cup, and result in a dry cake. Alternatively, use the gram measurements for the best results.
Gluten-free version: This cake works well with King Arthur’s gluten-free measure for measure flour. Please let the cakes completely cool, because they will feel too moist when warm. Readers have said this recipe also works with Namaste gluten-free flour, but my team and I haven’t tested it. Other gluten-free flour blends are made of different flours, and may have different results. - If you’d like a spicier cake, use 3 tablespoons ground cinnamon, 3 tablespoons ground ginger, 1 teaspoon ground nutmeg and 1/2 teaspoon ground cloves.
- To make this cake without molasses, increase the brown sugar to 2 cups (380g) and increase the dairy-free milk to 1 3/4 cups (440g). All the other ingredients stay the same.
- The frosting will work with a chilled spreadable vegan butter but I recommend omitting or using less dairy-free milk. Your frosting will be softer.
This post may contain affiliate links. As an Amazon Associate, I may earn a small commission from qualifying purchases at no additional cost to you.

Hey 🙂
I was wondering if I could replace the molasses with date syrup, and also if I make only half a batch how does it change the baking times and what the size of the cake will be approximately.
Hi Dana, molasses is more bitter than date syrup so it won’t be exactly the same. It’ll probably work similarly to golden syrup – see Note 4 in the recipe card on how to adjust the recipe.
If you want to bake half the cake, follow the instructions for baking a 2 layer cake (in the blog post) but just bake 1 layer. Hope that helps!
I used the base cake recipe but for cupcakes, and with slight adjustments (mainly adding coffee, and topping with a coffee flavoured buttercream) had gingerbread latte cupcakes since that’s what I was craving! Your recipes are always great, simple and beautiful. Always interesting flavour combinations too. Thank you.
I love how you adapted this recipe and gingerbread latte cupcakes sound absolutely dreamy! I’ll need to give it a try one day. Thank you soo much for your kind words and for leaving a review here, I appreciate it a lot 💛
I cooked this in a Nordic ware bundtlette cake pan (6 cake pan) and it took 20 mins to fully cook. Also I added more ginger to give it more of a ginger snap warmth to the cake. This recipe was easy and delicious! Can’t wait for my guest to try
Hi Rosemary, that’s wonderful to hear!! And it’s good to know how it worked in a bundlette cake pan too – I know other readers will find this useful. Thanks so much for letting me know!
I’d give this 100 stars if possible. I made it as a two layer cake for my four year old December baby’s birthday cake and my GOSH. It’s deliciously spiced and cravingly moist. Unfairly good. I poked around your site and saw that you used to be a professional cake baker! I can totally tell. I can’t wait to have your gingerbread cinnamon rolls for breakfast on Christmas morning and will be coming to your site for any future birthday cake needs, which will be often because I’ve got six kids 😂
Hi Mary, I’m over the moon that you loved this cake, especially the flavor and texture. I’m honored that you chose to make this cake for such a special occasion! And thanks so much for your kind words too! I hope you enjoyed the cinnamon rolls if you got to make them and any other recipes on my site 🙂
Any reason why this couldn’t be made in a bundt pan? Thanks!
I imagine this cake will work in a bundt pan, I just haven’t tested it. The cake will just be denser and take longer to bake (closer to an hour). Let me know if you make it!
I made this for an assignment for school and everyone loved it. My instructor thought it was delicious and light, and was really happy with the result (I don’t disagree). The only problem I had was that my icing seemed to break…? Crumb coating the cake and chilling the icing seemed to help a bit. I’m guessing the vegan butter I was given had a lot of water in it or something (they usually order Miyokos, but this time it was something different). Do you have any solutions to fix or avoid this?
Hi Veronica, thanks for choosing to make this for your assignment and I’m so glad that everyone at your school enjoyed this cake! For the icing, it can definitely split if your butter has a lot of water in it. Was your icing very soft? If it was soft and split, it would be a temperature issue. With high-water butters, sometimes I add a bit of vegetable shortening to help solidify the butter. The splitting can also be minimized with a spoon of cornstarch and by adding more sugar. Sometimes overmixing can split the butter too! To fix this, I remove a small portion of the icing, partially melt it and mix it back into the icing. I hope that helps!
Hi Andrea, Is it okay to make this as a two layer square cake using 9inch pans? It’s for a birthday celebration. Also, you mention the cake in the original recipe has a finer crumb, does that mean it’s very delicate and soft to handle? Thanks in advance. Your recipes are amazing I’ve tried most of them!