Vegan Tim Tams
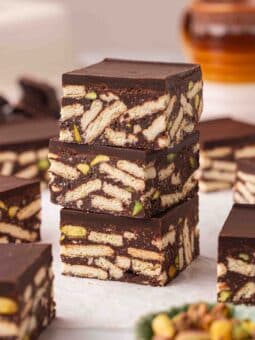
These vegan Tim Tams are a homemade copycat of the popular Australian chocolate cream biscuit, but without the dairy and food colouring! They consist of crunchy chocolate malt flavoured biscuits sandwiching a soft and creamy chocolate malt filling, all dipped in even more chocolate.

What to Expect From This Recipe
I absolutely adored Tim Tams growing up, and this recipe captures all the nostalgia of Australia’s most loved chocolate biscuit! They’re crunchy, sweet, have a malt-y depth of flavour, and it’s hard to stop at just one.
These homemade vegan Tim Tams have several components, and each one is relatively easy. Overall, you will need a little patience as the biscuits need to be cool for each step. Even still, these Tim Tams are easier to make than other desserts, such as layered cakes or lamingtons!
Ingredients You’ll Need

The full list of ingredient quantities and instructions are in the recipe card at the bottom of this post.
Cocoa powder. I used natural cocoa powder for a smoother taste that’s reminiscent of milk chocolate. Dutch-processed cocoa powder will also work and lend a deeper cocoa flavour (more like dark chocolate).
Liquid malt extract gives these biscuits their classic Tim Tam flavour. Without malt extract, these are just chocolate cream biscuits. Most malt powders in Australia contain milk powder, so we’re using liquid malt extract (you can get this from major supermarkets). Note that malt extract is not the same as rice malt syrup!
Vegan block butter for the biscuits and filling. Block butter has a lower liquid content than spreadable butter, which results in more buttery and richer cookies and a more stable filling. If you’re in a pinch, spreadable butter will work, but check out the notes in the recipe card for adjustments.
Dairy-free chocolate to coat these vegan Tim Tams. Milk chocolate is best for these Tim Tams as dark chocolate can overpower the flavor of the biscuits and filling. If you have access to Australian brands, I used Sweet William Mylk Choc Buttons and they were very easy to use in this recipe. I don’t recommend Whittaker’s 72% Dark Ghana as it tends to bloom when coating biscuits/cookies.

Make the Dough for the Chocolate Biscuits
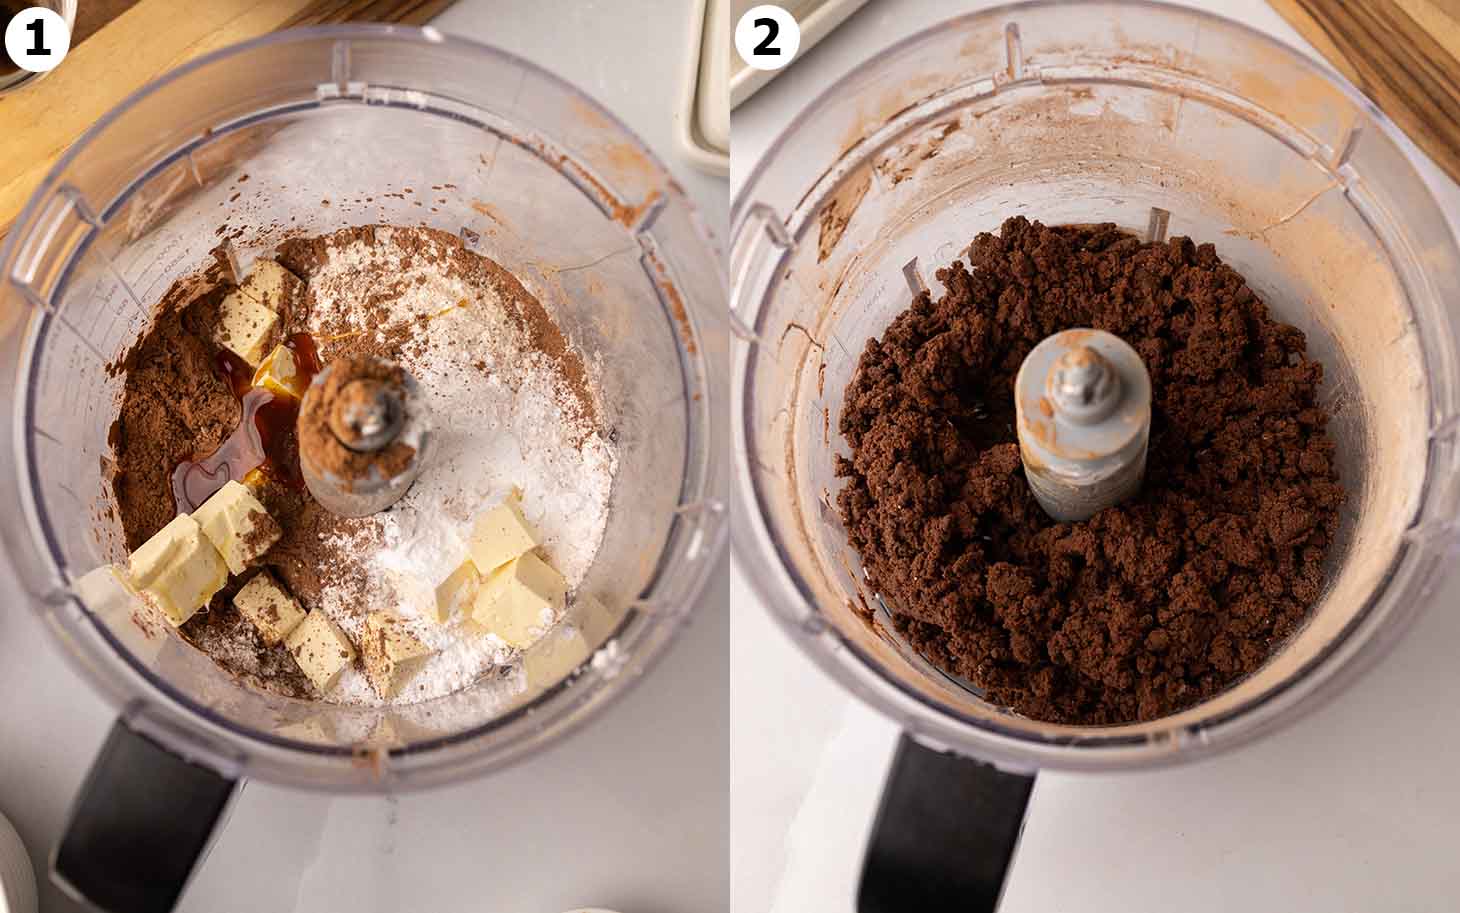
The biscuit dough is no-fuss and easy to make. Just add all the dough ingredients to a food processor and pulse until combined. The dough should look slightly crumbly but will stick together when you pinch some between two fingers. If the dough is any softer, it’ll be difficult to roll out.
If you don’t have a food processor, you can use a stand mixer or an electric hand beater. Just try to avoid overmixing the dough, as this can make the biscuits tough and rise unevenly.
TIP: Please measure the ingredients accurately using the gram measurements or the spoon and level method (if using cups). Overmeasuring the flour will make the dough crumbly and dry.
Shaping and Baking the Chocolate Biscuits
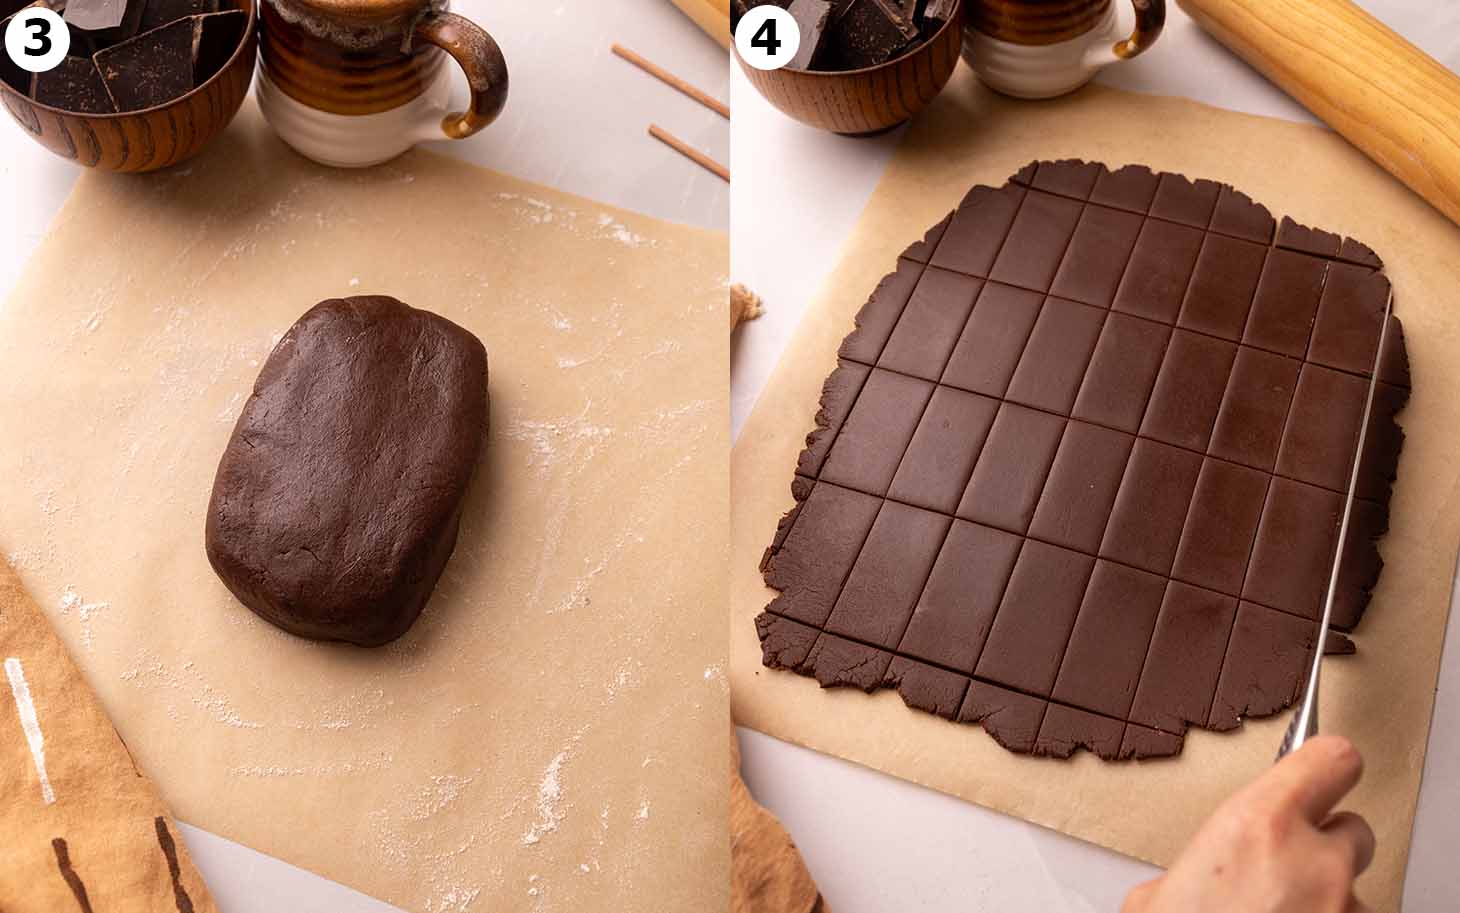
Most of the time, I don’t need to chill the dough as it’s usually a workable consistency straight from the food processor. However, if you’re making these vegan Tim Tams on a hot day or with spreadable butter, place the dough in an airtight container and chill it in the fridge until it firms up.
Lightly dust a clean work surface with flour and roll out the dough to about 4mm thick (this is a tiny little less than 1/4-inch). The biscuits may look very thin, but they’ll puff up during baking, and we’re using 2 biscuits for a single Tim Tam. For consistency, I rolled the dough using 2 wooden dowels for support.
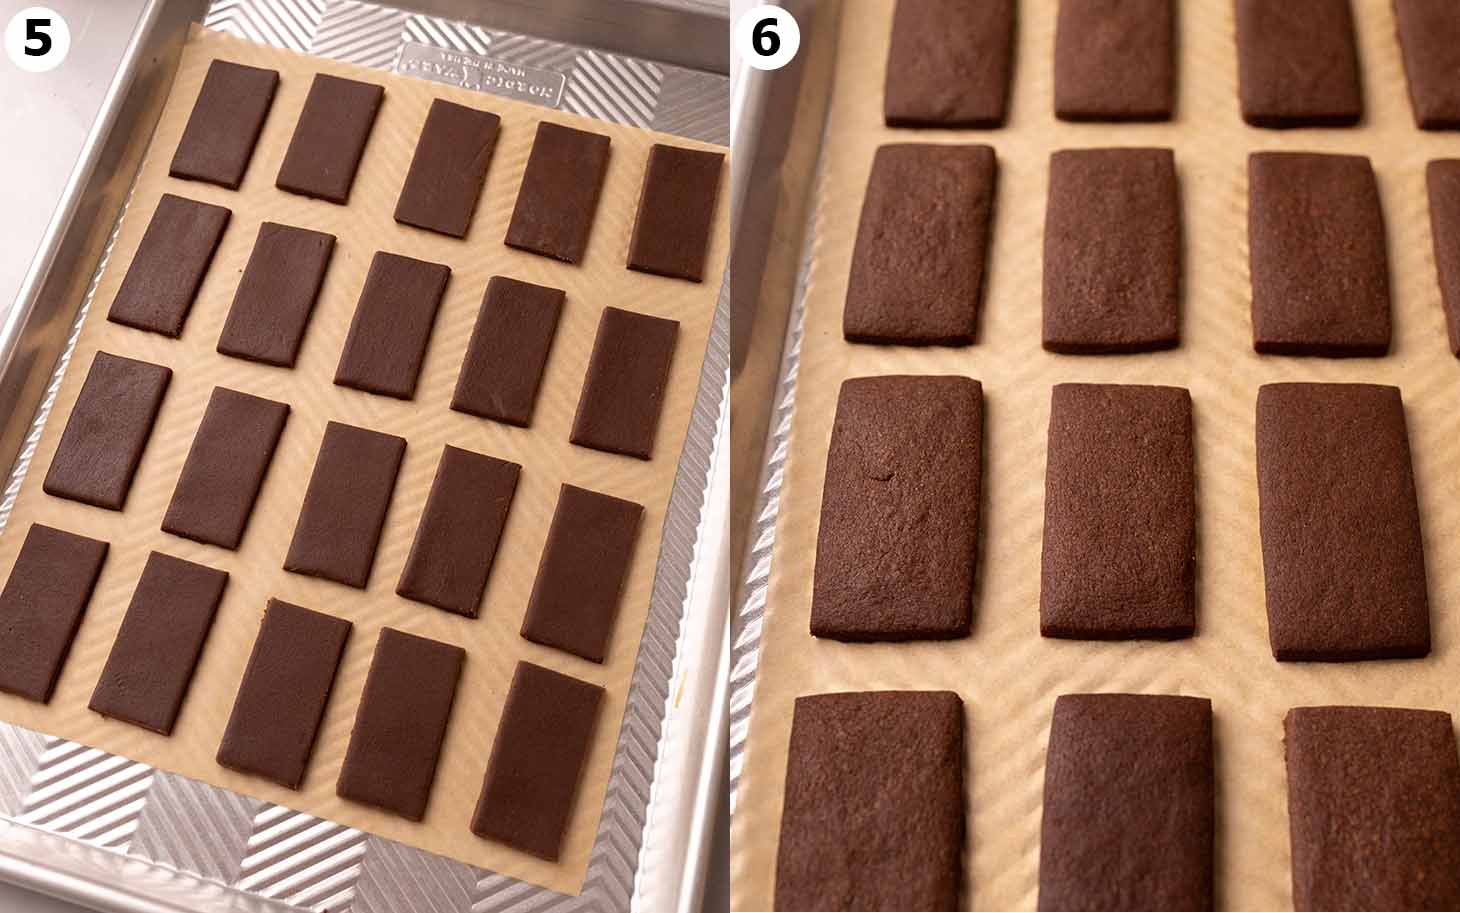
Finally, transfer the biscuits to a lined baking tray and bake them for about 13-15 minutes. This might feel like a long baking time for such thin biscuits, but we want them to be thoroughly baked through. Tim Tams are crunchy, not soft like chocolate chip cookies! If you underbake the biscuits, they’ll be a little chewy (thanks to the malt syrup).
When the chocolate biscuits are fresh from the oven, they will be slightly soft but will firm up when they cool.
Prepare the Chocolate Malt Filling
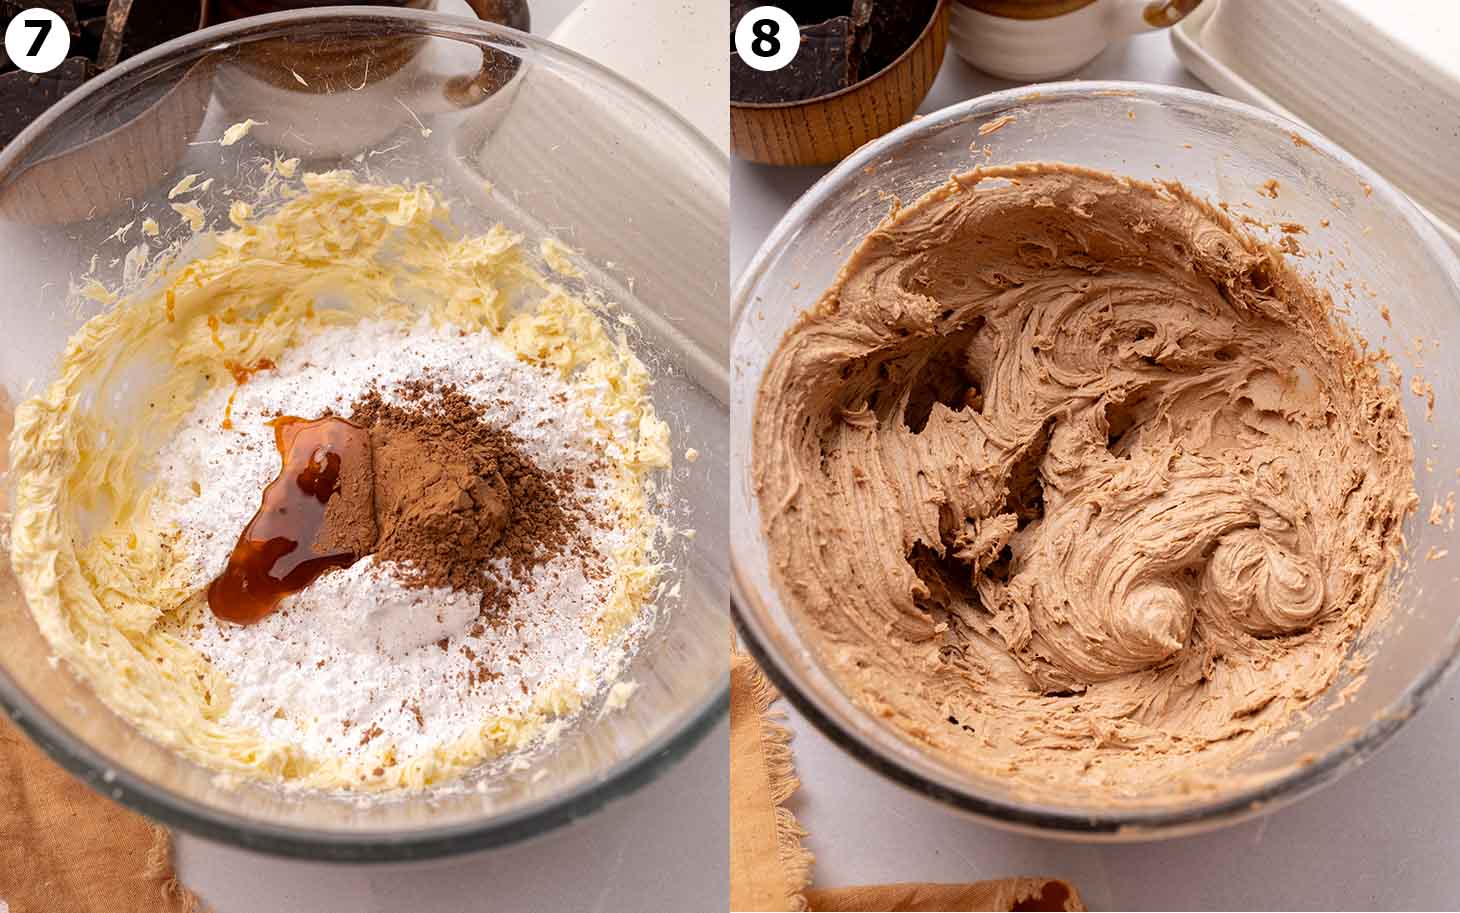
The chocolate malt filling is really easy to prepare, as it’s essentially a light chocolate malt buttercream!
Add the room temperature butter to a large bowl (if using a hand mixer) or the bowl of a stand mixer and whip until pale and fluffy. Then add the sugar, cocoa powder, malt extract and vanilla, then whip until well combined. It should be a beautiful light brown colour and you’ll probably want to eat it out of the bowl!
The filling should have a similar consistency to buttercream. Soft enough for spreading/piping, but not too soft that it’ll ooze out of the Tim Tams. If your filling is too soft, mix in more sugar or if it’s too firm, mix in a dash of milk/cream.
Assembling the Homemade Tim Tams
When your biscuits are completely cool, use a piping bag or a spatula and top half of the biscuits with the filling. Then chill the biscuits in the fridge or freezer for at least 30 minutes until they’re cold. If your filling is soft when you dip the biscuits, the chocolate will melt the filling.
To make things easier (and a little neater), set up a simple dipping station for dipping the Tim Tams. Lay out your chilled biscuit sandwiches, pour the melted chocolate into a shallow bowl, and have a lined tray nearby where you can place each Tim Tam after dipping. Finally, let the Tim Tams cool at room temperature or in the fridge until set!
For the best results, here are some expert tips:
- Your melted chocolate should be smooth and pourable and have a similar consistency to thick pouring cream or a thin custard. If it’s too thin, it’ll just drip off the Tim Tams. But if it’s too thick, it’ll be harder to coat the biscuits evenly. You can do a couple of tests to find the ideal consistency for your chocolate!
- You don’t need to temper your chocolate. However, some brands work better when they’re tempered and can result in a shinier and smoother chocolate coating.
- After dipping each Tim Tam in chocolate, gently shake each one and allow the excess chocolate to drip off. Shaking the Tim Tams also helps remove any little bubbles.
- If you want to make your Tim Tams look a bit fancier, let the chocolate coating set, then drizzle some extra chocolate on top. Flaky sea salt is optional!

Questions and Answers
I’ve only tested malt extract for this recipe but other liquid sweeteners should work similarly, though the flavour of your Tim Tams will be different. Malt extract is slightly thick, so if your chosen sweetener has a different consistency, you may add extra flour, milk or sugar to your dough and filling until they have a workable consistency.
I have only tested the recipe with plain flour (all-purpose flour) so I can’t say for sure! Gluten-free flour blends tend to act differently in baking, so you may need to make adjustments to the recipe. Note that malt contains gluten so you’ll need to use another liquid sweetener.
Yes! The Tim Tams keep well at room temperature for 1-2 days, as long as it’s not a hot day. This iconic Aussie treat also keeps well in the fridge for up to 2 weeks and in the freezer for up to 1 month. Note that freezing the Tim Tams may cause their chocolate coating to bloom (where it becomes white and hazy).

More Chocolate Biscuits, Cookies and Bars


Follow Rainbow Nourishments on Instagram, Facebook, TikTok and Pinterest, and subscribe via email to receive all of our latest recipes!

Vegan Tim Tams
Ingredients
Malt Chocolate Biscuits
- 1 ¼ cups (155g) all-purpose plain flour, spoon and leveled
- ½ cup (115g) vegan block butter, room temperature (note 2)
- ¾ cup (90g) powdered sugar / icing sugar
- ⅓ cup (30g) natural cocoa powder
- ¼ teaspoon baking powder
- 1 tablespoon (20g) liquid malt extract, see post for substitutions
- Pinch of salt, if using unsalted butter
Malt Chocolate Cream Filling
- ⅓ cup (75g) vegan block butter, room temperature (note 3)
- 1 ¼ cups (150g) powdered sugar / icing sugar
- 1 tablespoon (20g) liquid malt extract, see post for substitutions
- 2 teaspoons (5g) natural cocoa powder
- 1 teaspoon vanilla extract, optional
- Pinch of salt, if using unsalted butter
Chocolate Coating
- 200g-300g vegan-friendly chocolate, (I used vegan milk chocolate, but semi-sweetened dark chocolate will also work, note 4)
- 1 tablespoon neutral flavored oil, if needed e.g. coconut, vegetable
Instructions
- Preheat oven to 180°C (350°F) if using a conventional oven or 160°C (320°F) if using a fan-forced oven. Line 2 baking trays with parchment paper.
Make the chocolate biscuits
- If using a food processor: Add all the ingredients to a food processor and blitz until combined. The mixture should be slightly crumbly but will come together if you pinch some of the mixture between two fingers. If the mixture is a little soft, add more flour and pulse again. If it's a little dry, add a dash of milk and pulse until combined.
- If making by hand: Add all the dry ingredients to a large bowl and mix until combined. Add the butter and malt syrup and cut the ingredients together with a pastry cutter or two knives until you get a soft dough.
- Dust a clean work surface with flour. Roll out the dough to about 4mm (a little less than 1/4-inch) thick. Cut the dough into even rectangles, approximately 6 x 3cm (2.5 x 1.25-inch) large. Collect the excess dough, and repeat until you’ve used up all the dough.
- Arrange the biscuits on your baking trays, with a little space between each (they don't really spread). Bake for 13-15 minutes or until they look fully baked and their surface looks and feels dry but soft. The biscuits will continue to bake on the trays as they cool down. If your biscuits change shape after baking, you can use a knife to reshape them while they are still warm. Let the biscuits completely cool on their trays.
Make the filling:
- Add the butter to a large bowl (if using a hand mixer) or the bowl of a stand mixer. Beat until it's light and fluffy.
- Add the sugar, cocoa powder, malt extract and vanilla and beat the mixture on low speed until just combined. Increase the speed to high and beat until light and fluffy. For a firmer filling, add more sugar. For a slightly softer filling, add a dash of milk (be careful not to add too much milk as the filling needs to withstand the heat of the chocolate).
Assemble the vegan Tim Tams:
- Place half of the biscuits upside down (so their rough side is facing up). Use a piping bag or small spatula/knife to pipe or spread the filling on the biscuits. The filling should be approximately 5mm thick (1/4-inch). Sandwich with the remaining biscuits. Place the Tim Tams in the fridge or freezer to firm up for at least 1 hour.
- When your biscuits are cold and firm, melt the chocolate in a double-boiler. If your chocolate is a little thick, add the oil and mix thoroughly. Allow the chocolate to cool down slightly.
- One by one, dip the cold biscuits in the chocolate, allowing excess chocolate to drip off. Arrange the coated biscuits on a lined baking tray.
- Allow the Tim Tams to set at room temperature or in the fridge for at least 30 minutes (see note 5 for some decoration tips).
Storing the Tim Tams:
- Store the Tim Tams in an airtight container at room temperature for 1-2 days or in the fridge for up to 2 weeks. They also keep well in the freezer for up to 1 month, although the chocolate coating may bloom.
Notes
- This recipe yields around 22 Tim Tams but the quantity will depend heavily on how thick your biscuits are, and how much filling you put in each Tim Tam. If you roll the dough to exactly 4mm, you’ll get around 22 Tim Tams. If your dough is a little thicker (even by 1mm), you’ll get fewer Tim Tams.
- Block butter is definitely best for the biscuits. However, if you use spreadable vegan butter (such as Nuttelex) for the biscuits, I suggest adding more flour to your dough so it’s not too sticky.
- If you use spreadable butter for the filling, it will be softer and melt quicker. Try adding more sugar or cocoa powder to absorb the excess liquid and avoid adding any milk to the filling.
- The amount of chocolate you’ll need will depend on your chocolate and how thickly you coat each Tim Tam. Dairy-free milk chocolate tends to be runnier than dark chocolate, so you will need around 200g of milk chocolate or 300g of dark chocolate.
- To make your Tim Tams look extra fancy, you can sprinkle some flaky sea salt, nuts or freeze-dried berries on top of your Tim Tams before the chocolate sets! For the Tim Tams in the pictures, let the chocolate coating fully set, then use a small spoon to drizzle more melted chocolate on top.
This post may contain affiliate links. As an Amazon Associate, I may earn a small commission from qualifying purchases at no additional cost to you.

Made these yesterday and they were incredible! The steps are easy to follow, and you can tell how well-tested the recipe is. The only tricky part is cutting the dough into uniform sizes — but wonky Tim Tams still taste amazing and hit some serious nostalgia.
Hi Basim, I’m soooo glad you enjoyed these! Yes, it can be tricky cutting the dough evenly and sometimes they bake unevenly too – when I have a moment, I’ll add some tips in the blog post! And you’re absolutely right about wonky Tim Tams haha. Thanks so much for your feedback, I appreciate it a lot!
Made these cookies for Christmas cookie boxes that I gave to family this week – it was a big hit! All chocolate lovers were in heaven, and the crunch of the biscuit was simply divine. Thank you for the amazing and detailed recipe, it was such a joy to make this, never done a sandwich cookie like this before and I rarely worked with chocolate – this gives me the courage to try more similar recipes. Will definitely make it again!
Hi Alexandra, I’m so thrilled you and your family loved these cookies!! What a special addition to your cookie boxes and thank you for choosing to include them 😍. I’m so glad you enjoyed the process of making them and I love how it’s built your confidence for similar recipes (me too actucally)! Thank you so much for your kind comment and for taking the time to let me know 🙂
Hello ! Will traditional barley malt syrup work? It’s the only one I can find in the US.
Yes, I believe that’s the same as what I used!
Hi Anthea. I’m an Australian living in Sicily and here they don’t have liquid malt. Can I buy it on line? Thank you in advance.
Hi Angelina, yes I imagine you should be able to buy it online but I don’t know what online shops are available in Italy or Europe. Google ‘liquid malt extract’ and see what you can find!
Hi Anthea,
I live in Australia. Could you please send me any substitutes for liquid malt extract please.
Thank you kindly,
Frances
Hi Frances, you can use any other liquid sweetener such as maple syrup. I talk more about this in the blog post! However, liquid malt extract really is the best option because it’s what gives Tim Tams their unique flavour. You can get it from any Woolies or Coles.
Hi
I could not get malt extract here in Canada. But I found a vegan malt powder. Could I use this instead and do you have recommendations on how to substitute it. Thank you
Jodie
Hi Jodie, I haven’t tested a malt powder so I can’t be 100% sure but I would add 1-2 tablespoons of it then just enough milk to bring the dough to the right consistency. Hope that helps!